# Step 4: Creating your first campaign
# Campaigns in the Tracker
The process of working with the tracker is facilitated through campaigns. For example, campaigns can be created for the following purposes:
- Tracking the effectiveness of an advertising campaign in ad network;
- Independently collecting leads from your own websites;
- Dividing traffic with landing pages, offers, or rotating offers.
A campaign in Keitaro allows you to collect and analyze data on traffic, conversions, revenue, and other metrics, which help in making informed decisions and optimize advertising campaigns for better results.
# Creating a Campaign
Let's create a basic campaign without using integration scripts and prepare it for launch: connect a domain, add a traffic source, an affiliate network, a landing page and an offer. All further tips are optional and show basic examples of setup.
Basic order of campaign setup:
- Buy a domain and park the domain in the tracker;
- Add a Traffic Source template to the tracker;
- Add an Affiliate Network template to the tracker;
- Create a campaign with the specified elements added.
To understand how the basic setup and integration of the tracker with affiliate networks and traffic sources are performed, we recommend watching the video. (Use EN subtitles, please).
# Purchasing and connecting a domain to Keitaro
The domain parking is required for campaigns working via HTTPS secure connection, traffic loss prevention and the proper functioning of the tracker and its features. In Keitaro, a domain serves as a link to the content of the campaign. Important note: purchase a dedicated domain for working with Keitaro. It is restricted to use a domain for both Keitaro and third—party software, hosting, etc. For more details, check the video (please, use EN subtitles).
Step—by—step video using a domain from Namecheap as an example
This is the text and screenshots description on purchasing and parking a domain to Keitaro.
Alternative guide:
We recommend to use Namecheap.com:

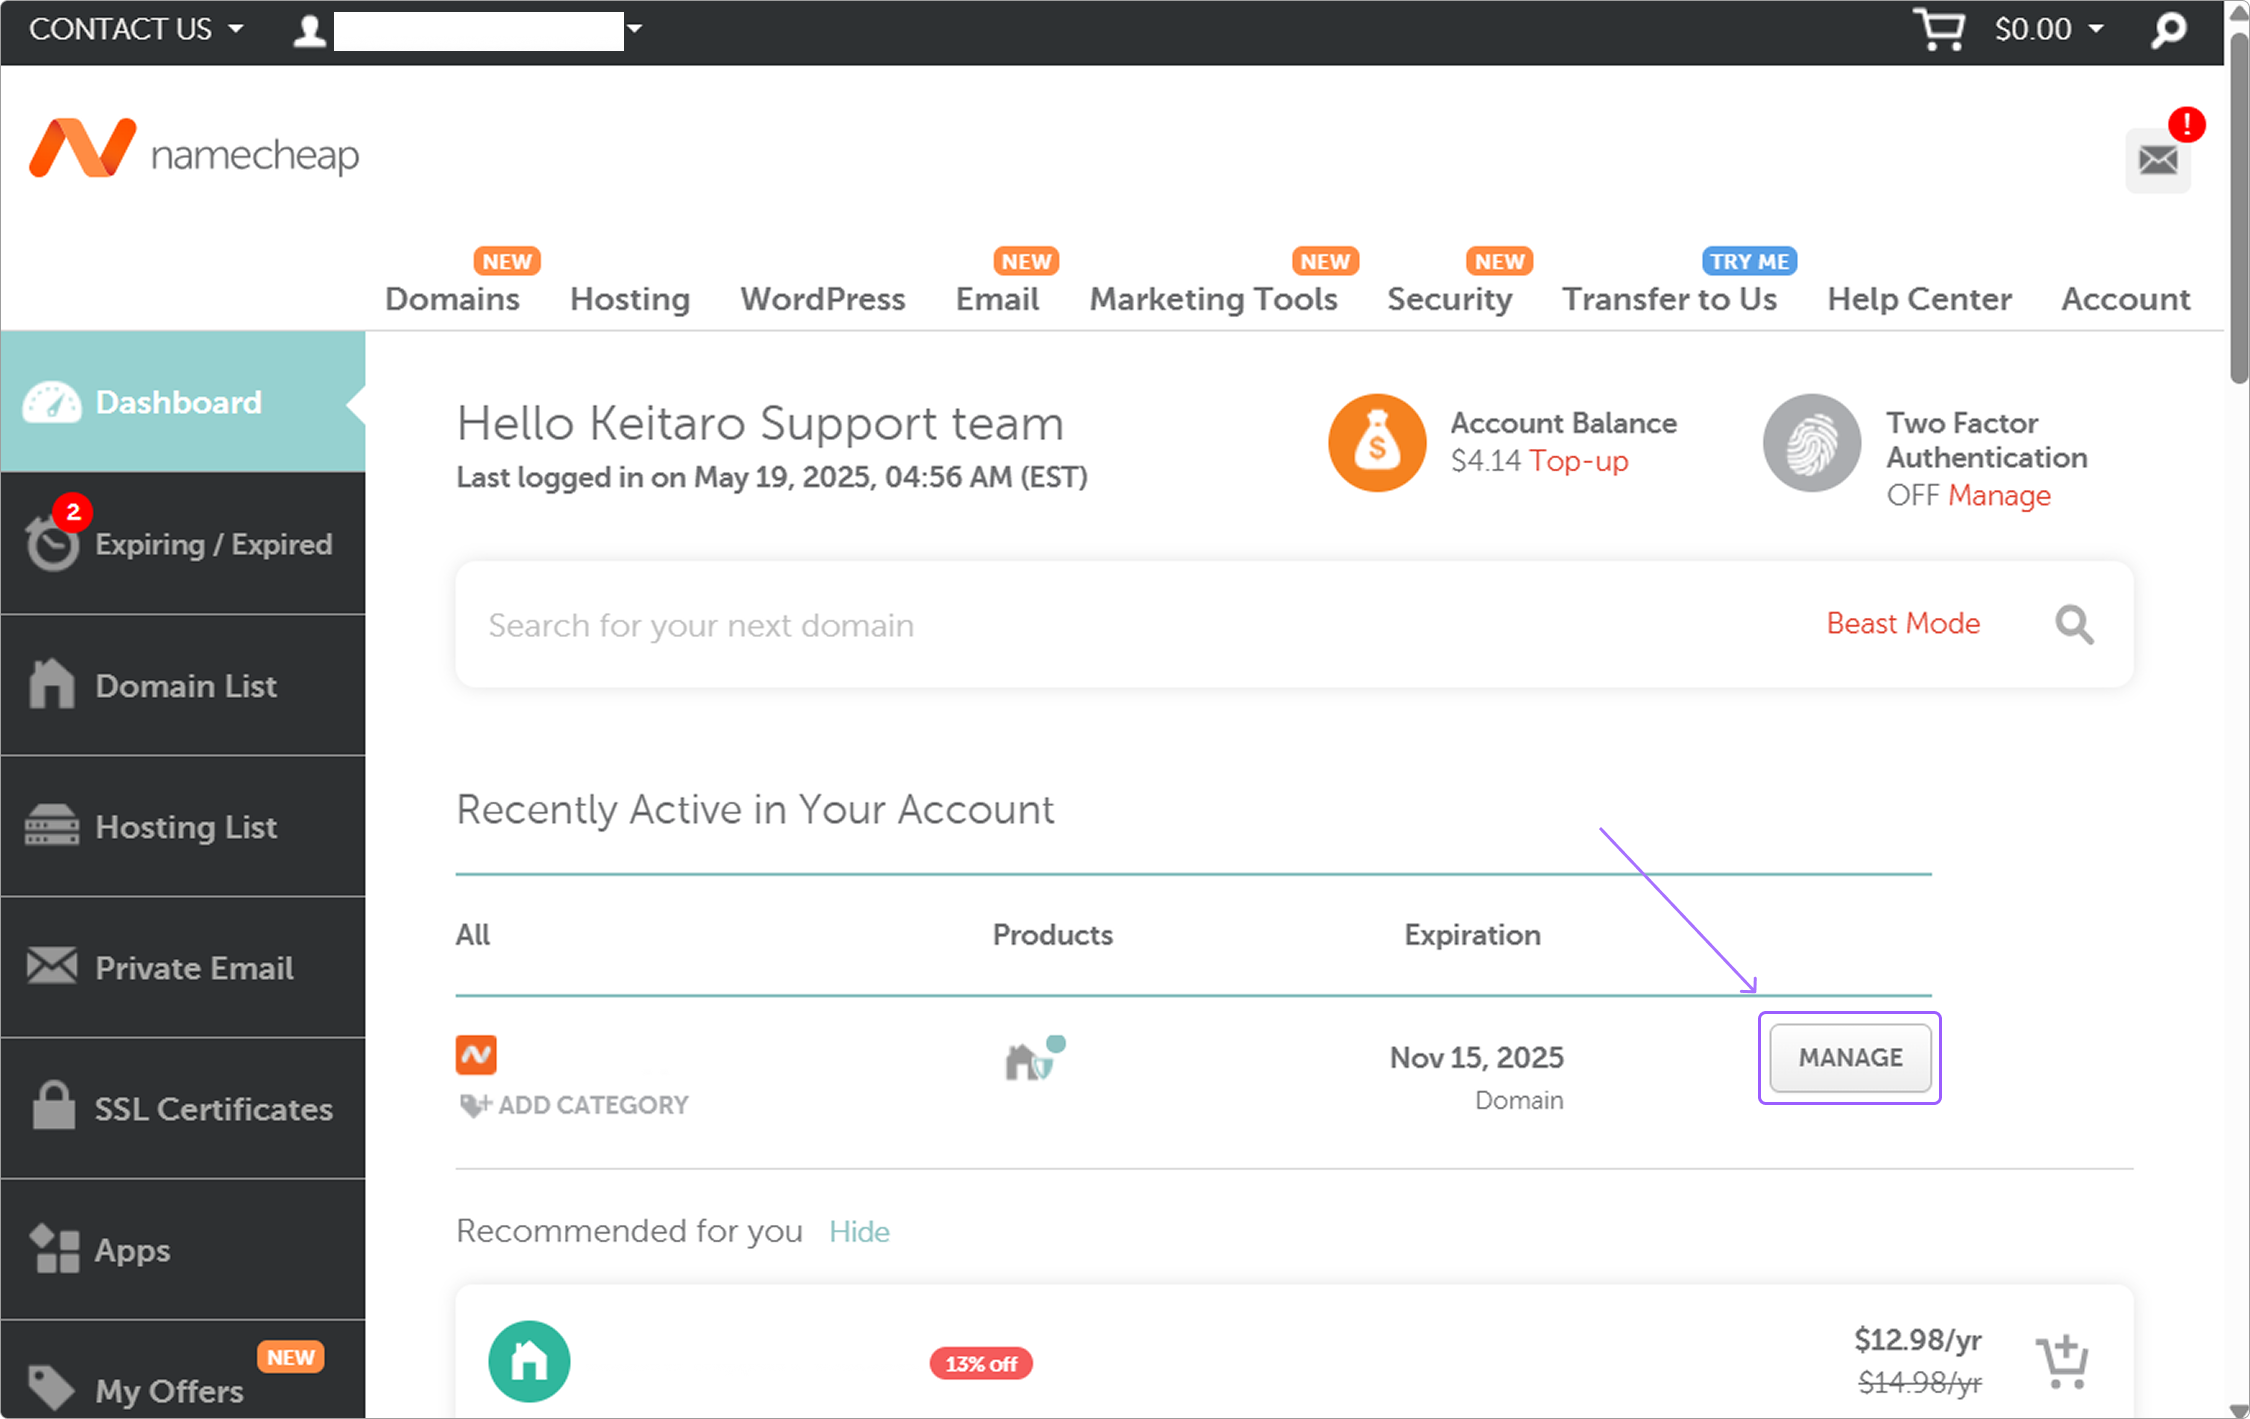
In the left panel, click Dashboard to open the Dashboard, click Manage for your domain:
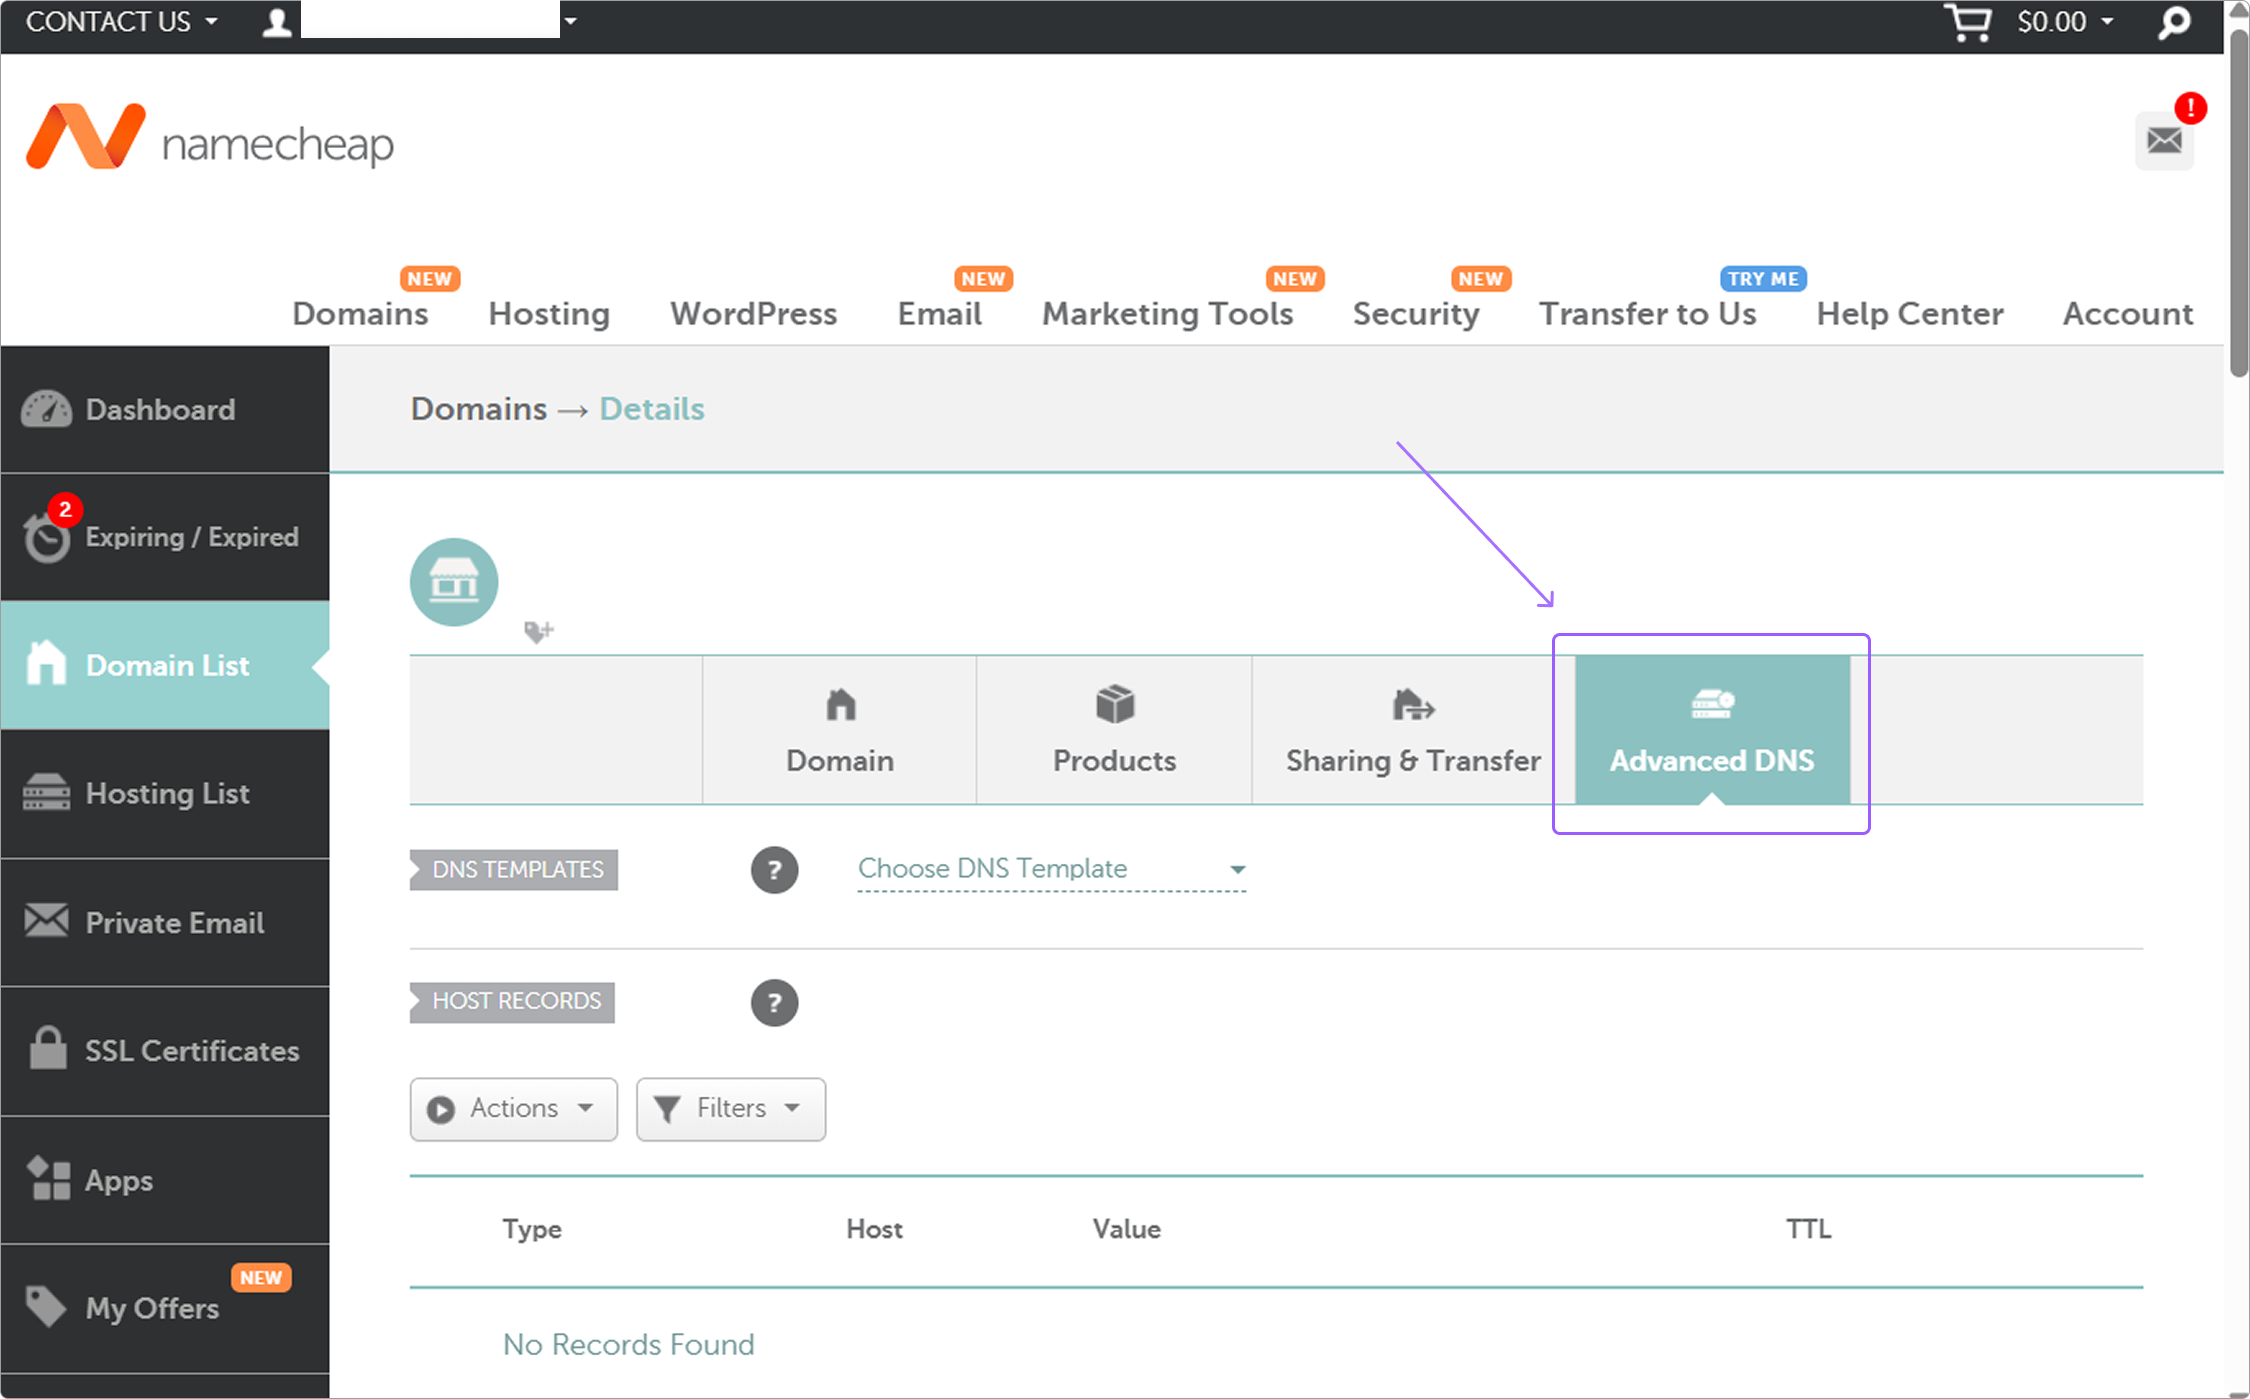
Select the Advanced DNS tab:
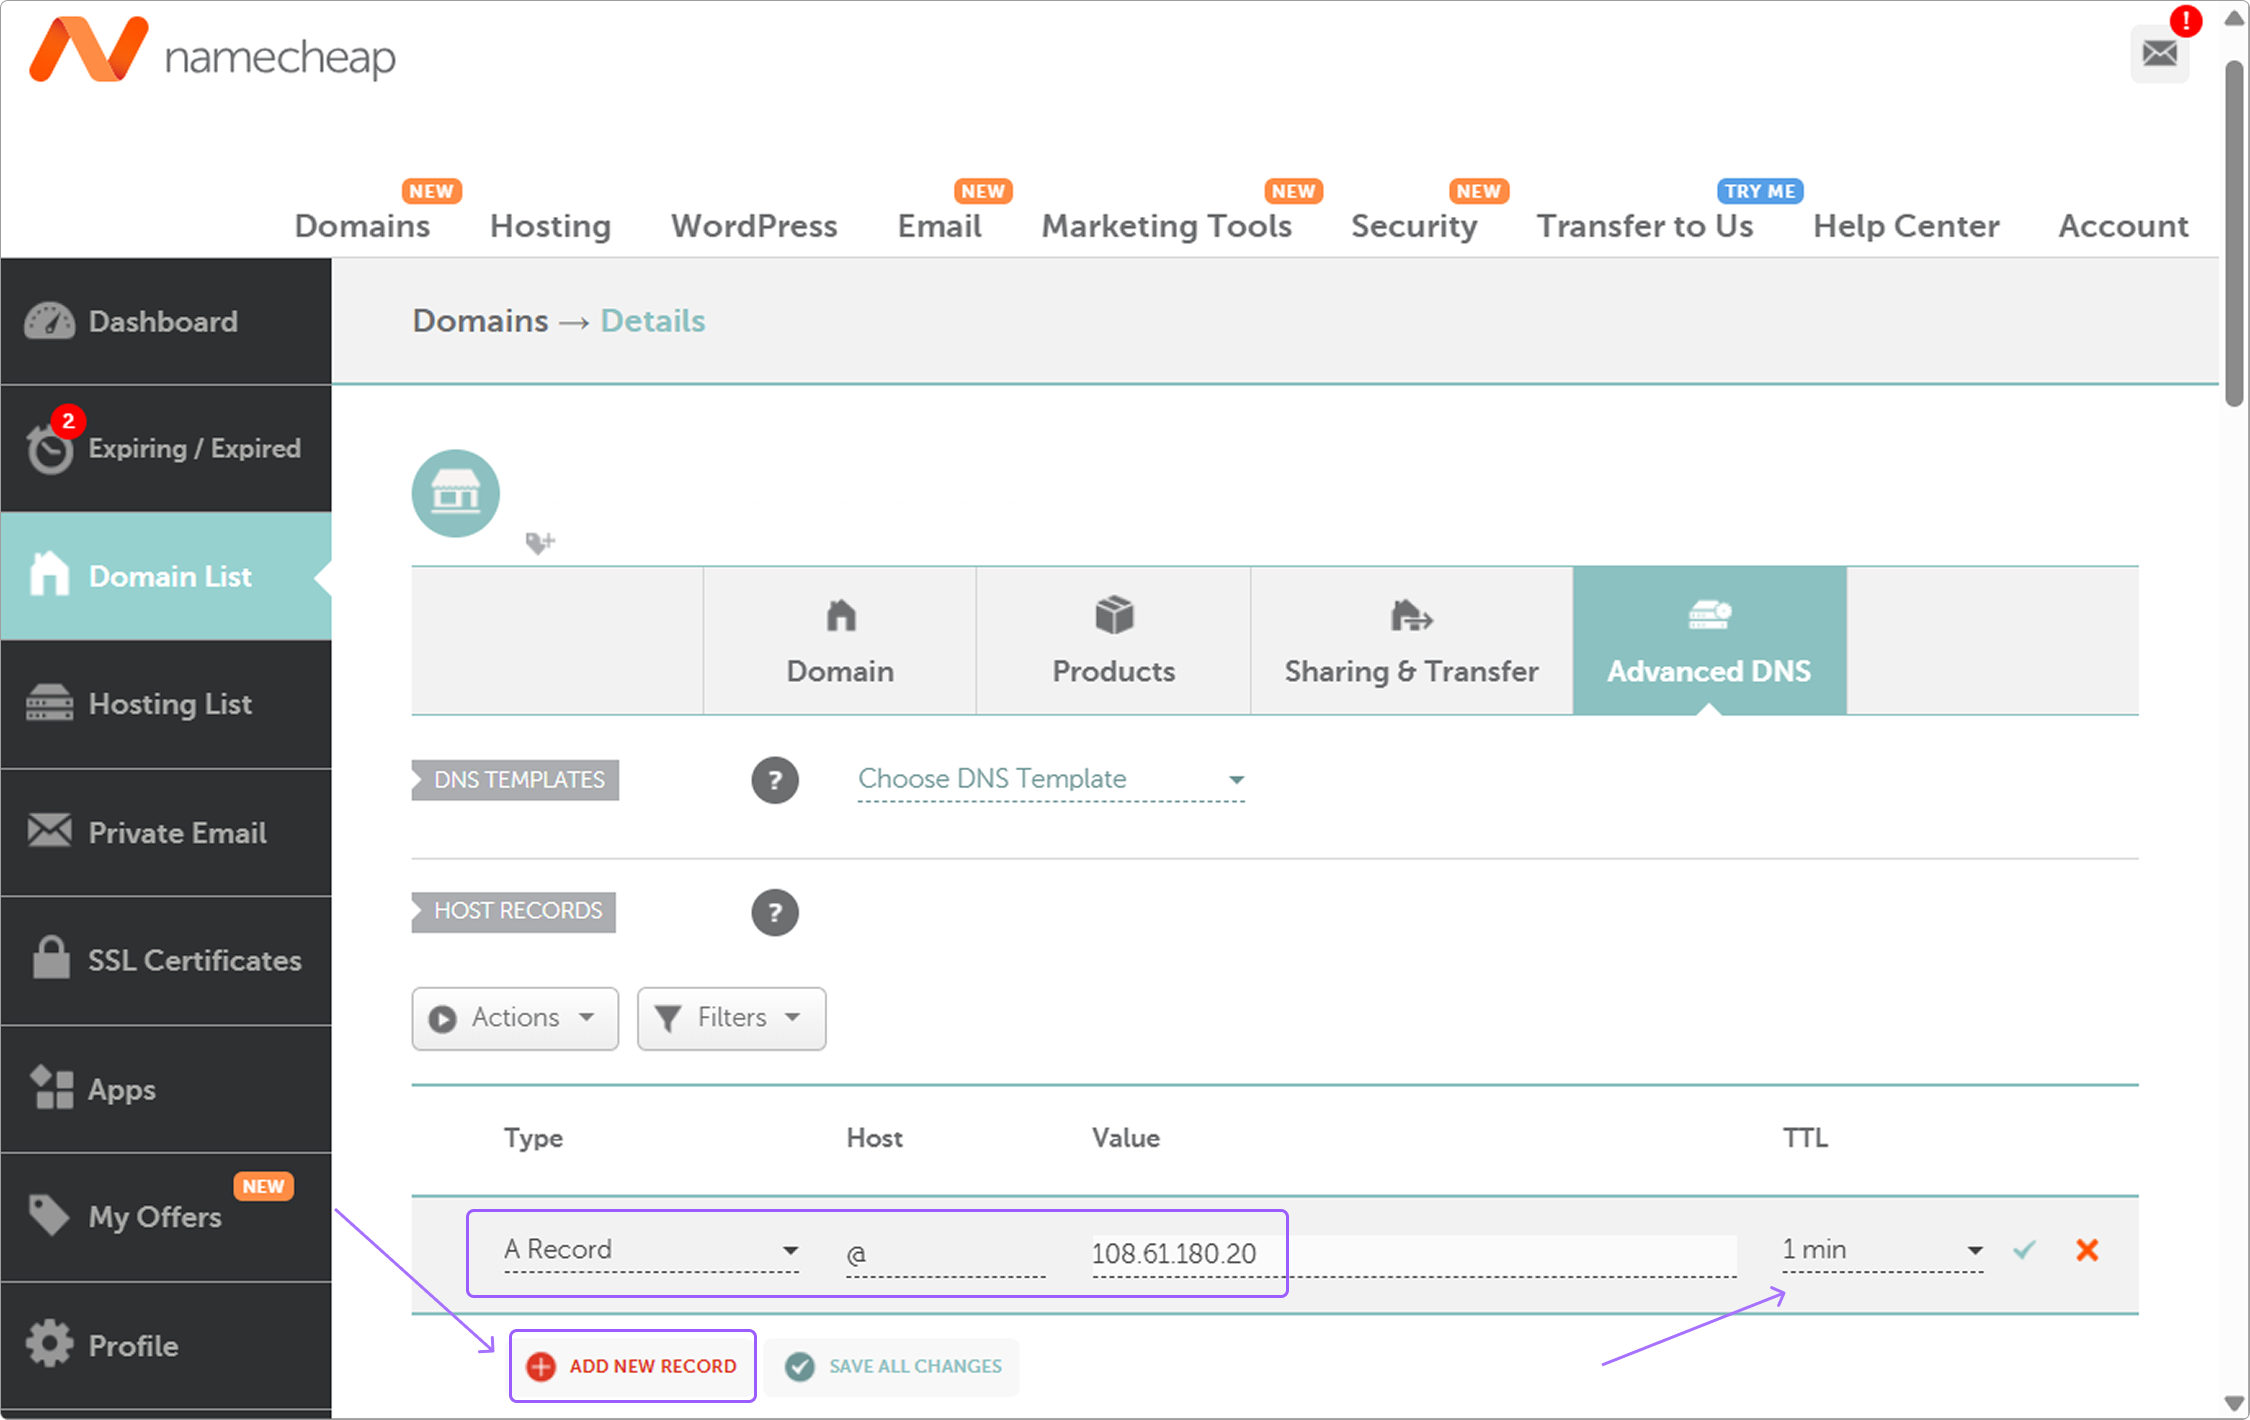
Add an A—record:
- Choose "A—Record" in the first column.
@for Host.- The server IP as Value.
- Select the lowest value for TTL
Open the Domains tab, and click Add.
Enter your desired domain name
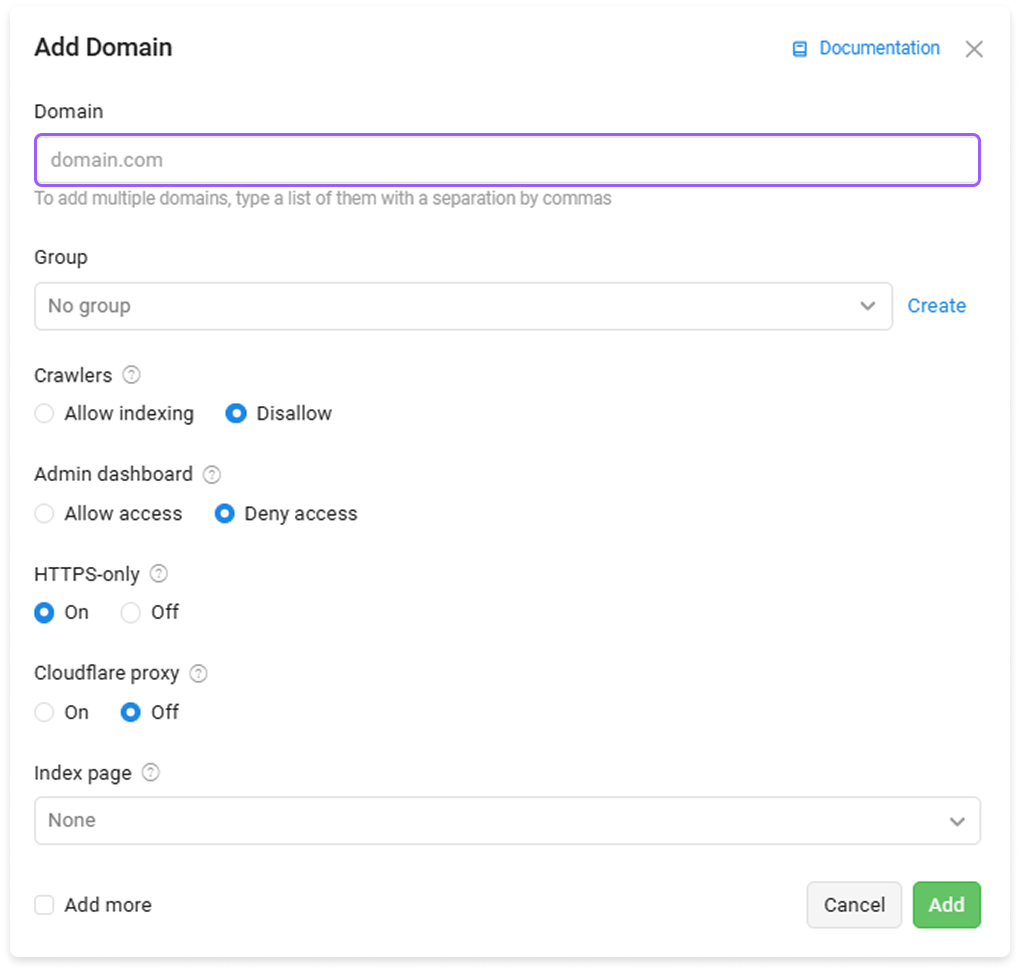
Click Create.
DNS servers of different internet service providers update at different times, which means that the site may be accessible through one provider, but not through another. Generally, DNS server updates up to 24 hours (this process is independent of the tracker).
# Adding traffic source
Keitaro Traffic Source is a template data set with an ad platform utm—parameters. It is used for transfering additional click data from your ad network or any other traffic source. It is connected to simplify the setup of data transfer from the source to the tracker and back to the source if needed.
Detailed video about utm—parameters and Traffic sources in Keitaro check here (please, use EN subtitles)
Alternative guide:
Open Sources, press Create.
Choose the desired traffic source from the templates in the Template Name dropdown:
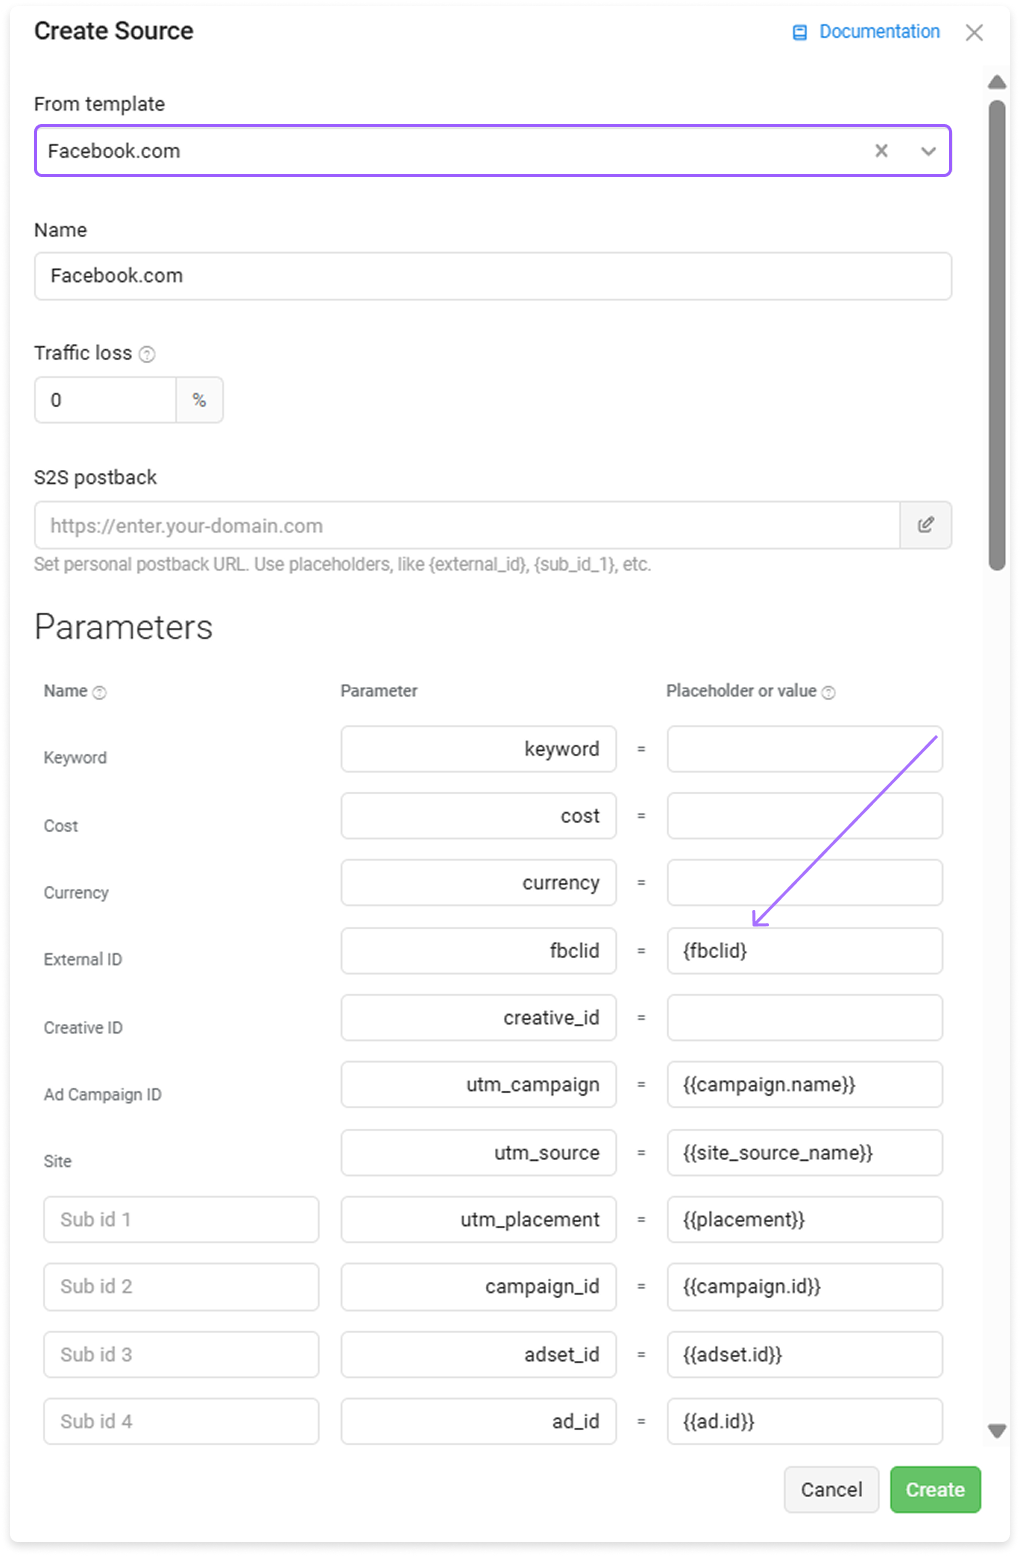
Click Create.
There is no template for my traffic source.
# Adding affiliate network
Affiliate network in Keitaro is a template with affiliate network placeholders data set. It is used to simplify postback setup and conversions receiving.
Open Affiliate networks, press Create.
Choose the desired Affiliate network in the Template Name dropdown, then click Create

Check the detailed video How to plug in Affiliate network template and receive conversions from Affiliate network. Please, use EN subtitles.
There is no template for the affiliate network.
See Adding affiliate network without template or full—step guide How to create Affiliate network template, is there is no such one in Keitaro. Use EN subtitles, please.
# Creating a campaign with landing page, offer, source template and affiliate network
It is not necessary to add both the landing page and the offer to the campaign. The campaign content is added optionally and depending on your goals and funnel details.
As an example, check this step—by—step video. Use EN subtitles, please.
Creating a campaign with adding a local landing page (affiliate archive) and a redirect—offer (affiliate link to an offer). Use EN subtitles, please.
Alternative guide:
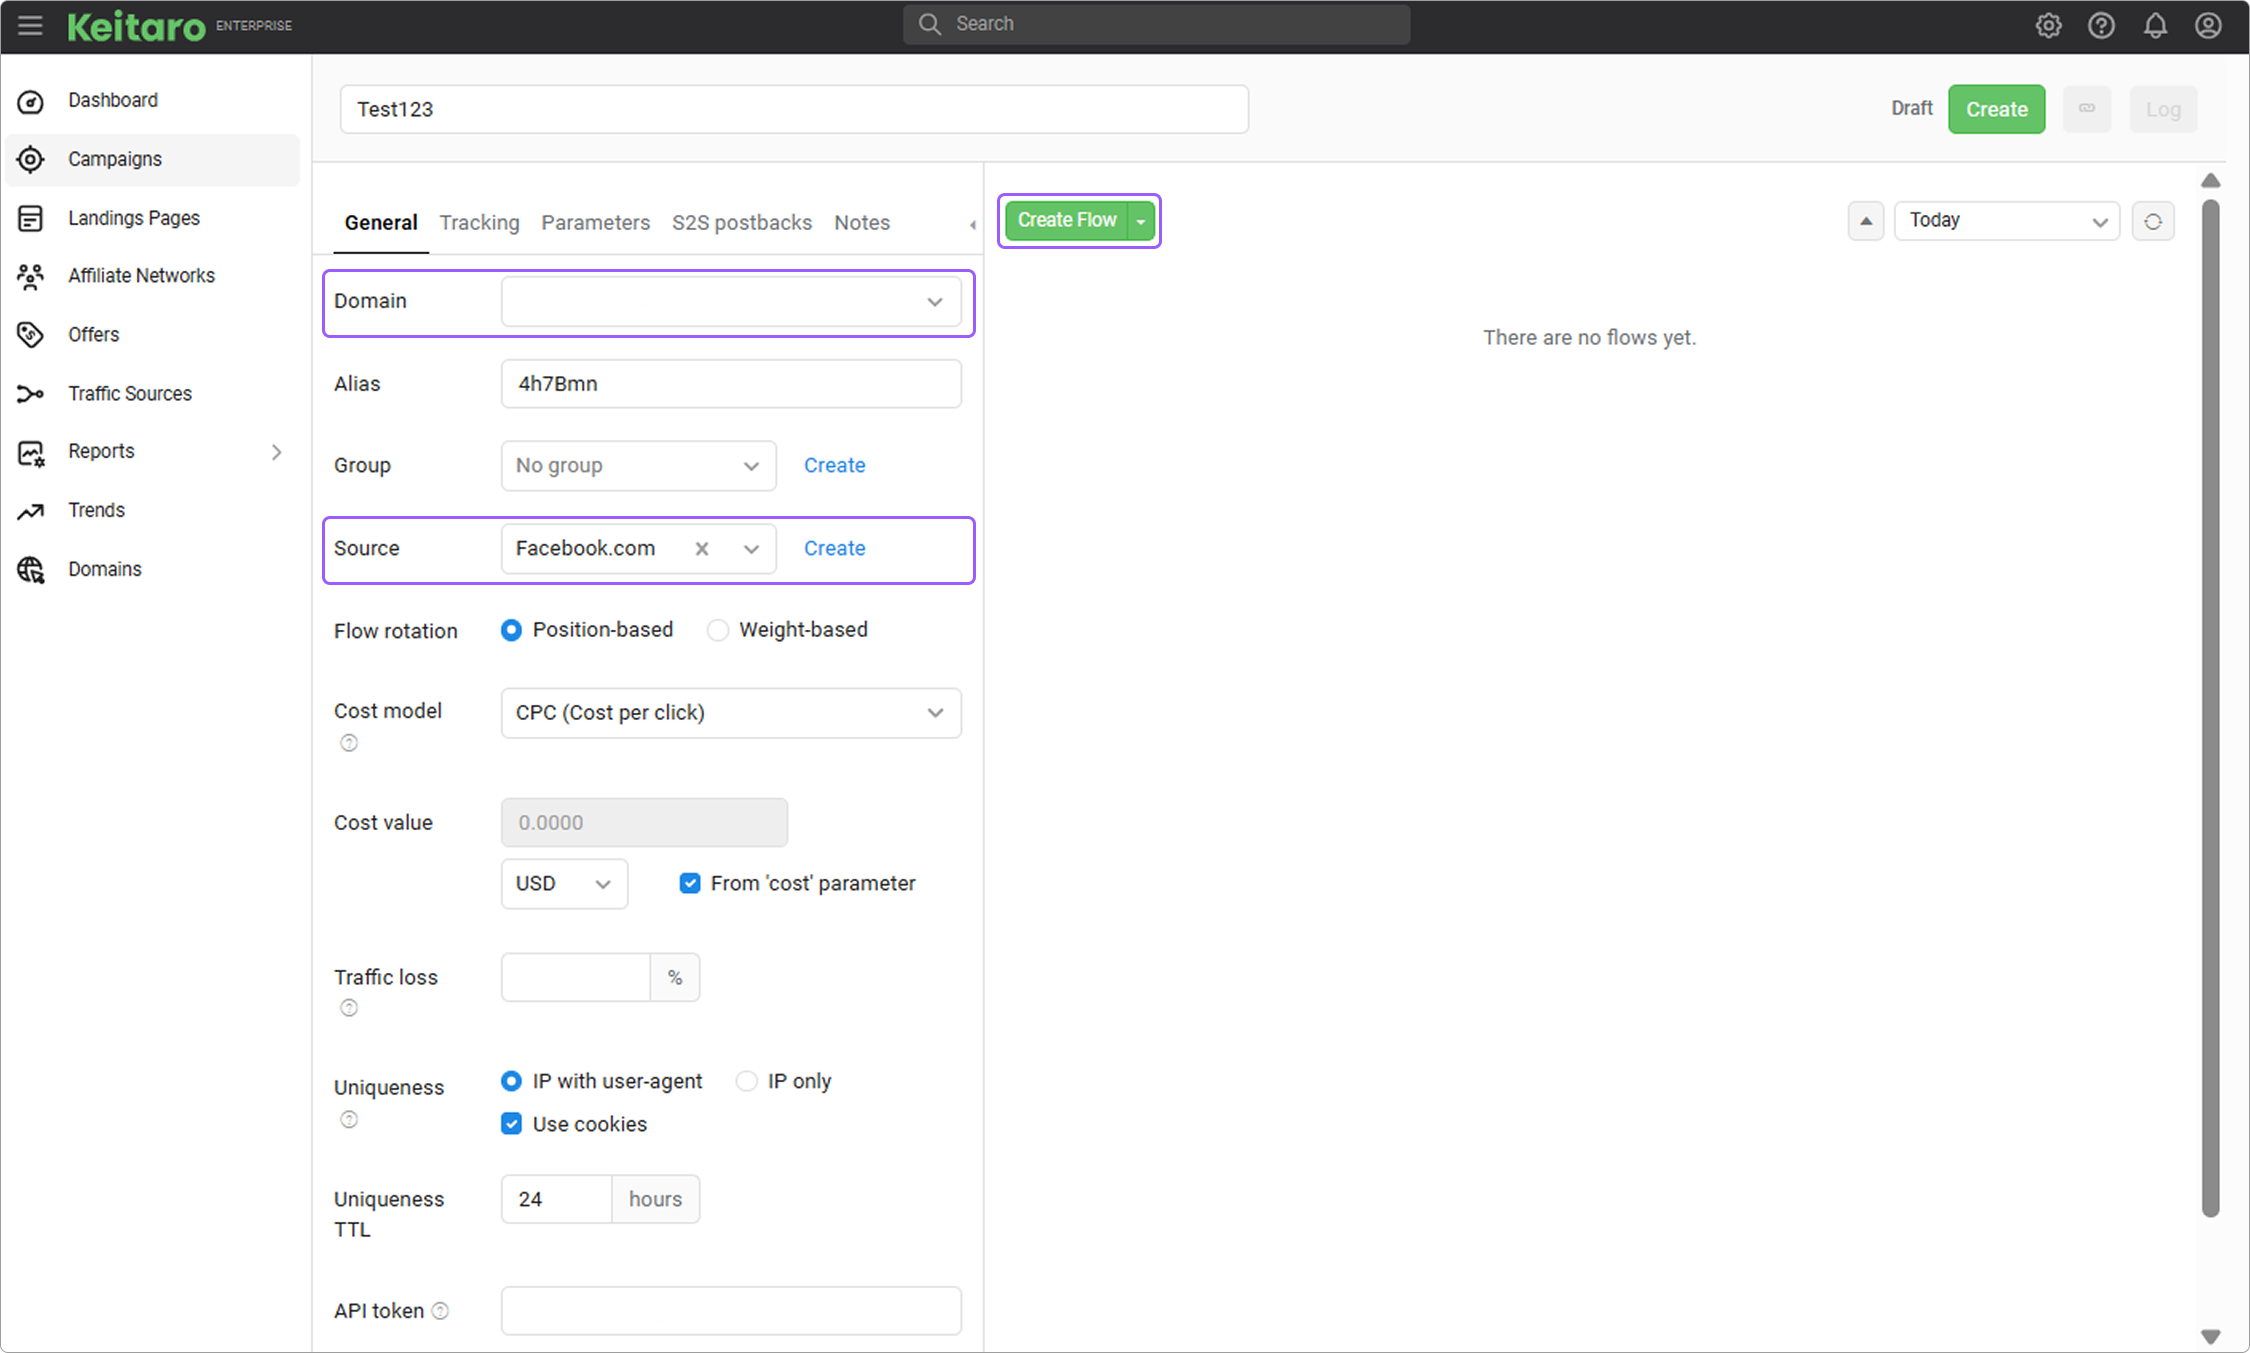
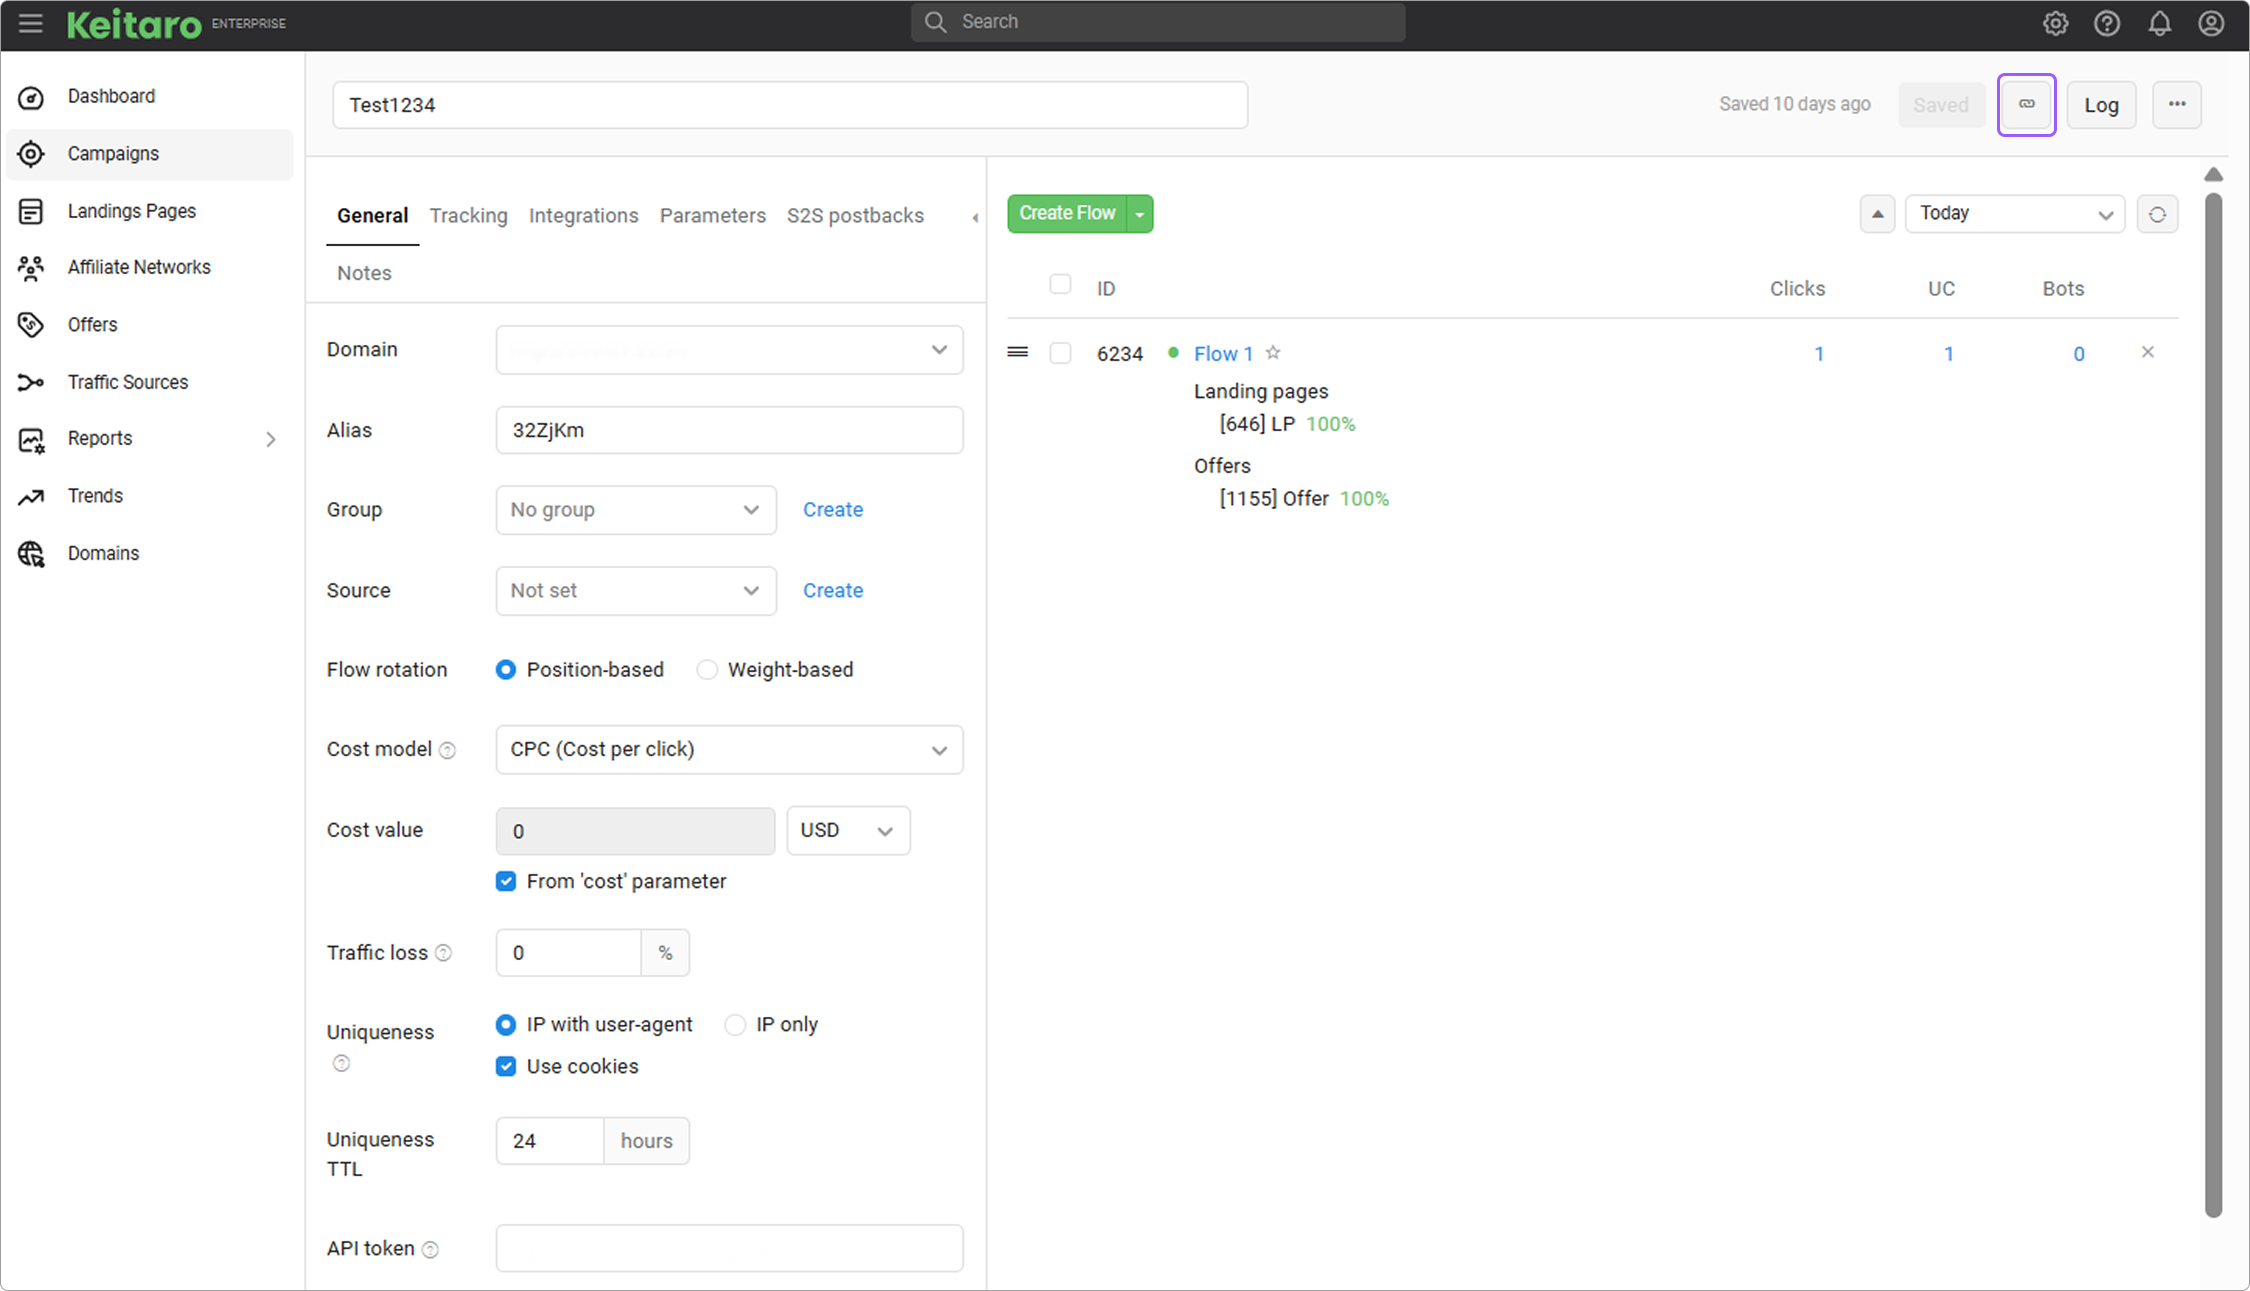
- Open Campaigns, then click Create.
Choose the domain and the traffic source. Click Create flow.
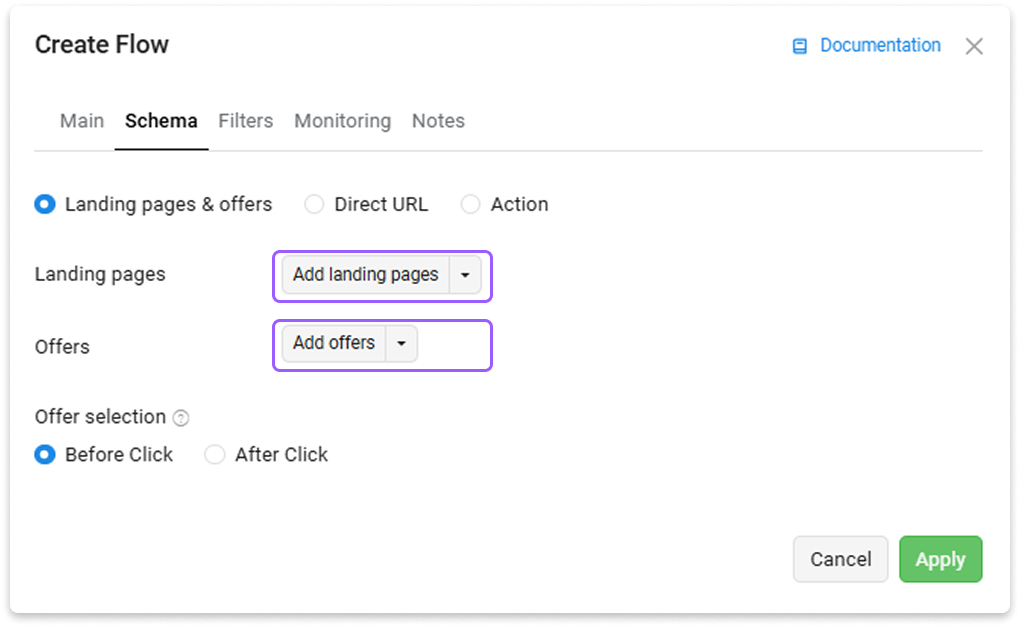
Switch to Schema, add the landing page and the offer:
- Go to the landing page code editor and find the link following to the target page, for example
random_name.html
Replace random_name.html to placeholder {offer} in href attribute of </a> tag for each link following to the target page
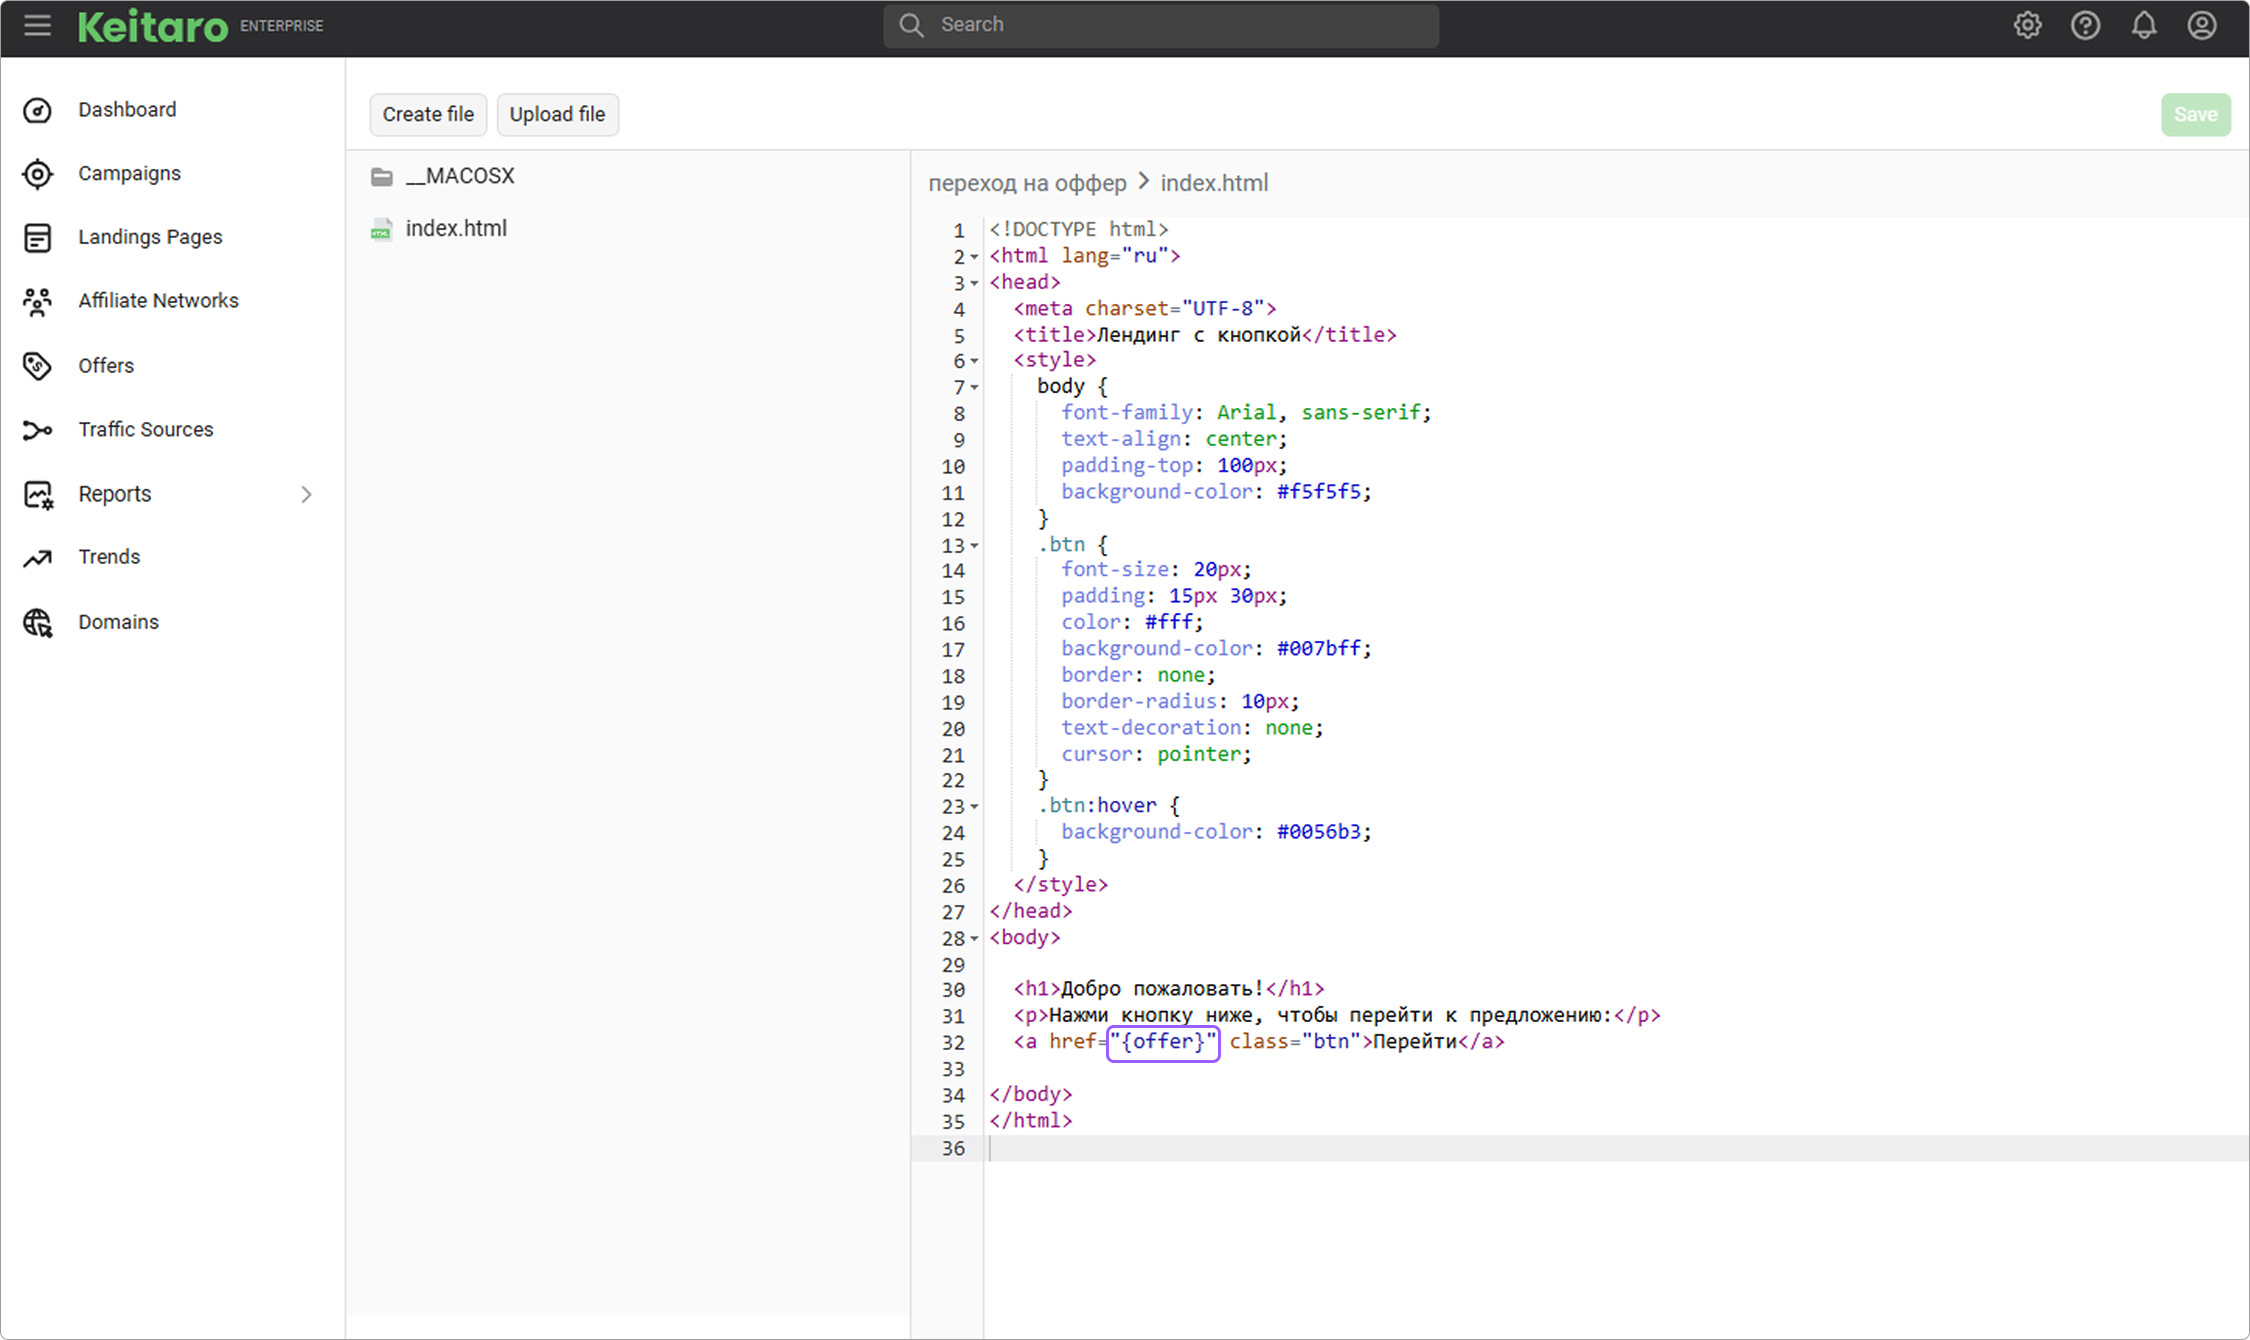
Click Apply and save the campaign.
Copy the Campaign URL:
Open the URL in the browser and verify that everything is working fine.