advanced expert team enterprise
Keitaro collects information about advertising campaign costs via Facebook and sends conversions to optimize ad campaigns on the source side. Cost integration is separate from conversion integration. The integrations transfers conversions and costs to Facebook via API. To transfer conversions via pixel without using integration and API, use the FB Pixel instruction.
# Import costs from Facebook
betaOpen Integrations, select Facebook cost integration:
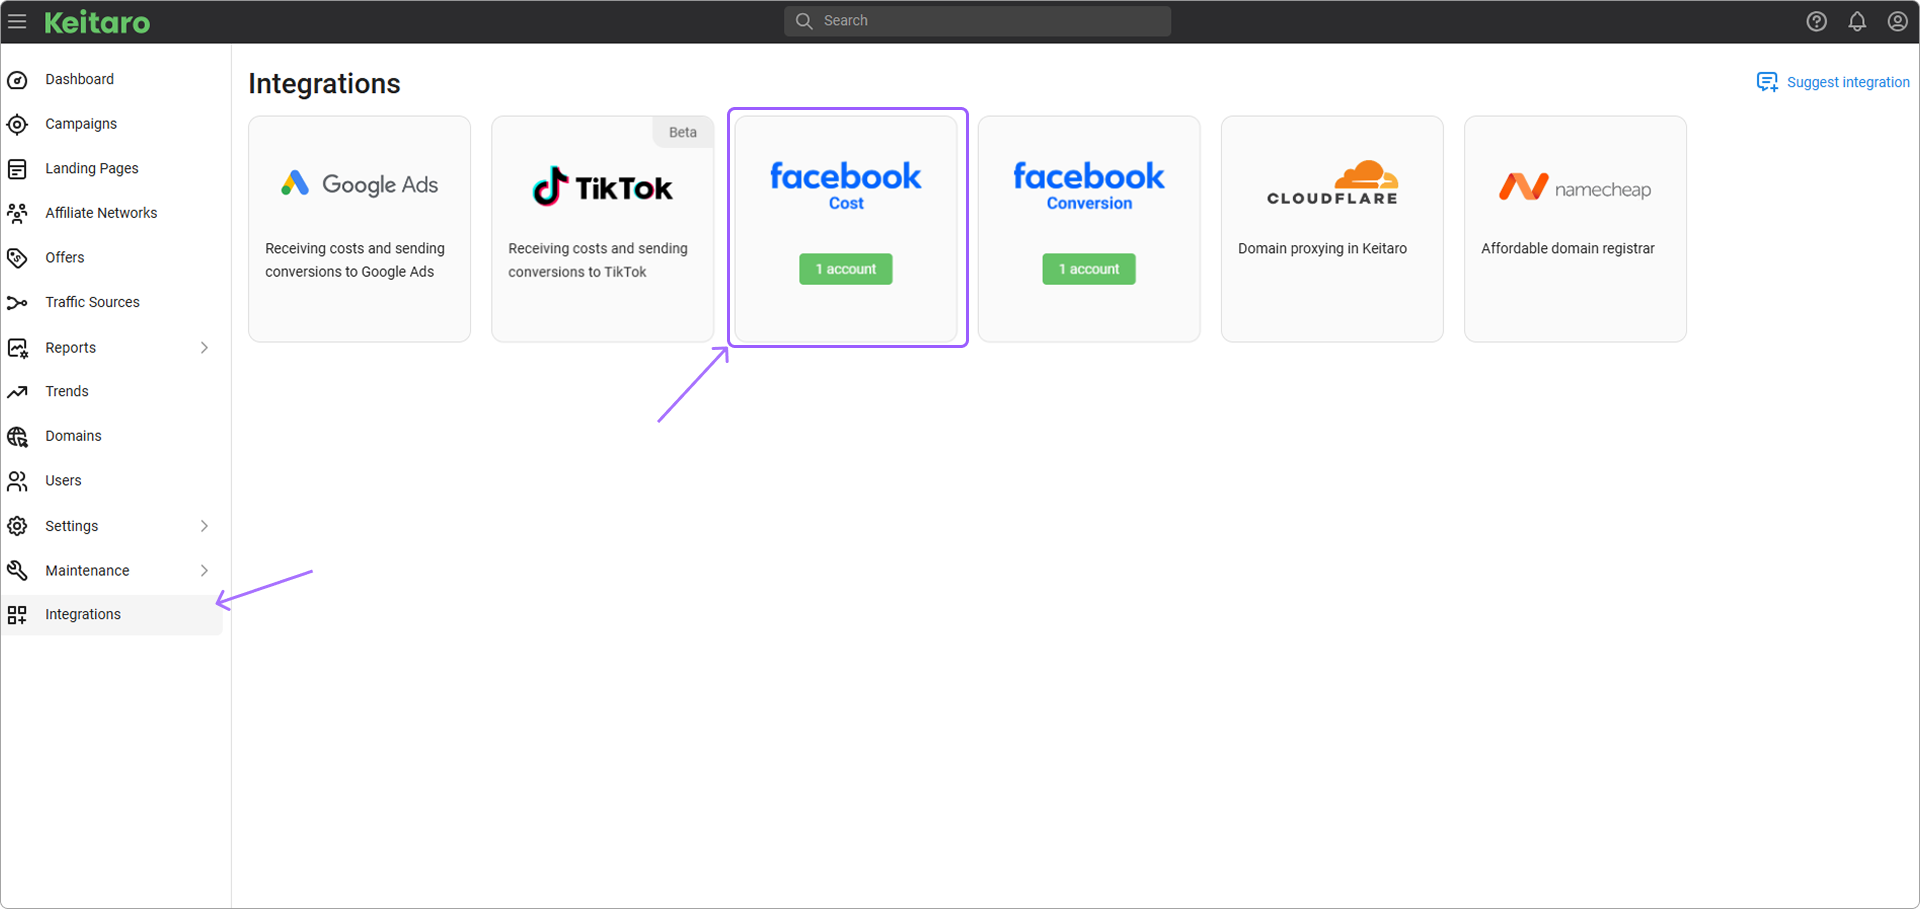
Click Add account
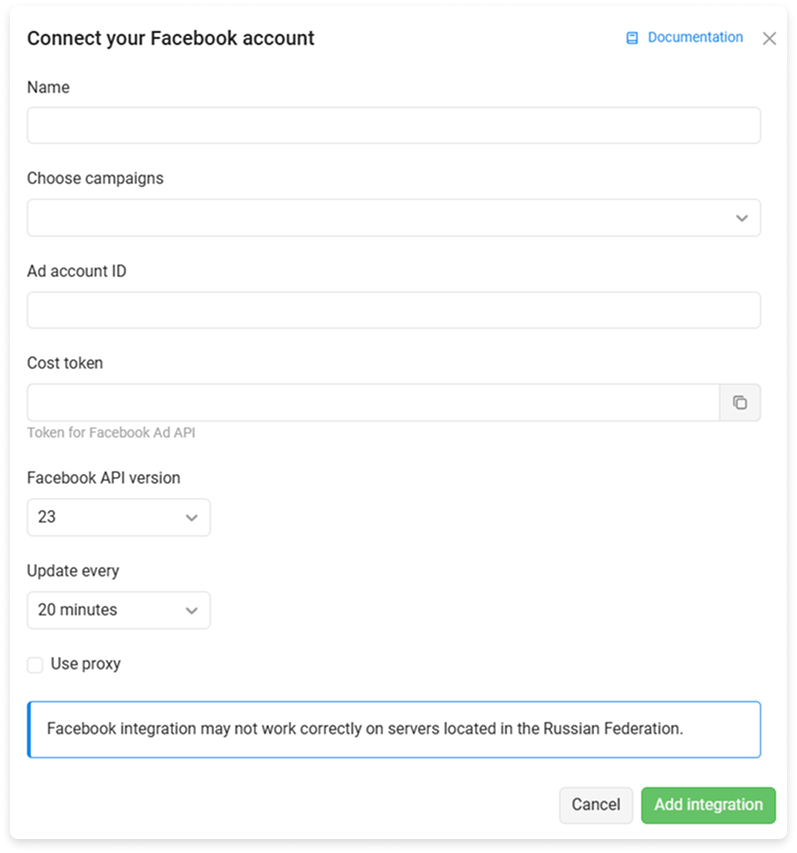
# Description of cost settings
- Name. Name of the new integration.
- Choose campaigns. Each FB integration is for one or more campaigns. Select from the list for which campaigns to update costs.
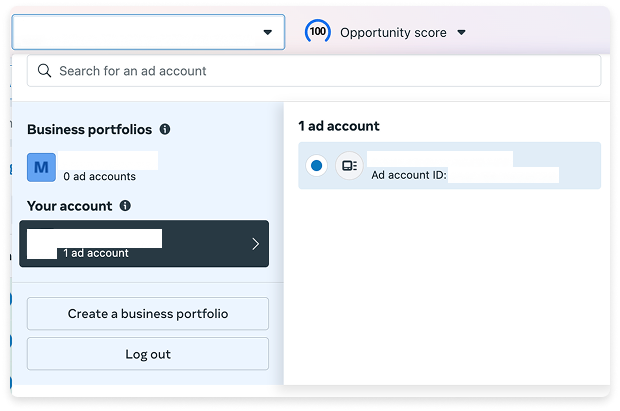
- Ad account ID. Account ID.
- Cost Token. Token for connecting to the advertising account via API, see how to connect a token.
- API version. Facebook API versioning.
- Update every. Updating integration costs in a specified time interval.
- Use proxy. Make all requests to the FB API with a proxy.
# Send conversions to Facebook
betaOpen Integrations, select Facebook cost integration:
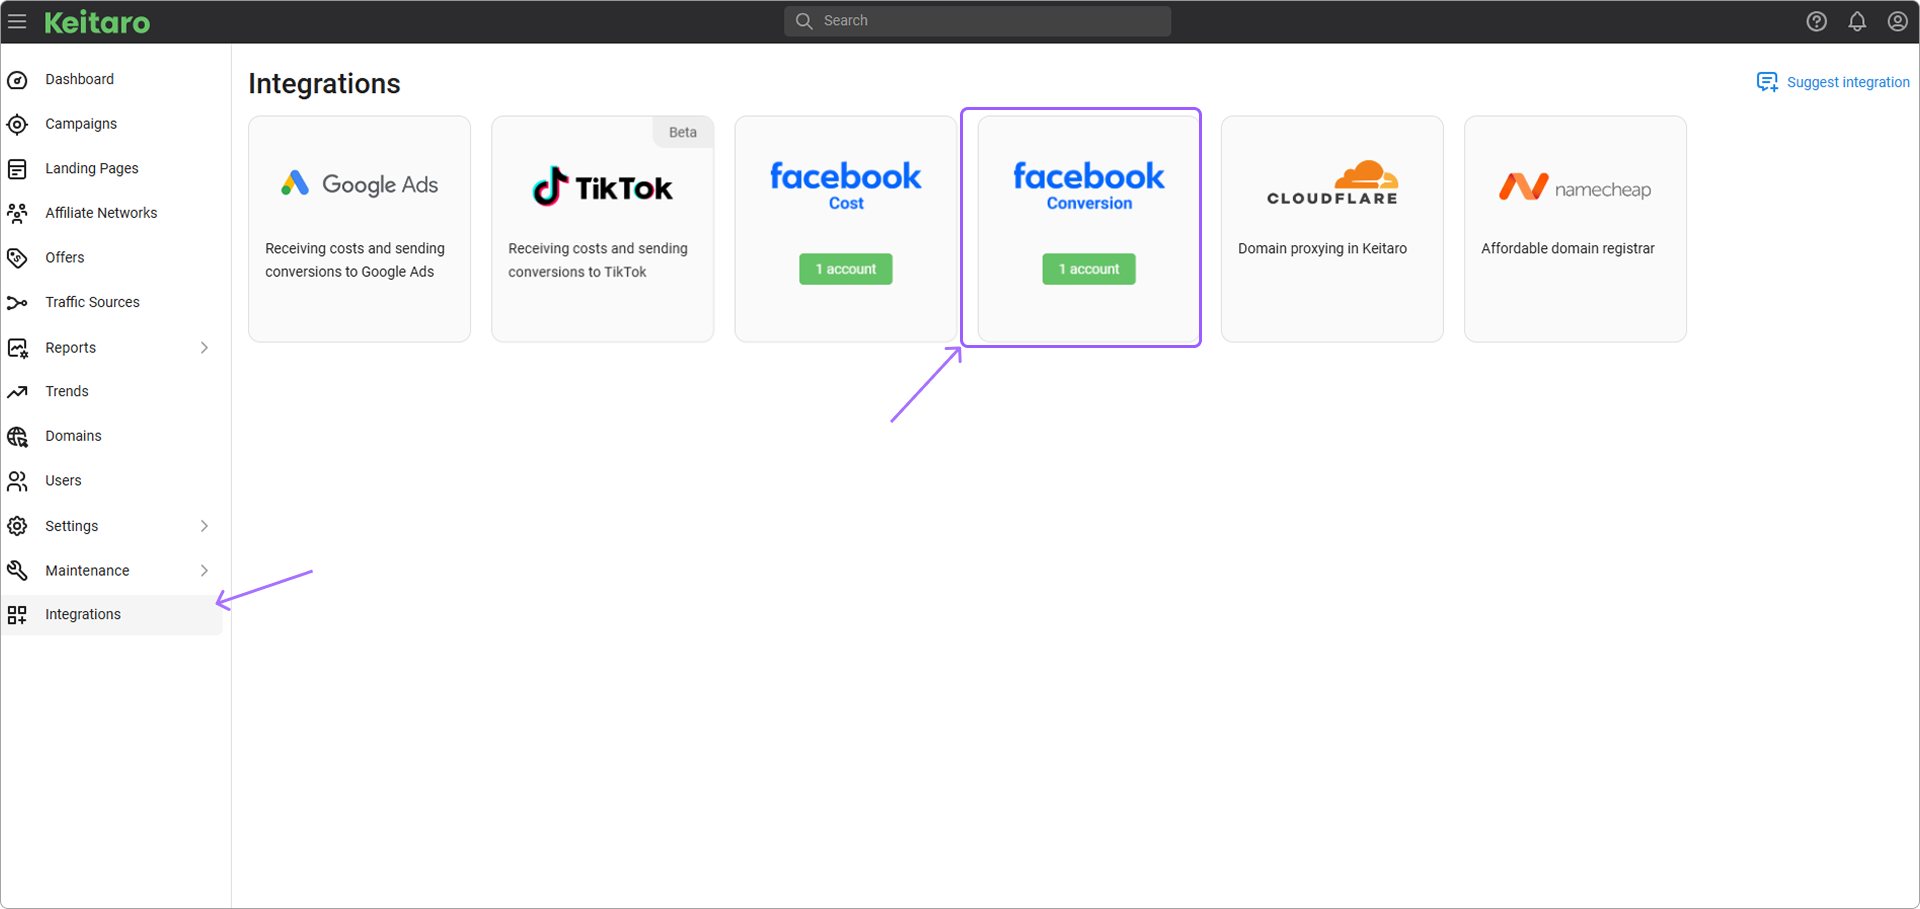
Click Add account
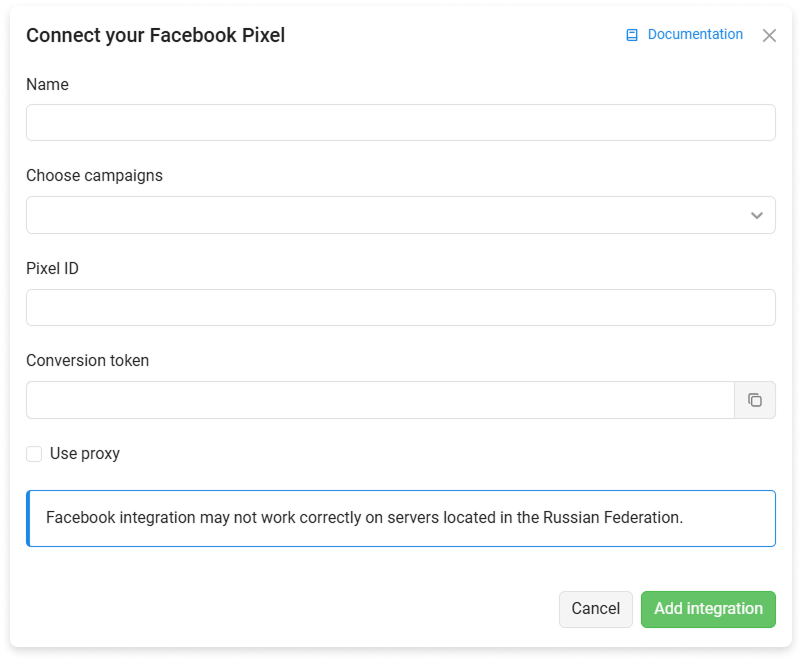
# Description of conversion settings
- Name. Name of the new integration.
- Choose campaigns. Each FB integration is for one or more campaigns. Select from the list for which campaigns to update conversions.
- Pixel ID. Pixel ID is used to send conversions via API, see instructions.
- Conversions token. To send conversions via API, you need to generate a token, passed as a parameter during the API request, see See instructions for obtaining a token.
- Use proxy. Make all requests to the FB API with a proxy.
# Working with the integrations list
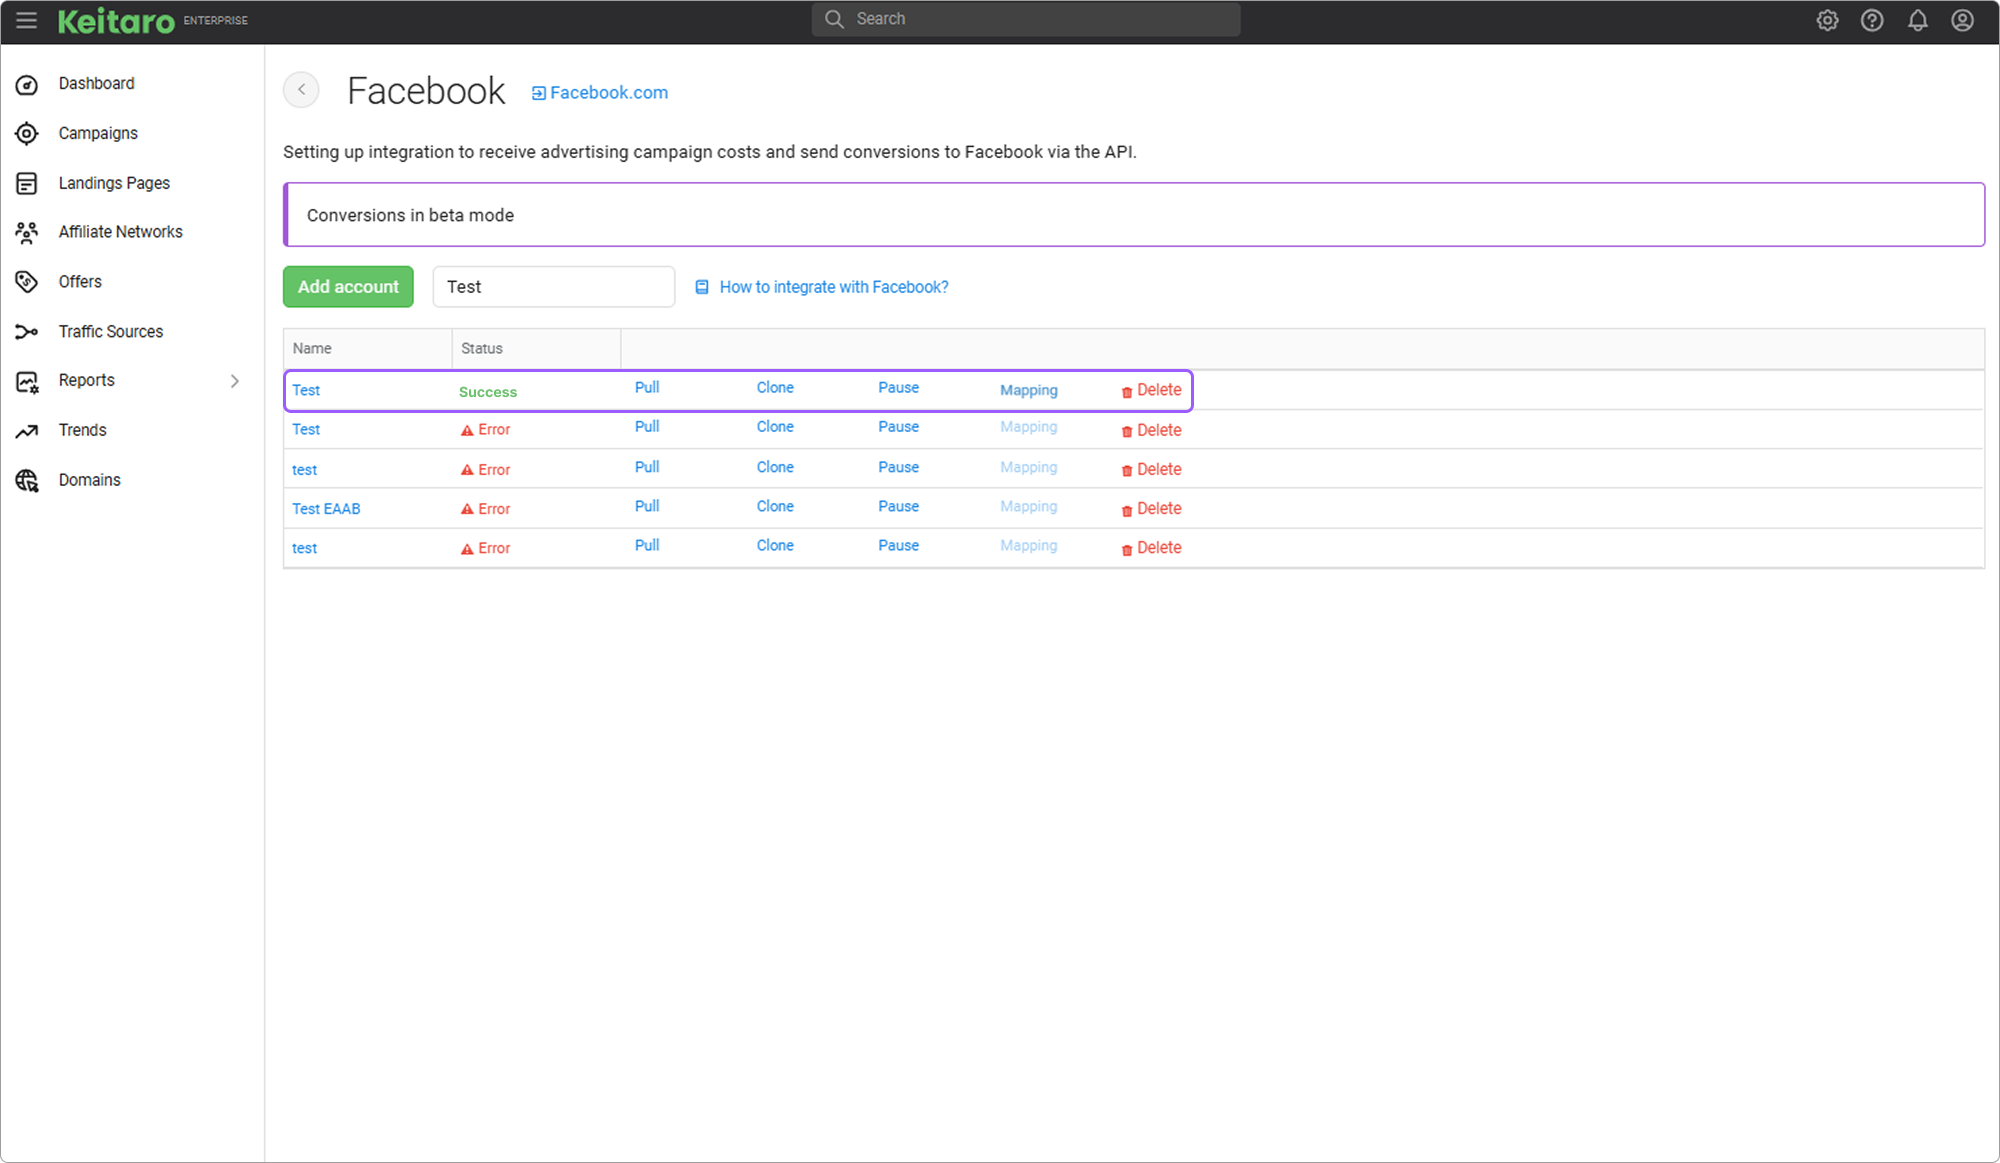
- Name. Displays the name of the added integration. Clicking on the name will open the integration editing form.
- Status. The status of the added integration. Please note that creating a Facebook integration without adding a campaign will show an error.
- Update costs. Request to update costs for this integration with the Facebook account.
- Clone. Ability to add a copy of the configured integration, along with the added "Mapping" statuses.
- Pause / Resume. Pause or continue the work of the added integration.
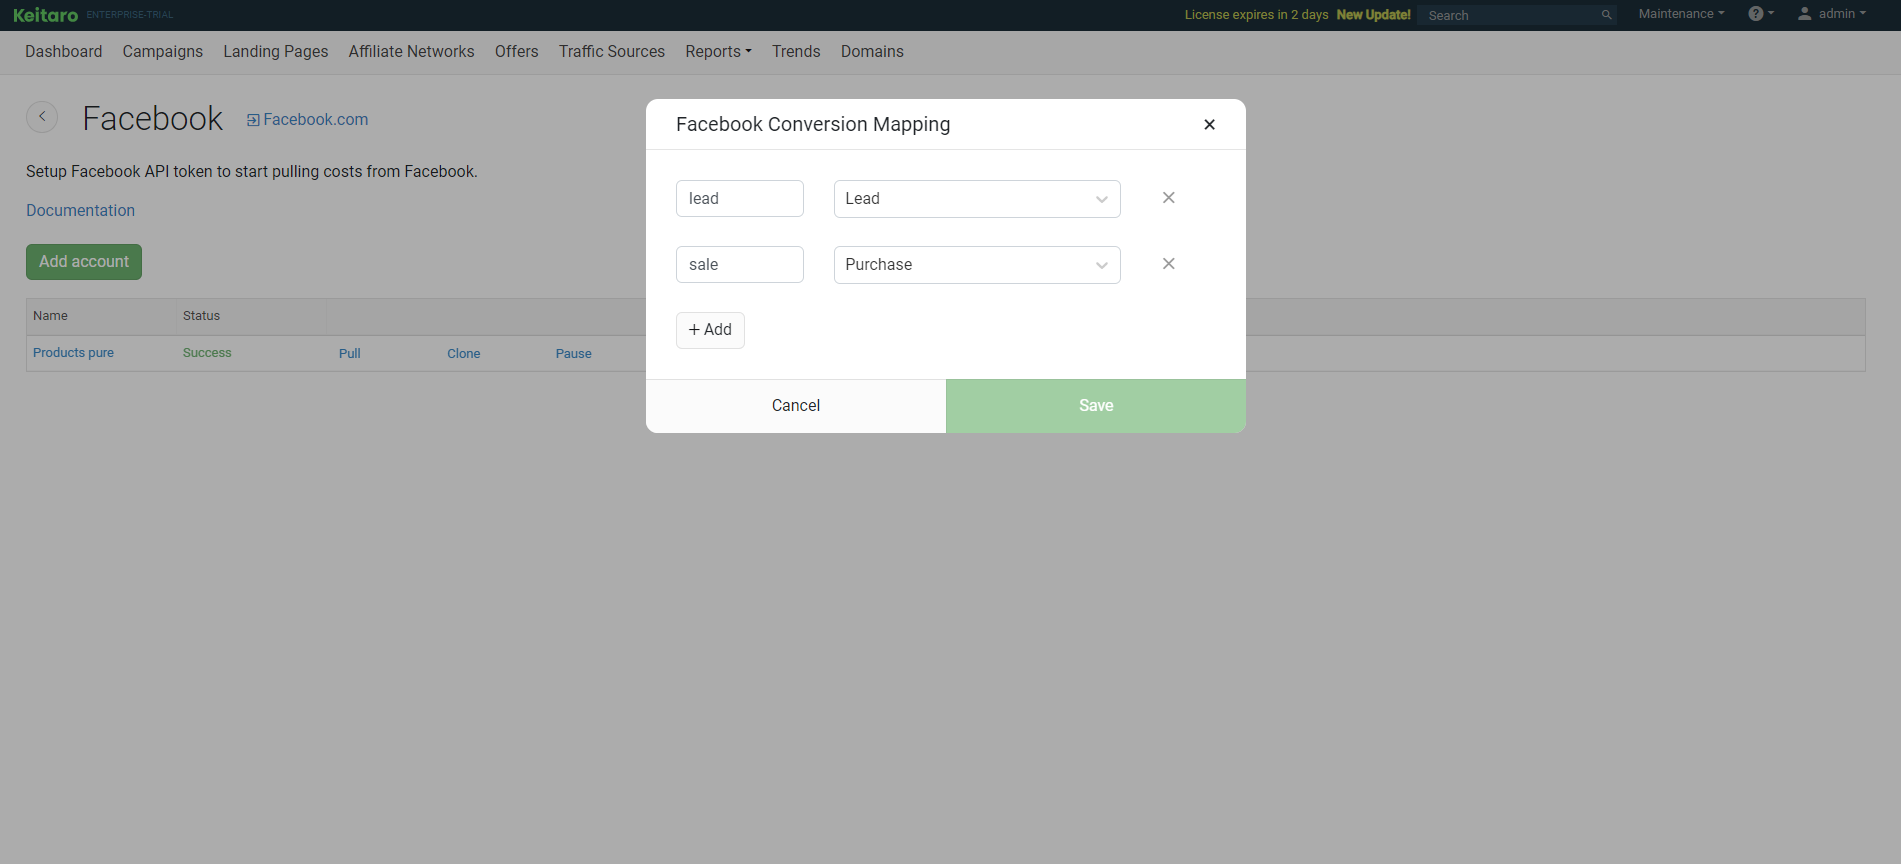
- Mapping. Matches user actions on your website or app with corresponding Facebook events. Ensures accurate display of conversion data and allows you to optimize advertising campaigns.
- Delete. Deleting the selected integration in the tracker.
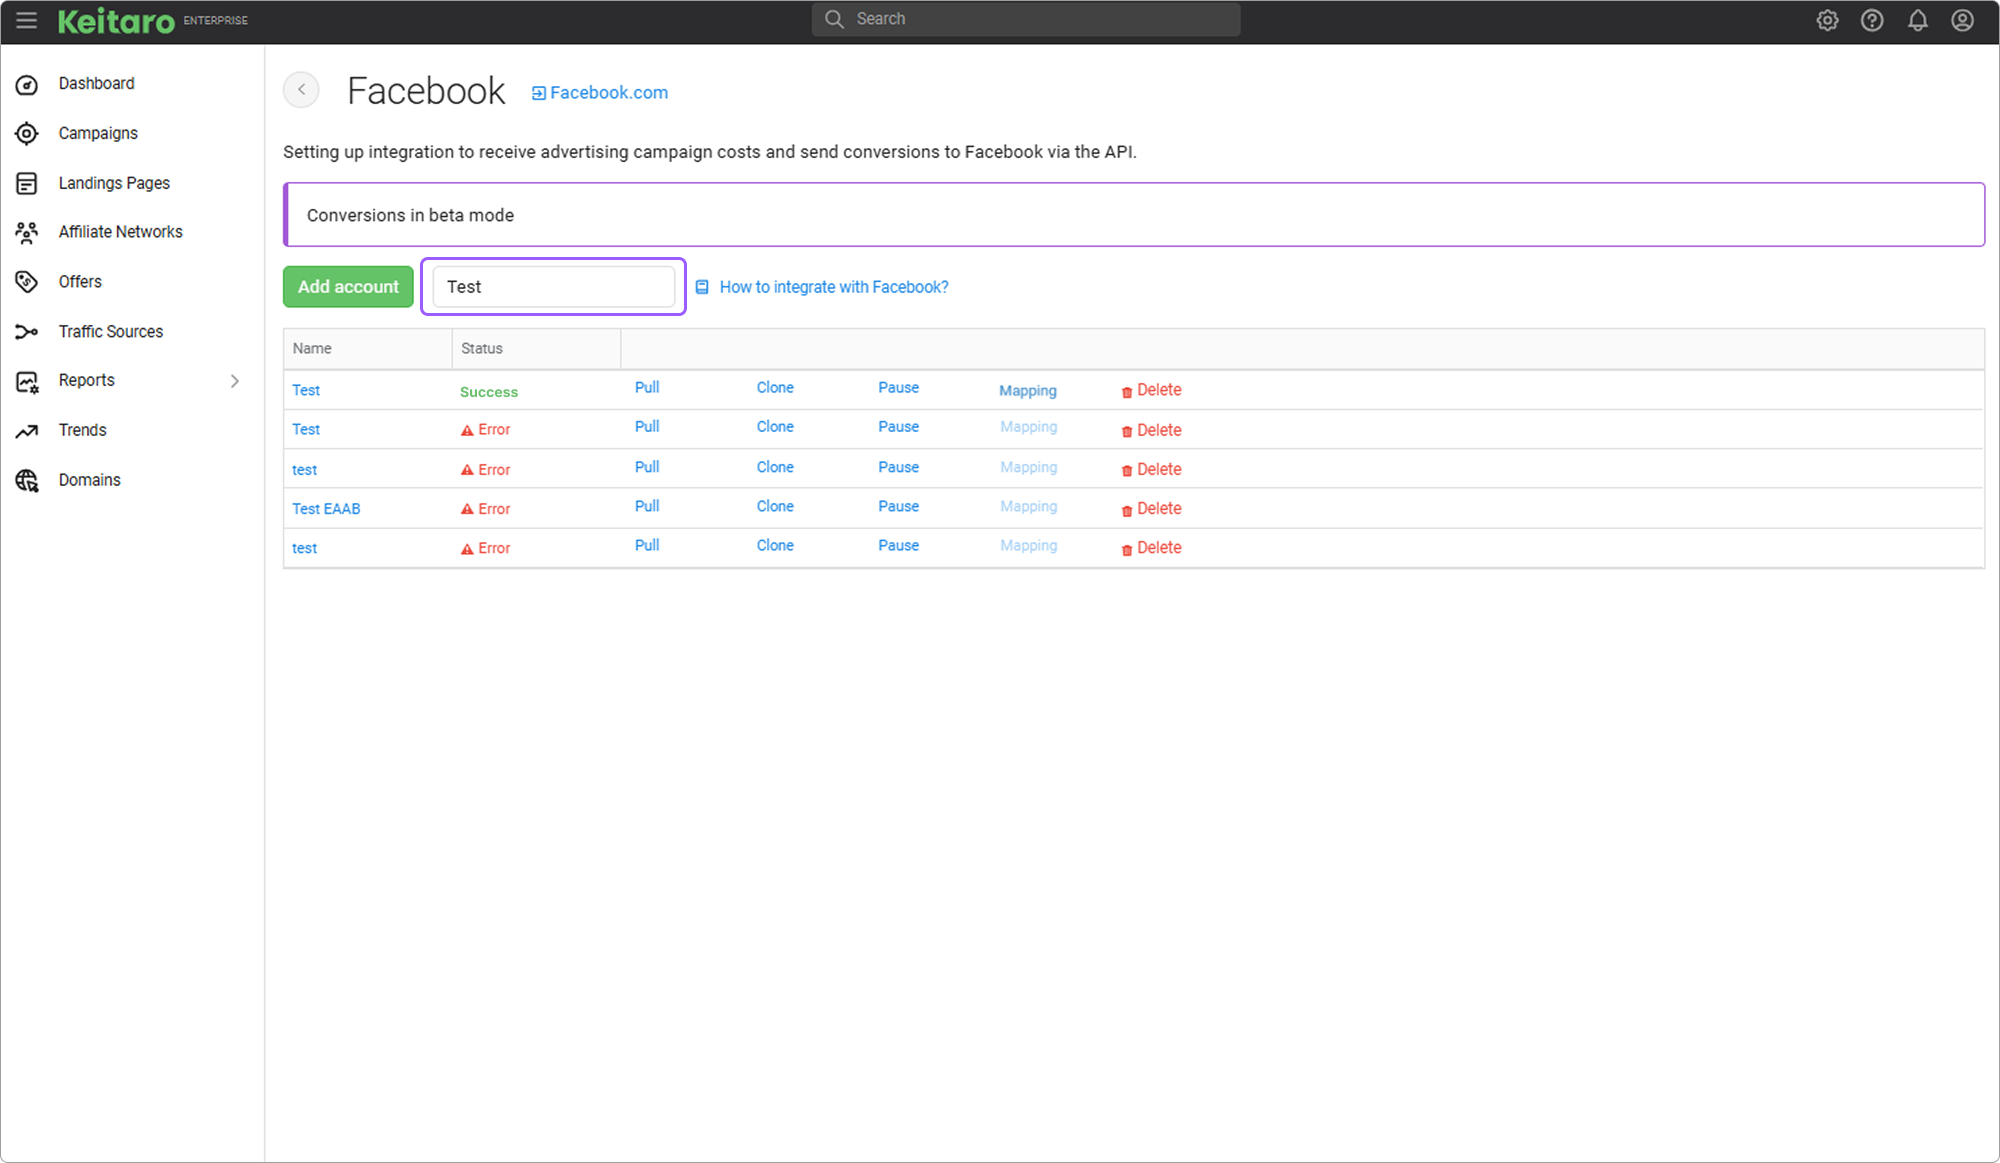
It is possible to search for added integrations by their names:
# Getting the account ID
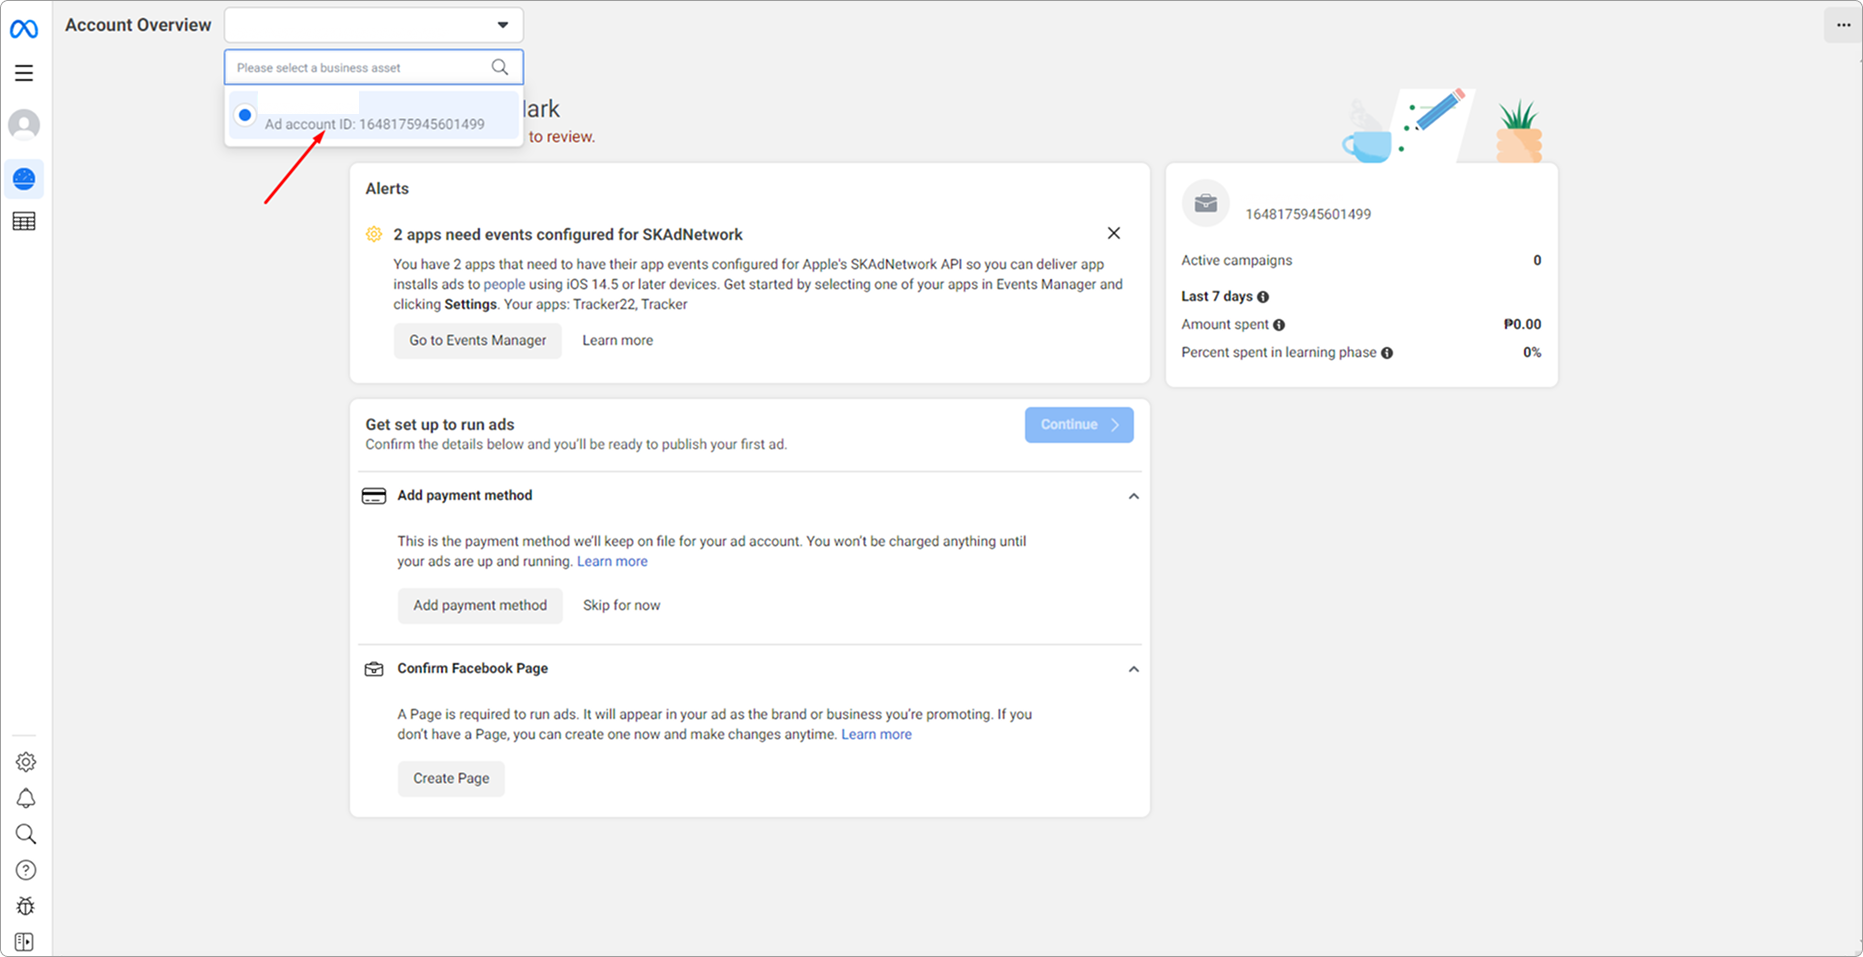
Open Facebook Ads Manager and copy the ID:
# Getting an API token
- Log in to Facebook account.
Open the app page and click Create app
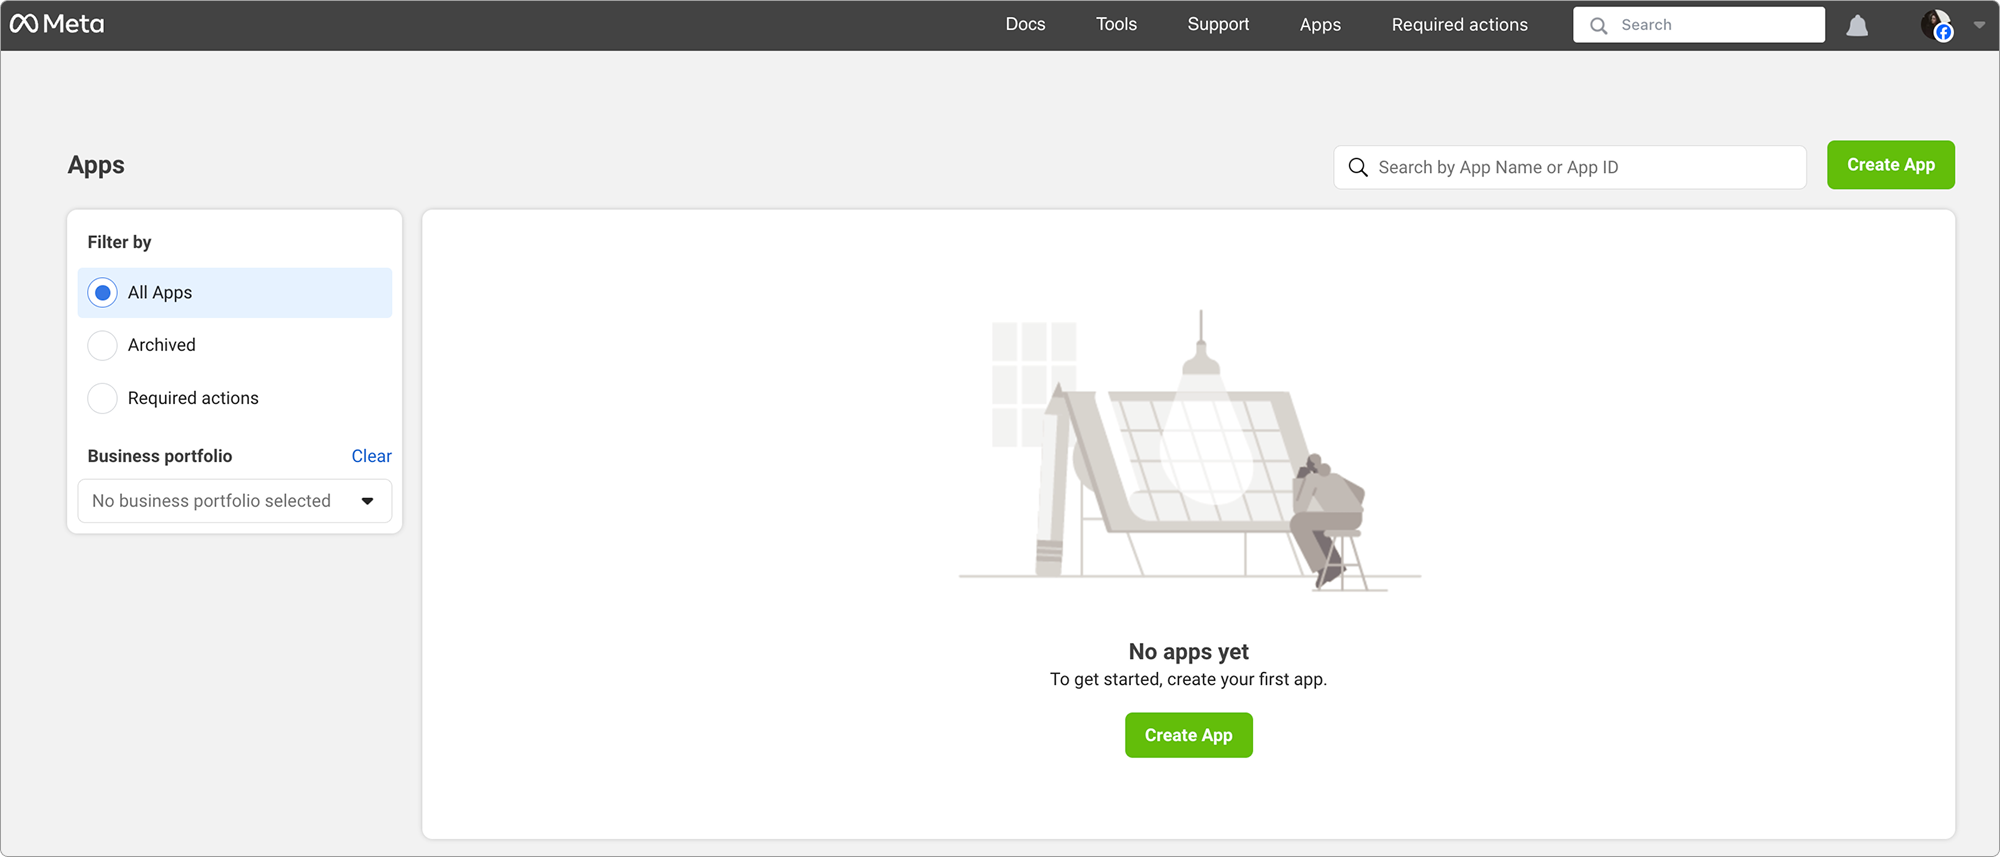
- On the next window click Next
- Select "Other" and click Next
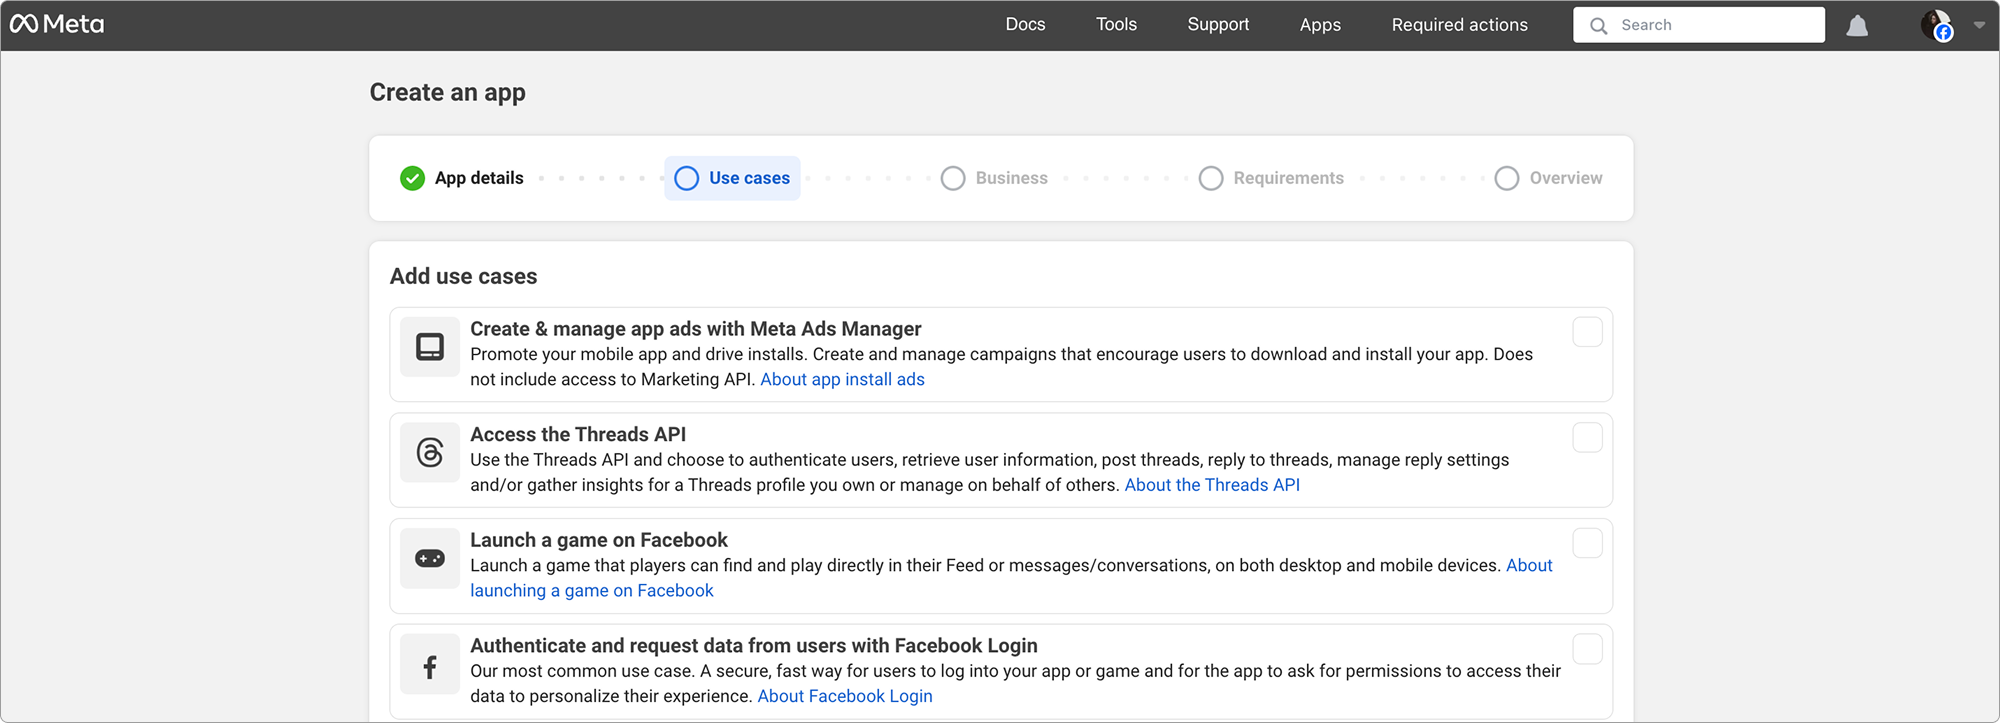

- Choose "Business" and click Next

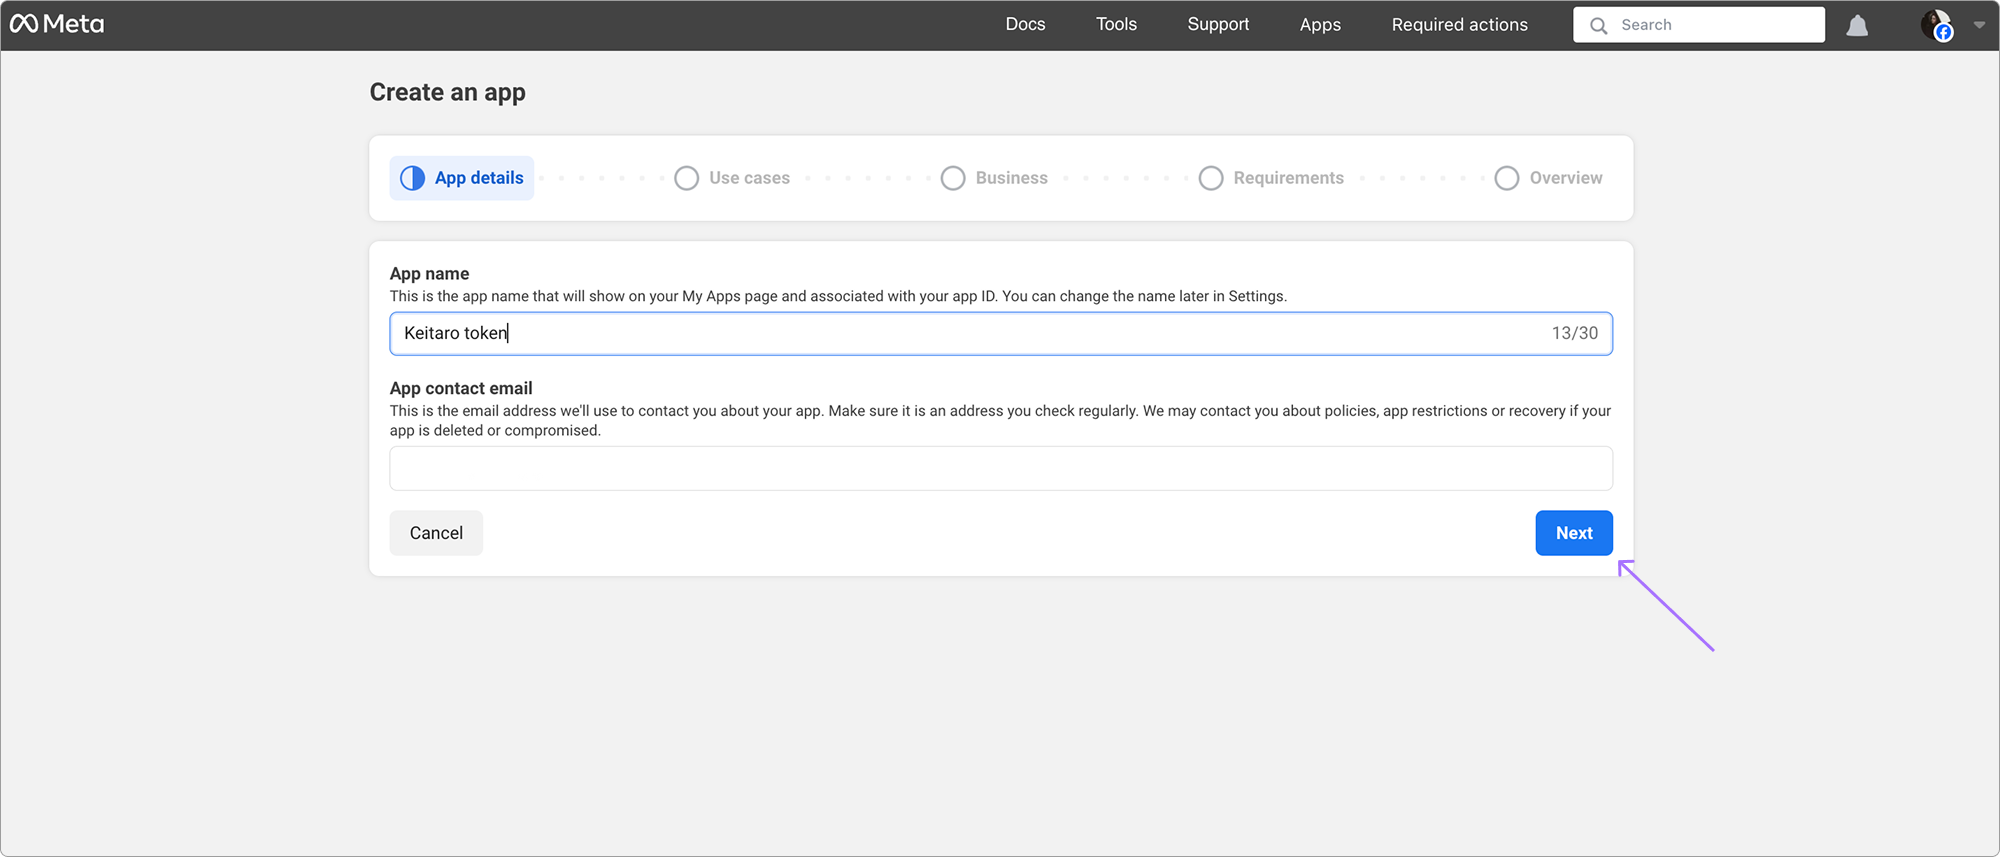
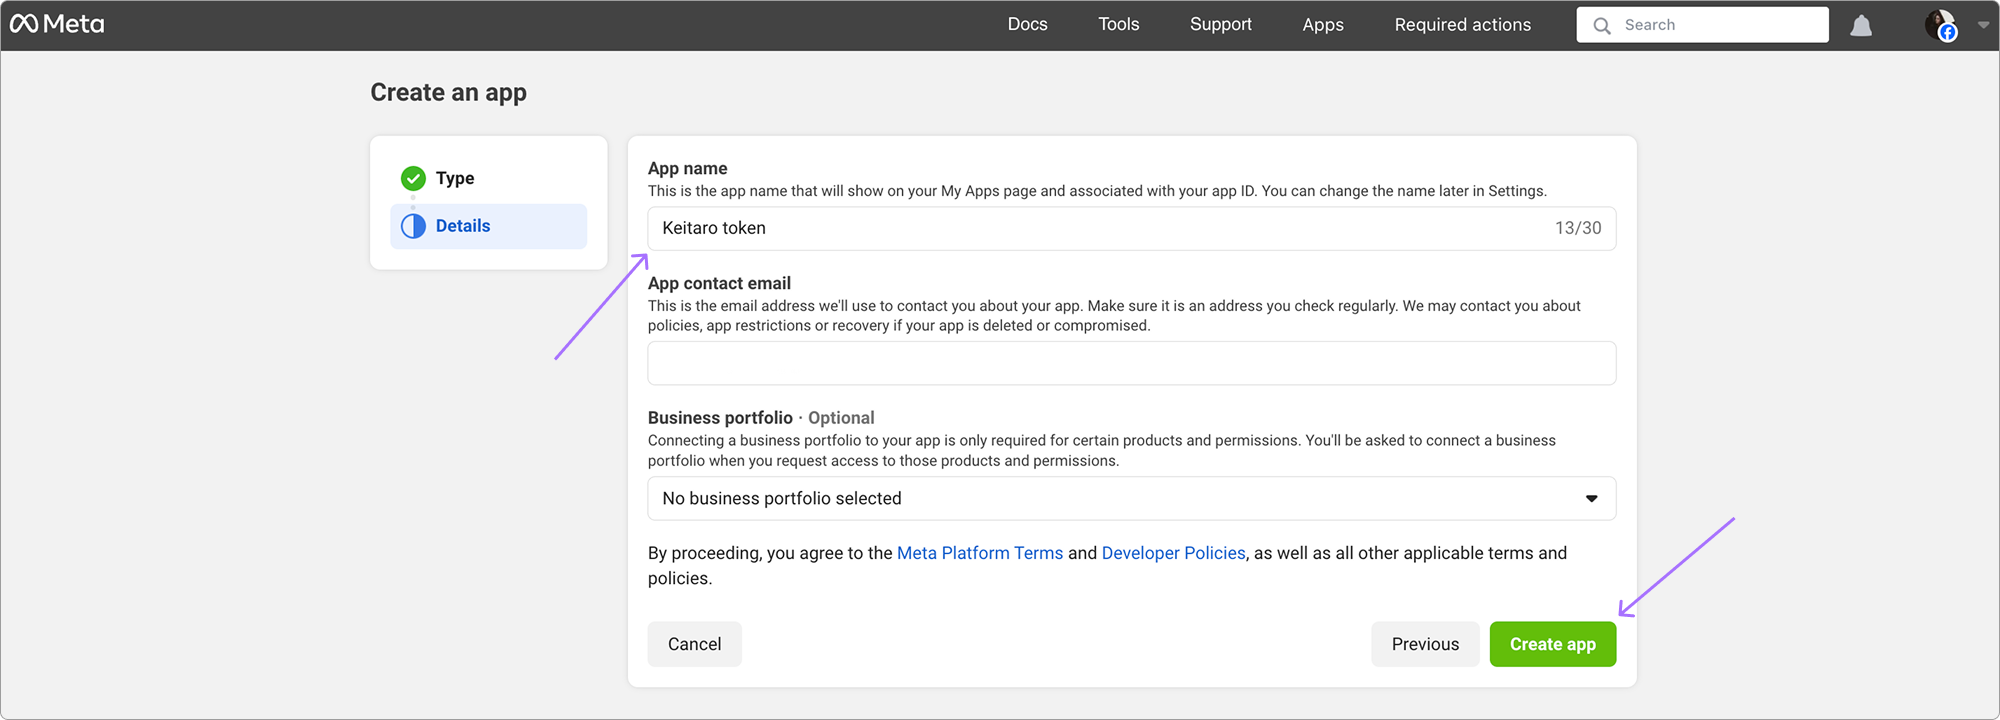
- Add the app name, enter the contact email and click Create app
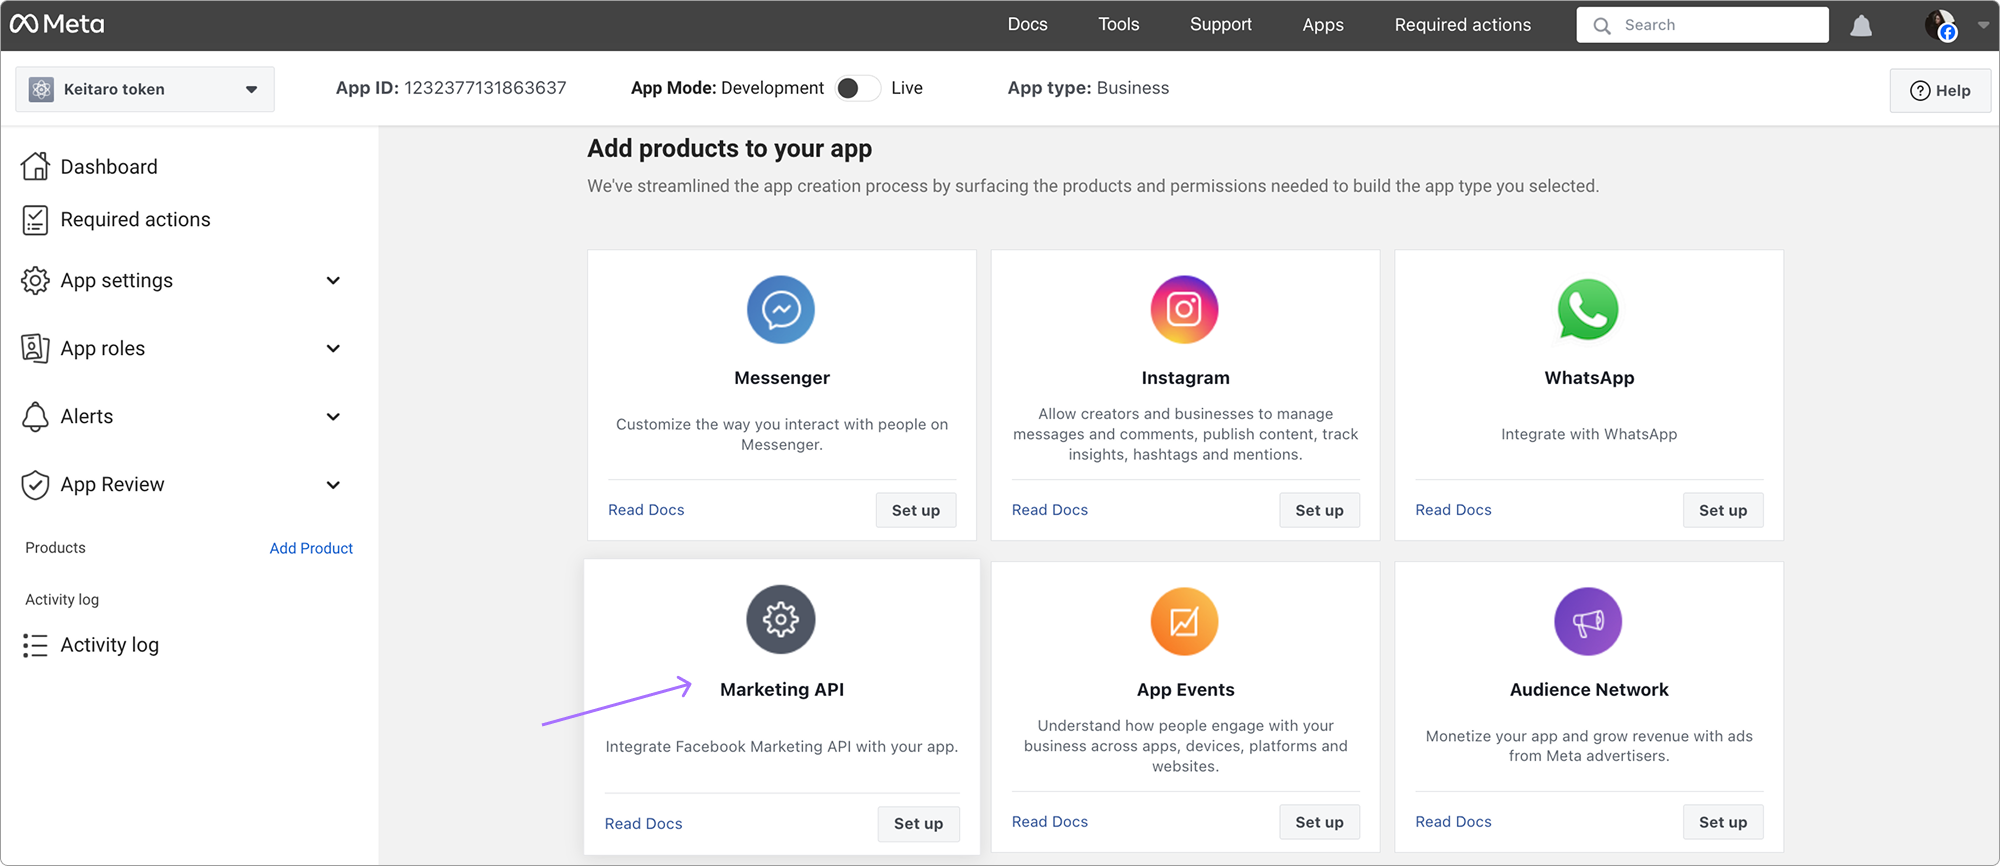
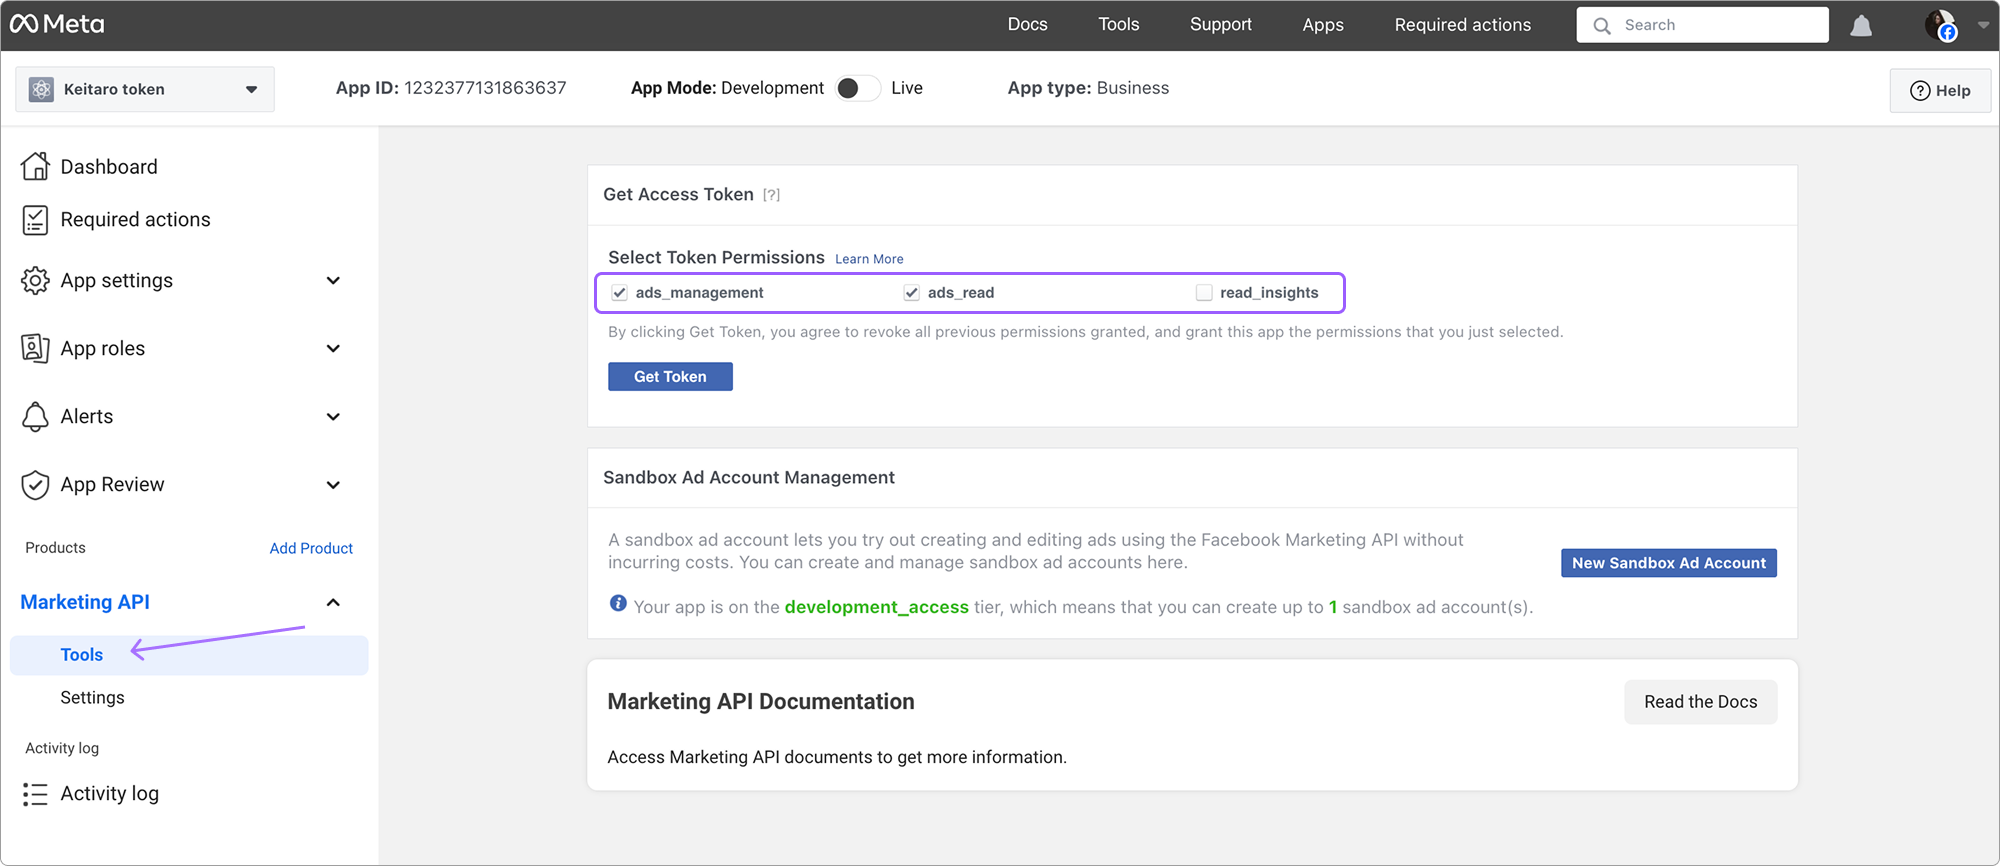
- Open the app settings. Choose Marketing API
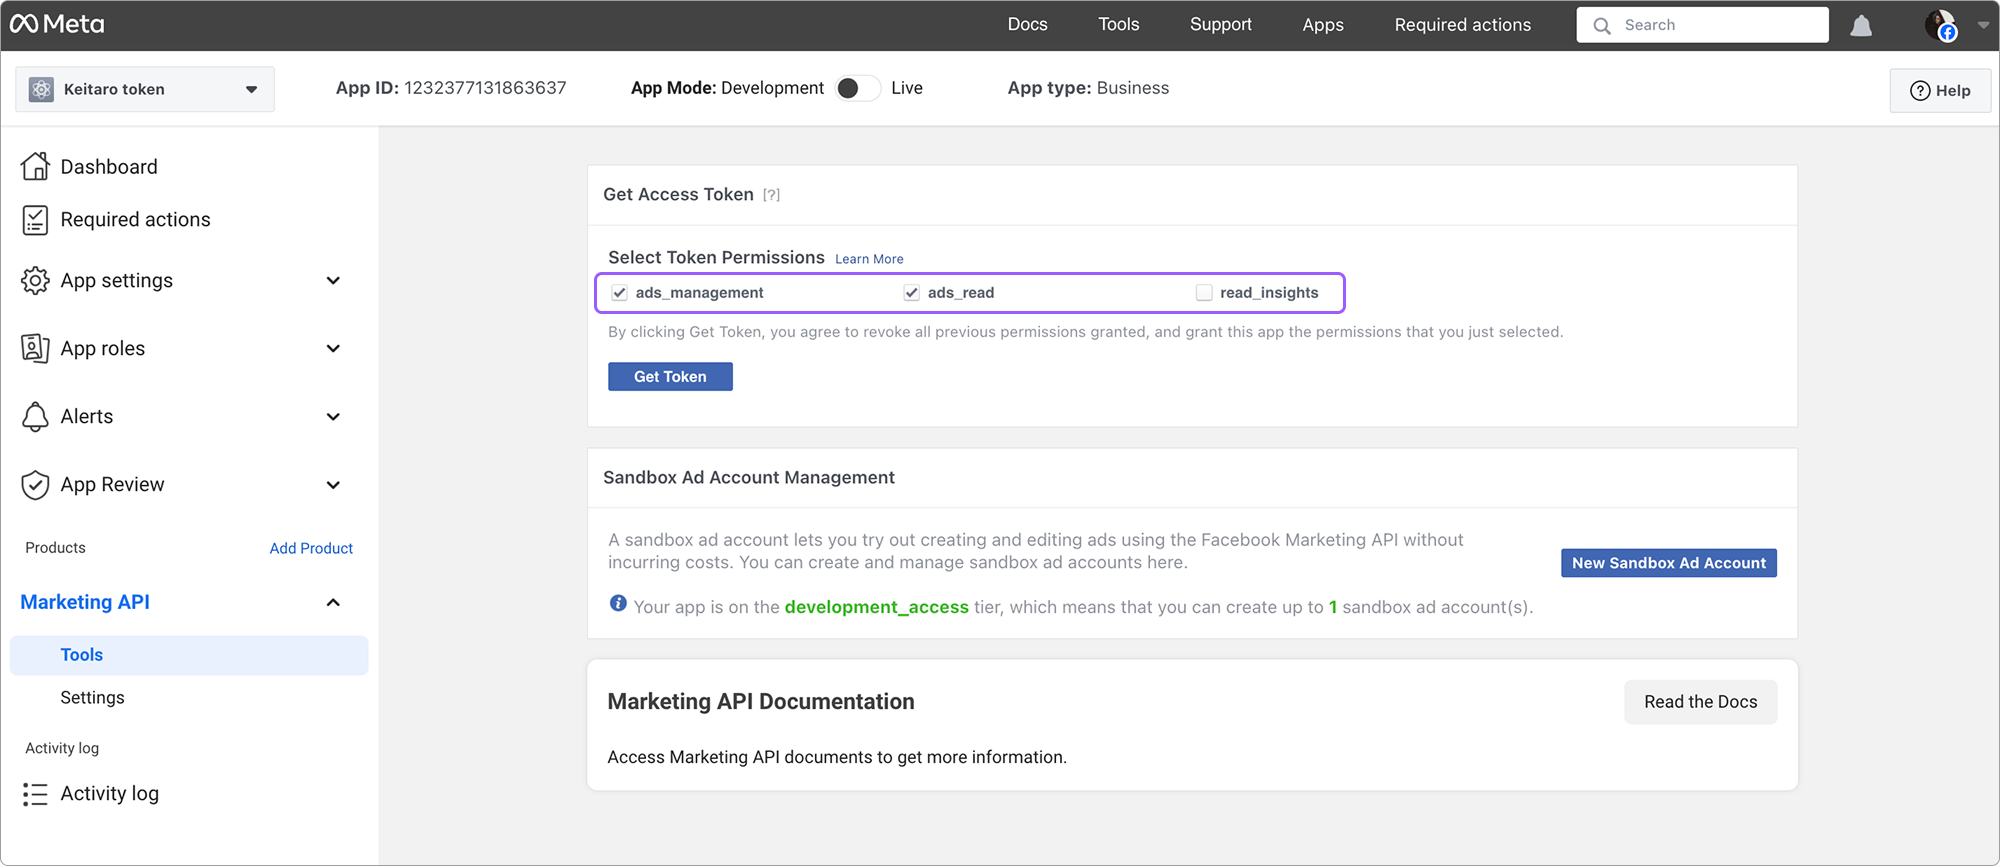
- Choose "Tools" from Marketing API. Select all checkboxes and press the button to purchase a marker
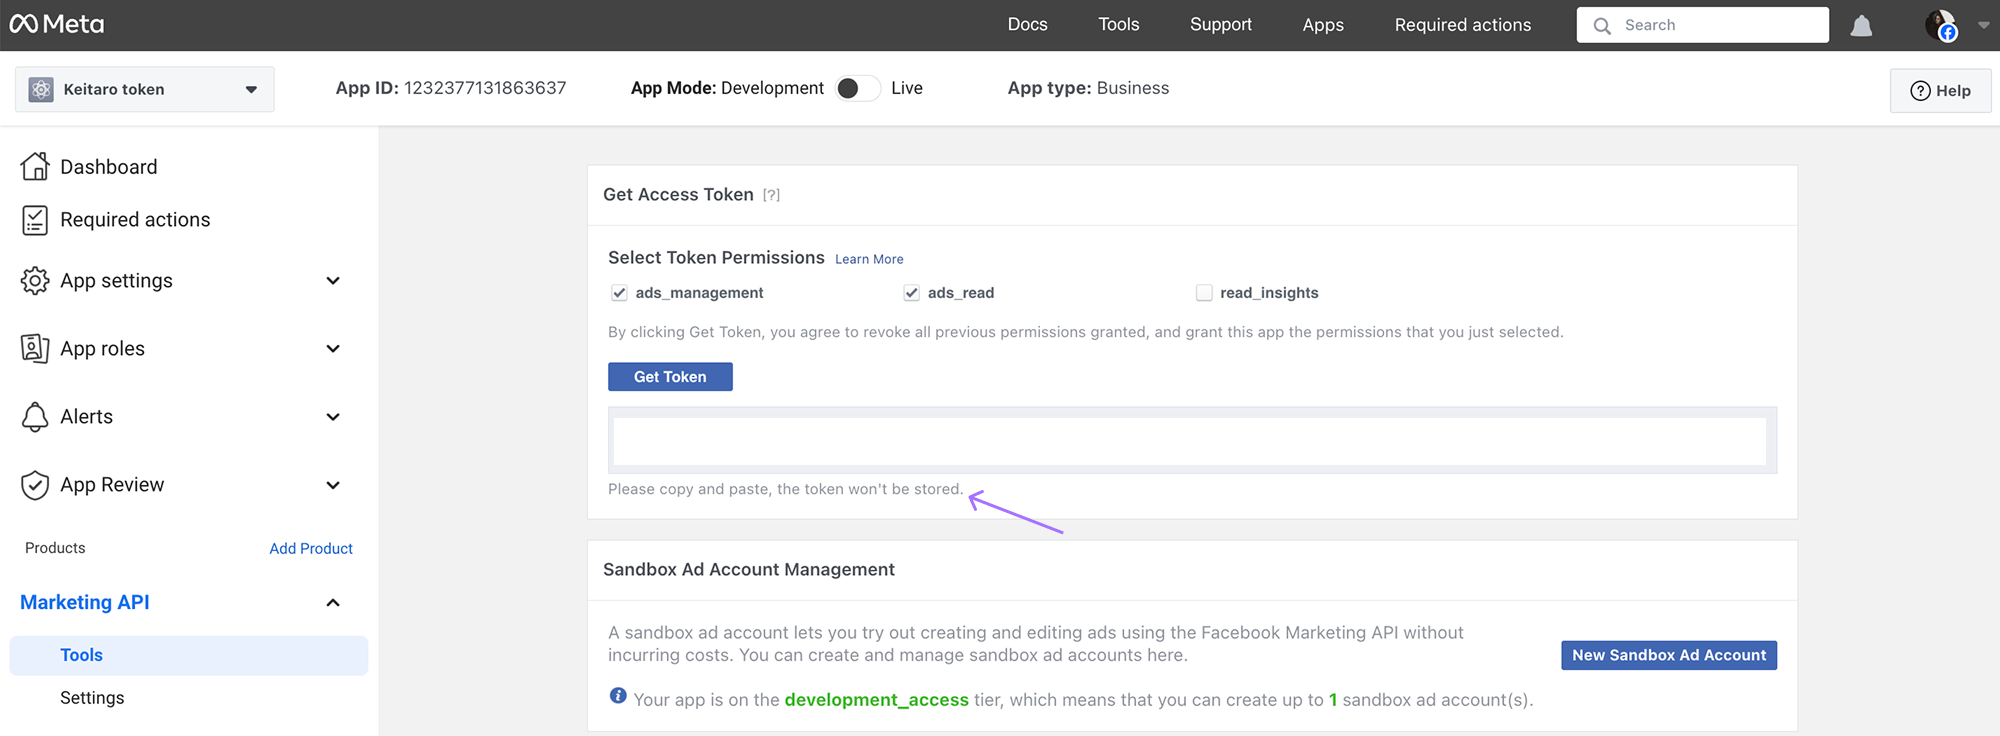
- Copy the API token of the app
# Getting Conversions Token
Get parameters for filling out the Facebook integration fields, according to the instructions
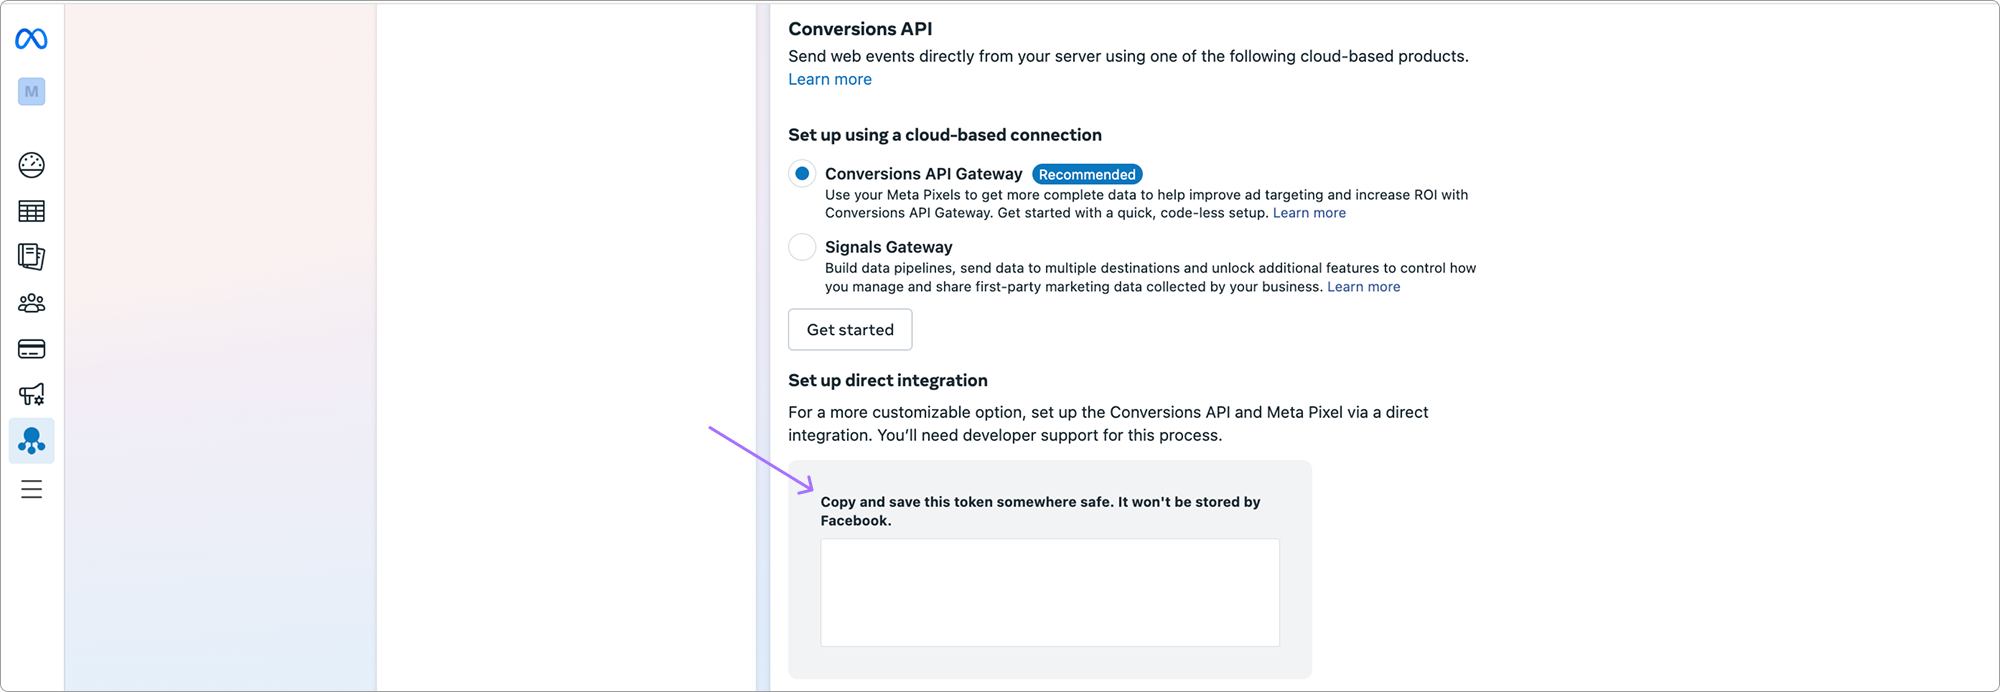
Conversions Token - is taken from the setting up the direct integration of the Personal Account. Click Generate Access Token. See instructions for obtaining a token

WARNING
Copy and save the marker in a safe place. The marker is issued once and cannot be viewed again. Otherwise, reissue the marker.
# Use proxy
Without a proxy in the integration settings, requests are sent from the tracker server.
Facebook often imposes geographic or IP restrictions. Using a proxy allows you to:
- Simulate access from the desired region (for example, to set up ads for certain countries).
- Avoid blocking or captcha that may occur with frequent or automated requests.
For stable access to Facebook, use a proxy. To set up, go to the created integration or create a new one and select the Use proxy checkbox:
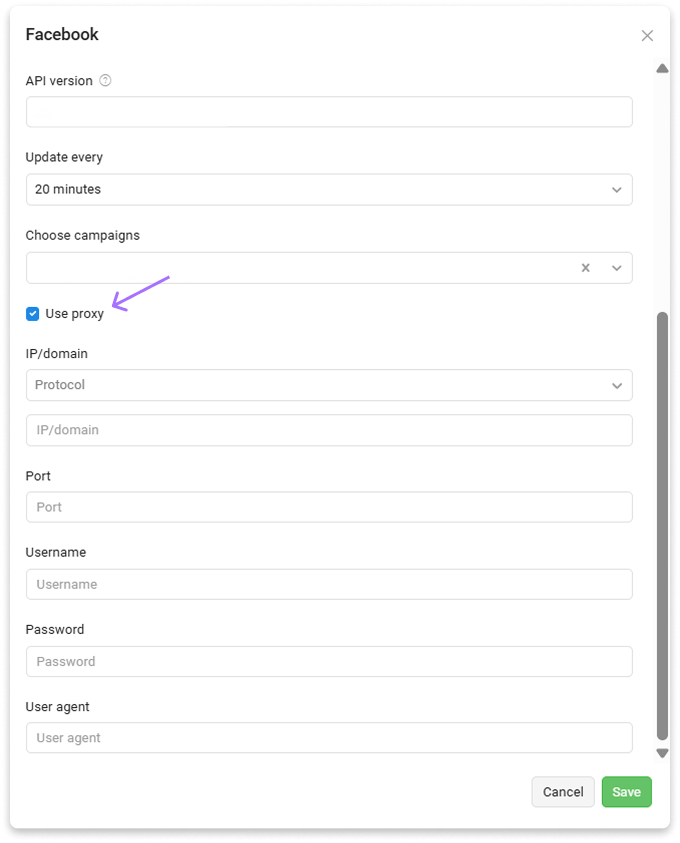
Add proxy data and click Save.
# Fixing connection errors for integration
The main reasons why users do not receive costs in the tracker and conversions on the source side:
Outdated version of the integration API. Make sure you are using at least the latest current stable version of the tracker (Maintenance — Update Keitaro — Stable — Current version is up-to-date). This version of the tracker is compatible with version 18 of the Facebook API.
Incorrect token for connecting to an advertising account via API. The page from which the correct token is taken looks like this:
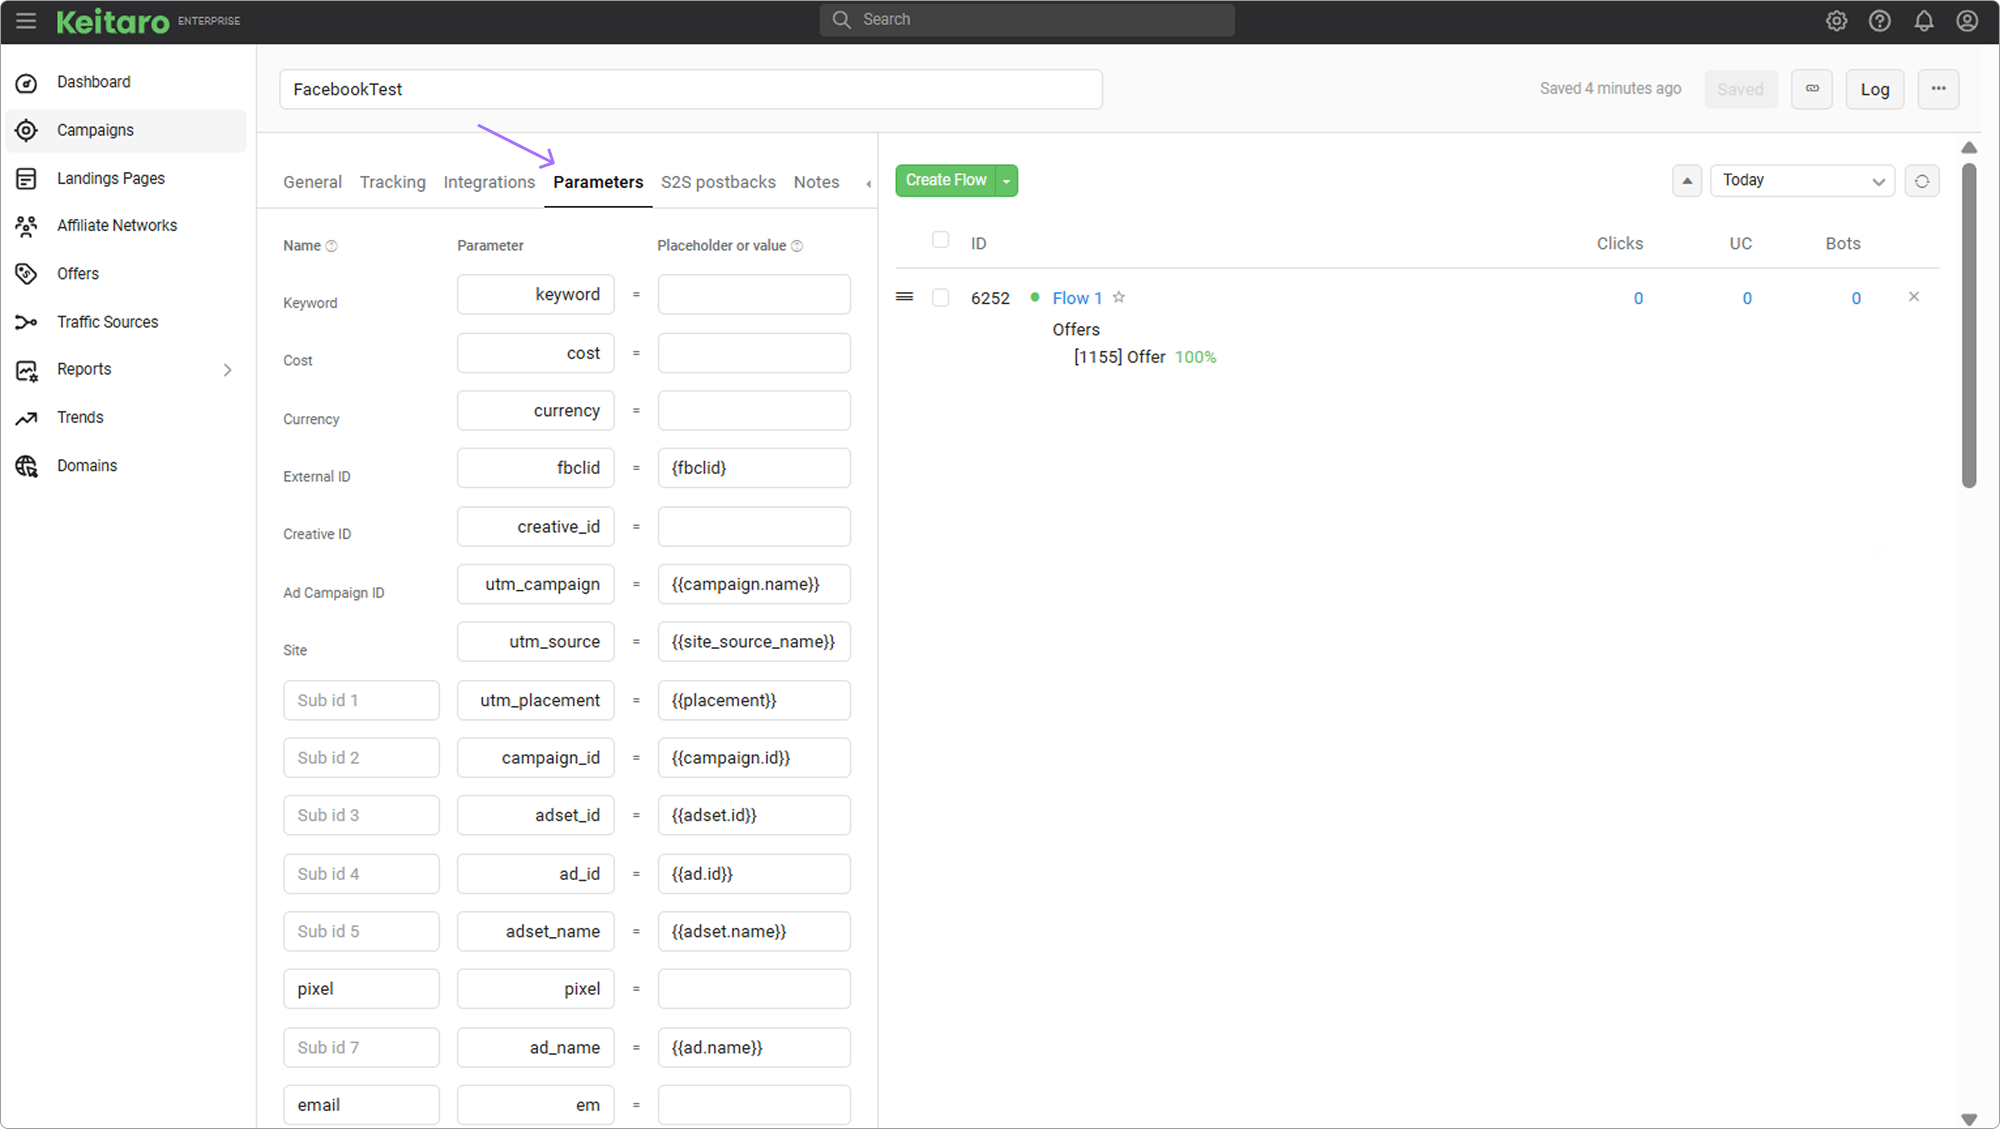
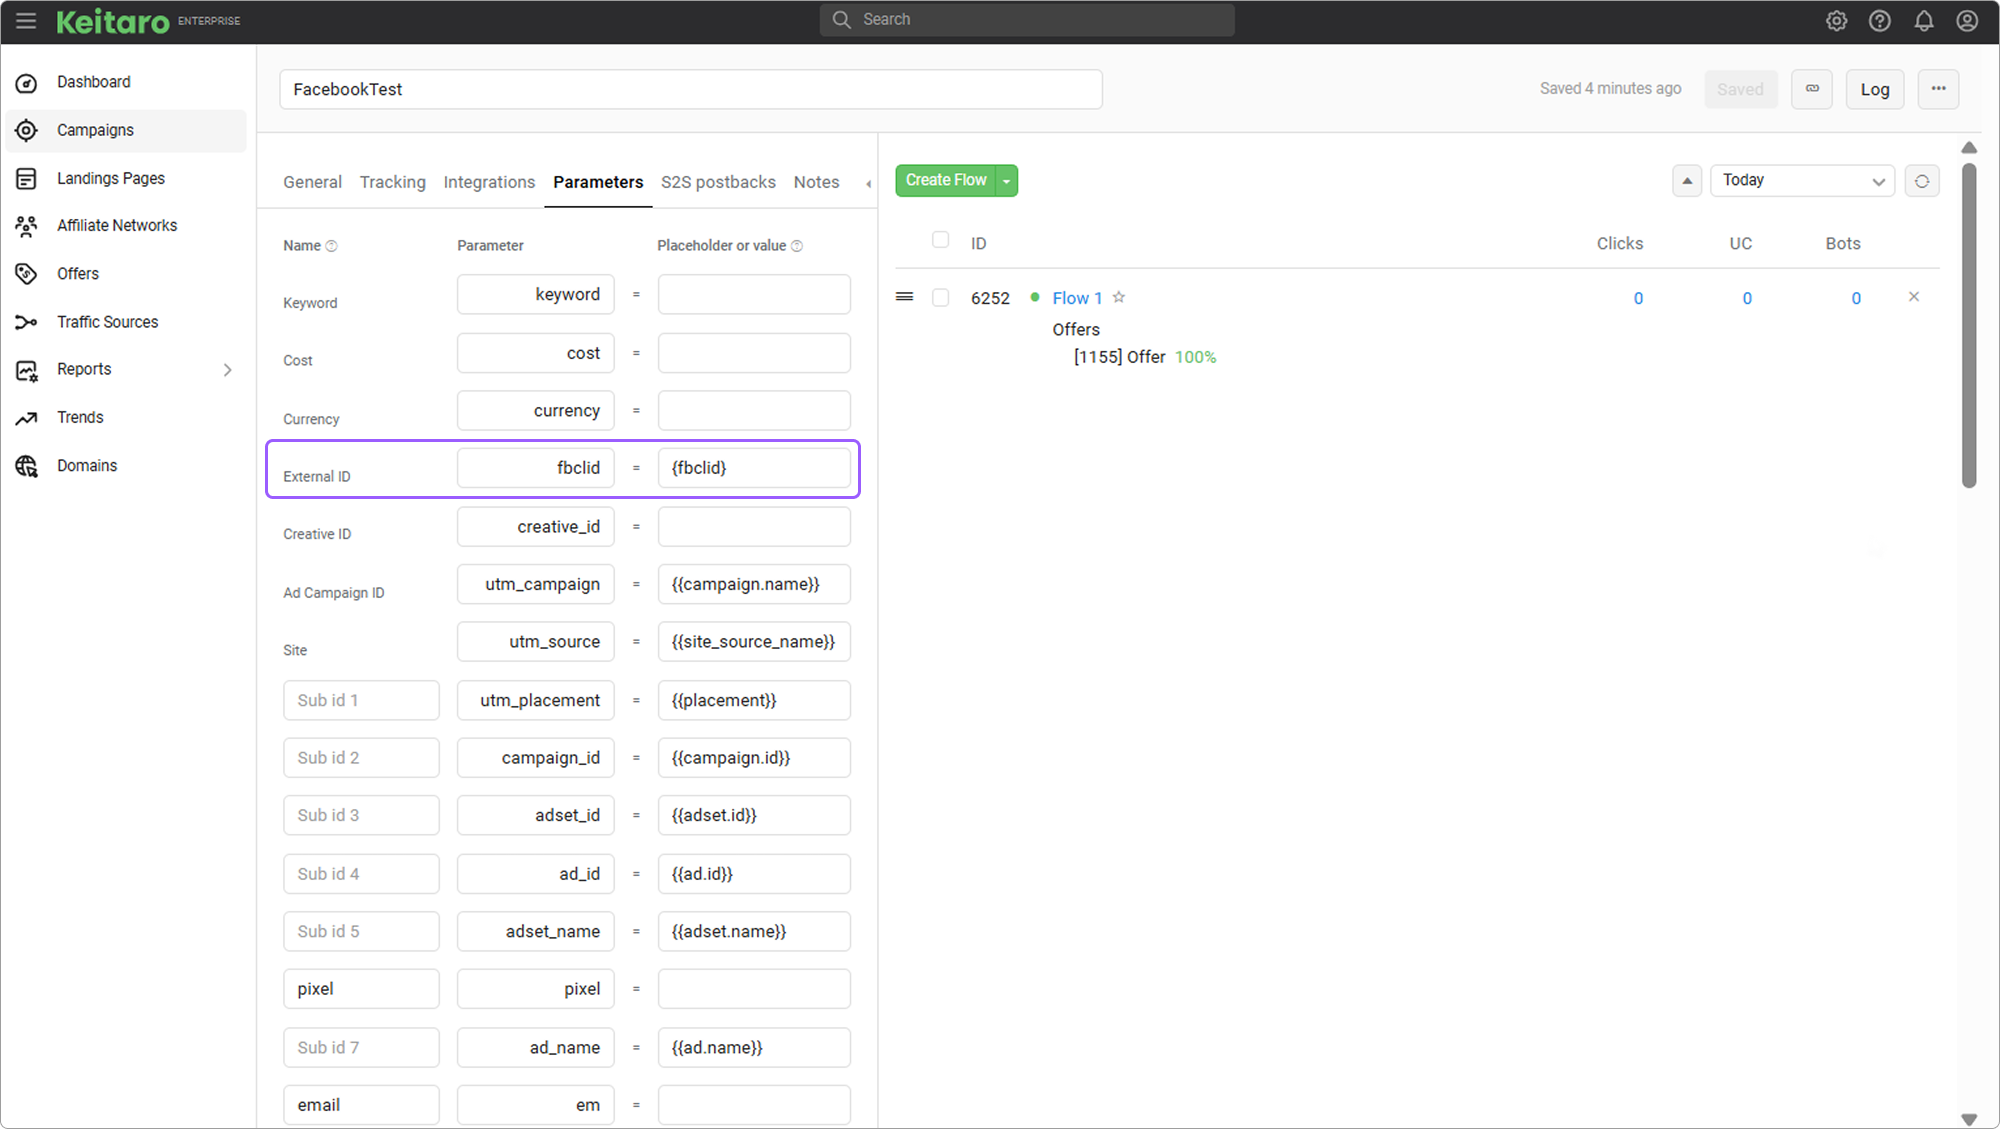
- Missing Facebook parameters, such as
{{adset.id}}for expenses and{fbclid}for conversions, in the Campaign settings in the Parameters section.
In the campaign link that you place in the source, you must add the campaign parameters, including {{adset.id}}, but {fbclid} must be removed from the link when adding to the source.
WARNING
The fbclid value is not passed by the placeholder from the source, it is generated automatically, so the content of the placeholder in the link will interfere with writing the label to the tracker.
Connect the parameters directly from the template, in the campaign settings:
If the parameters are not filled in or if macros other than template ones are used, expenses will not be recorded and conversions will not be sent:
If the traffic primarily goes to a remote site to which the tracker is connected using any integration script (KClient PHP; Tracking script; WordPress plugin), tags from the source template must be added to the site URL as domain.com?adset_id={{adset.id}}&...
- In the FB ad settings, a link to the campaign, or the integration site is inserted without additional parameters. When creating an ad, the tags that you receive when using the source must be added to a separate window for parameters.
# Setting up Keitaro to sending conversions and events in Facebook Ads Manager
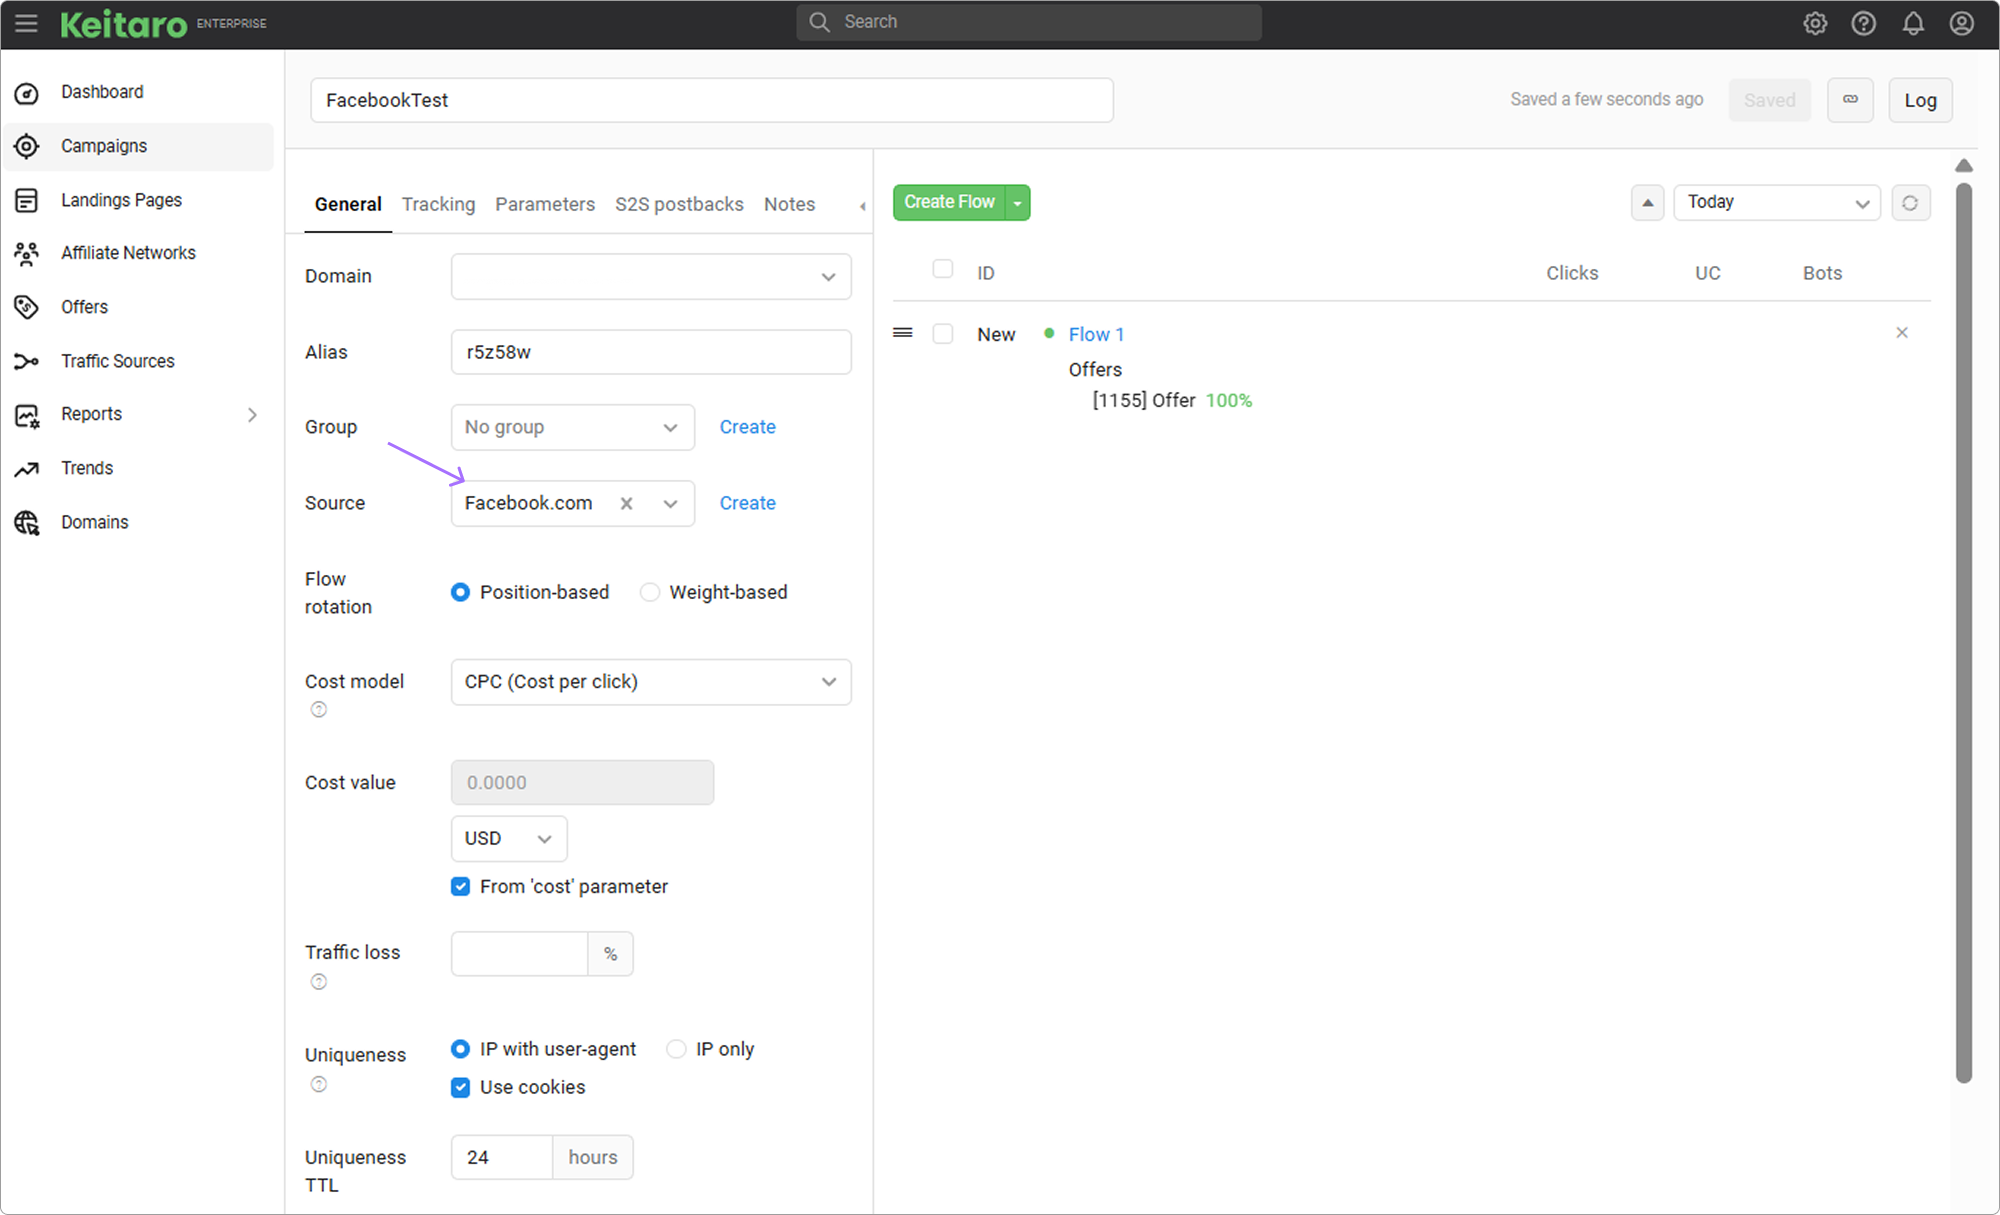
- Create a campaign in the tracker. When creating a campaign, use the Facebook source template, save:
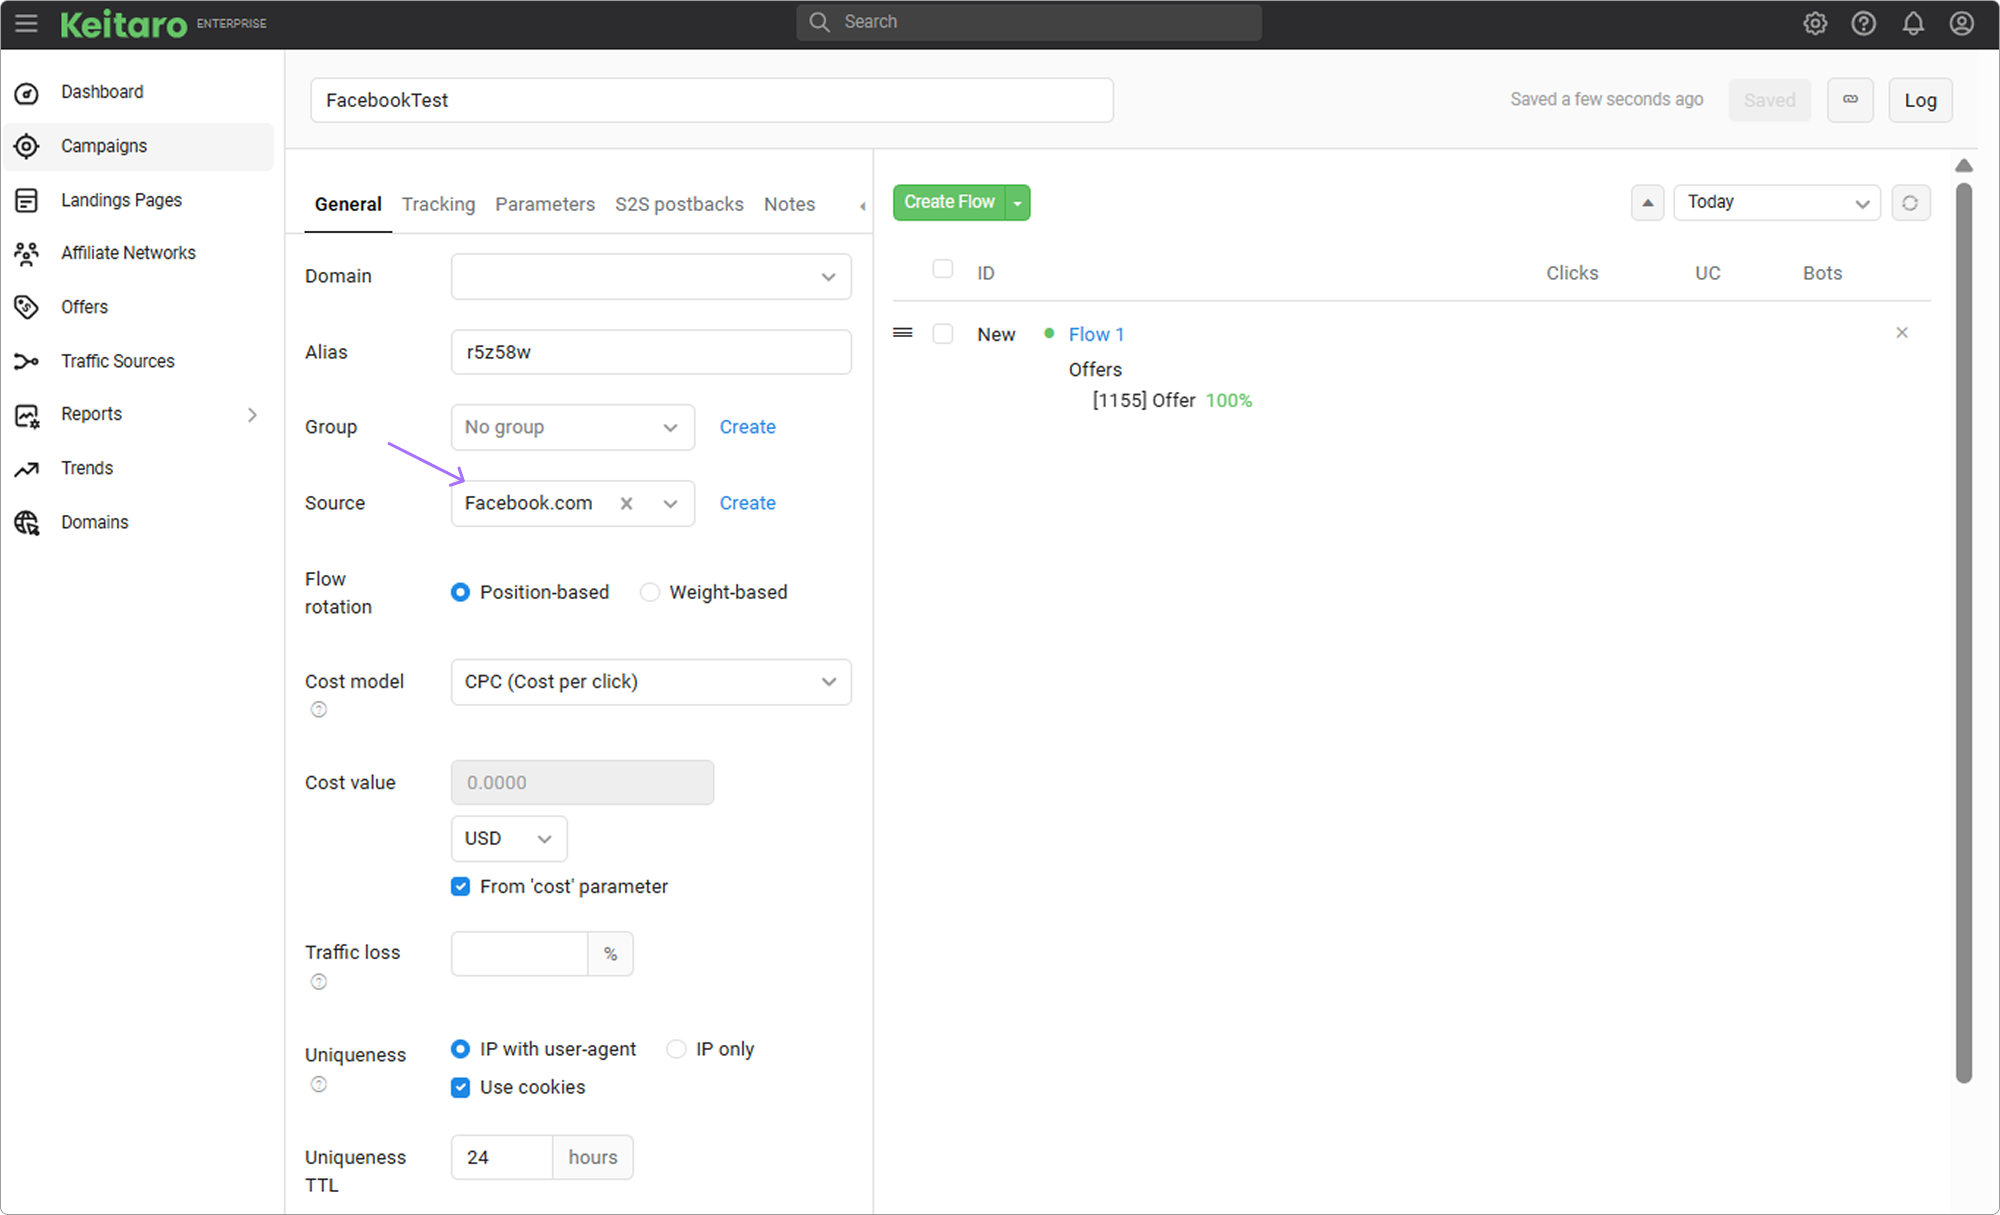
Connect your campaign integration to your Facebook Ads Manager advertising account. See the settings above.
In the integration settings, click Mapping. Select the desired statuses, and events that you want to send to Facebook Ads Manager
Add Pixel ID and Conversions Token, according to the instructions above.
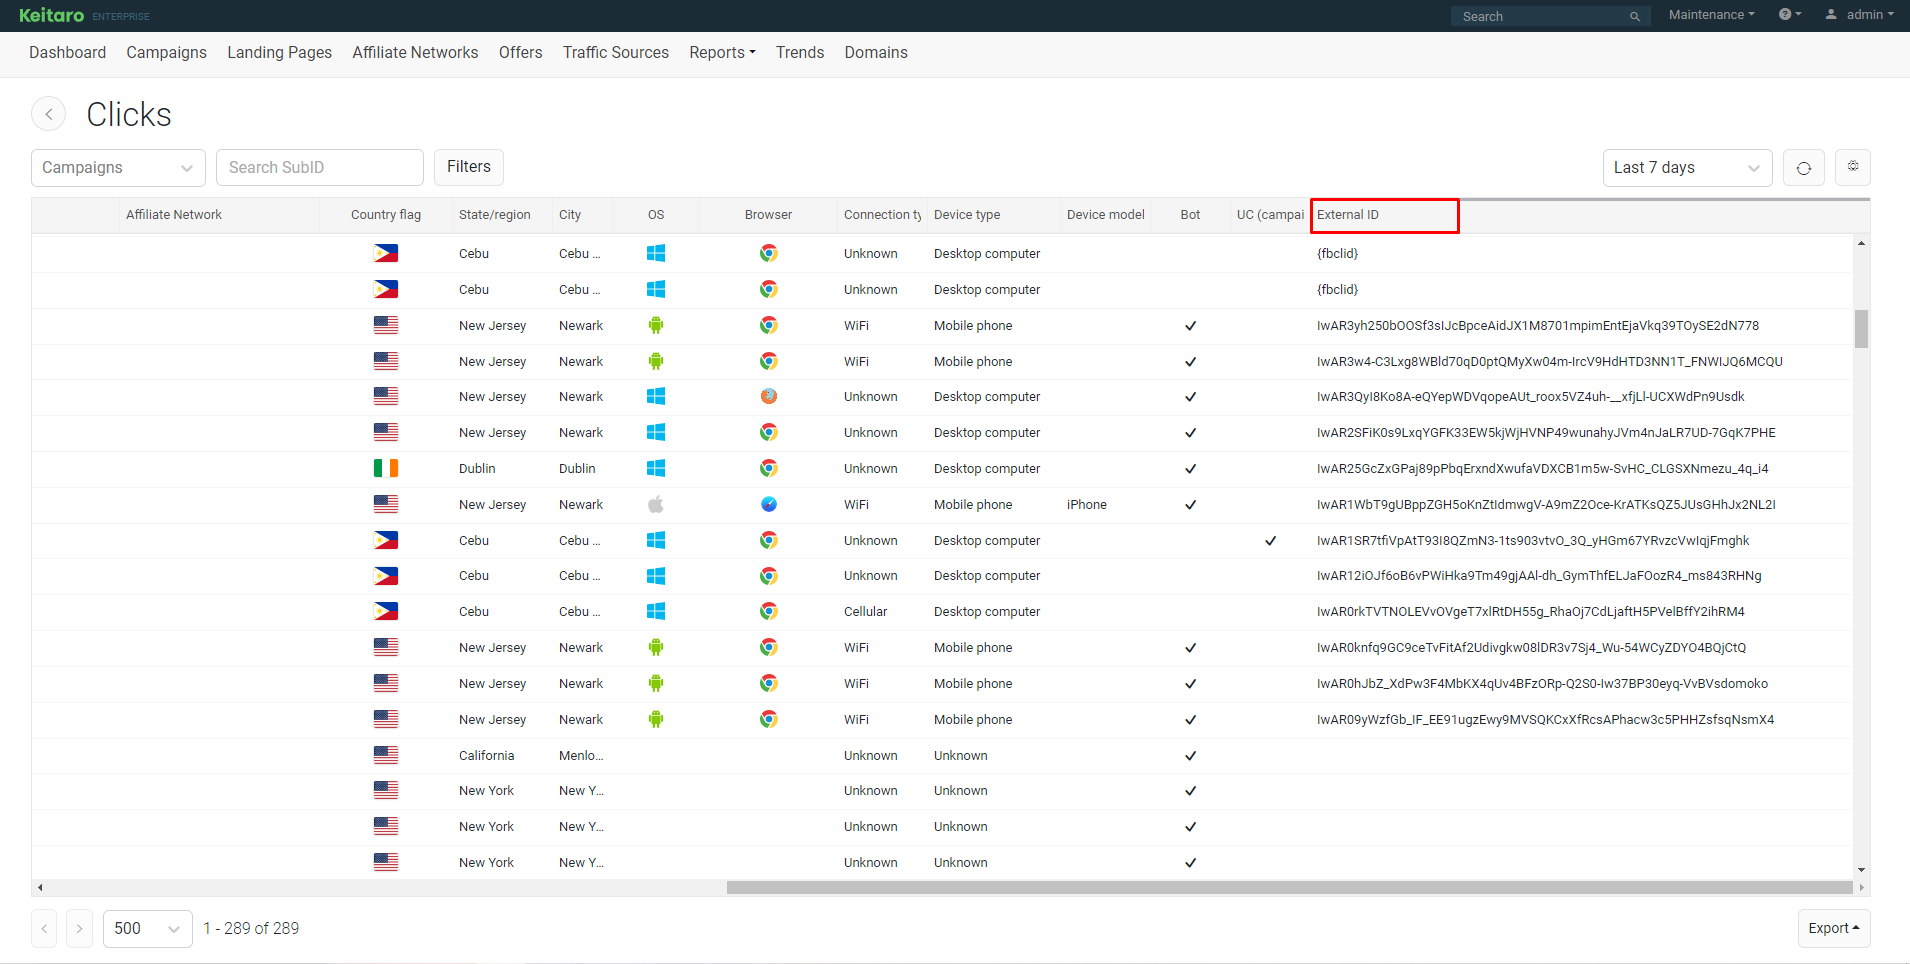
Done! The integration is configured. When target clicks start appearing in the campaign with
fbclidparameter (see section Reports — Clicks), send a postback to check:
# How to set up Facebook Ads Manager to get conversions
- The conversion is sent if the
fbclidparameter is present:
- Open the Facebook Ads Manager page, go to your business account:
- Create an advertising campaign:
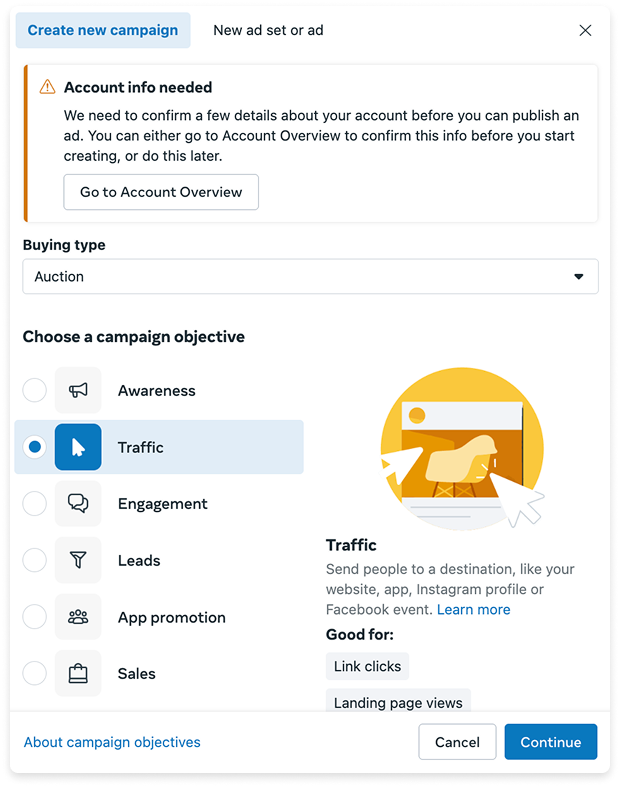
- In the Website URL section, specify the tracker's campaign link with the ID:
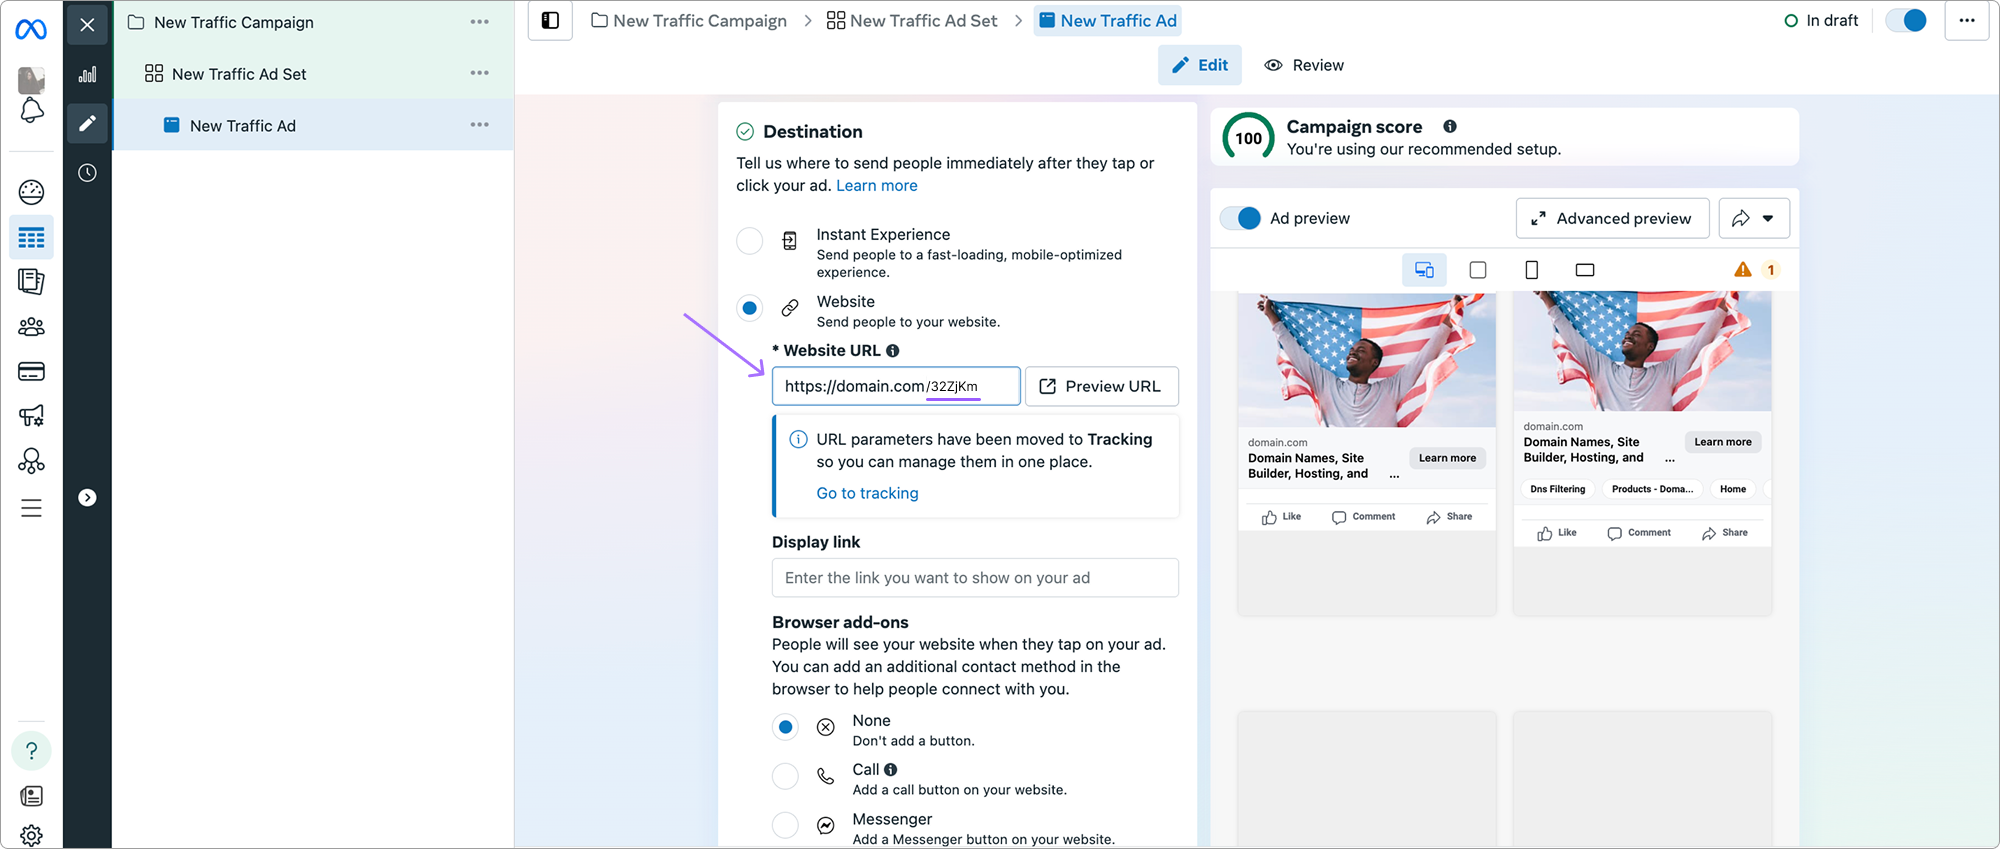
- Additionally, enter the URL with the tracker's parameters section:
WARNING
It is necessary to remove fbclid={fbclid} from URL Parameters when adding campaign parameters to Facebook. Leave the Keitaro campaign template unchanged.

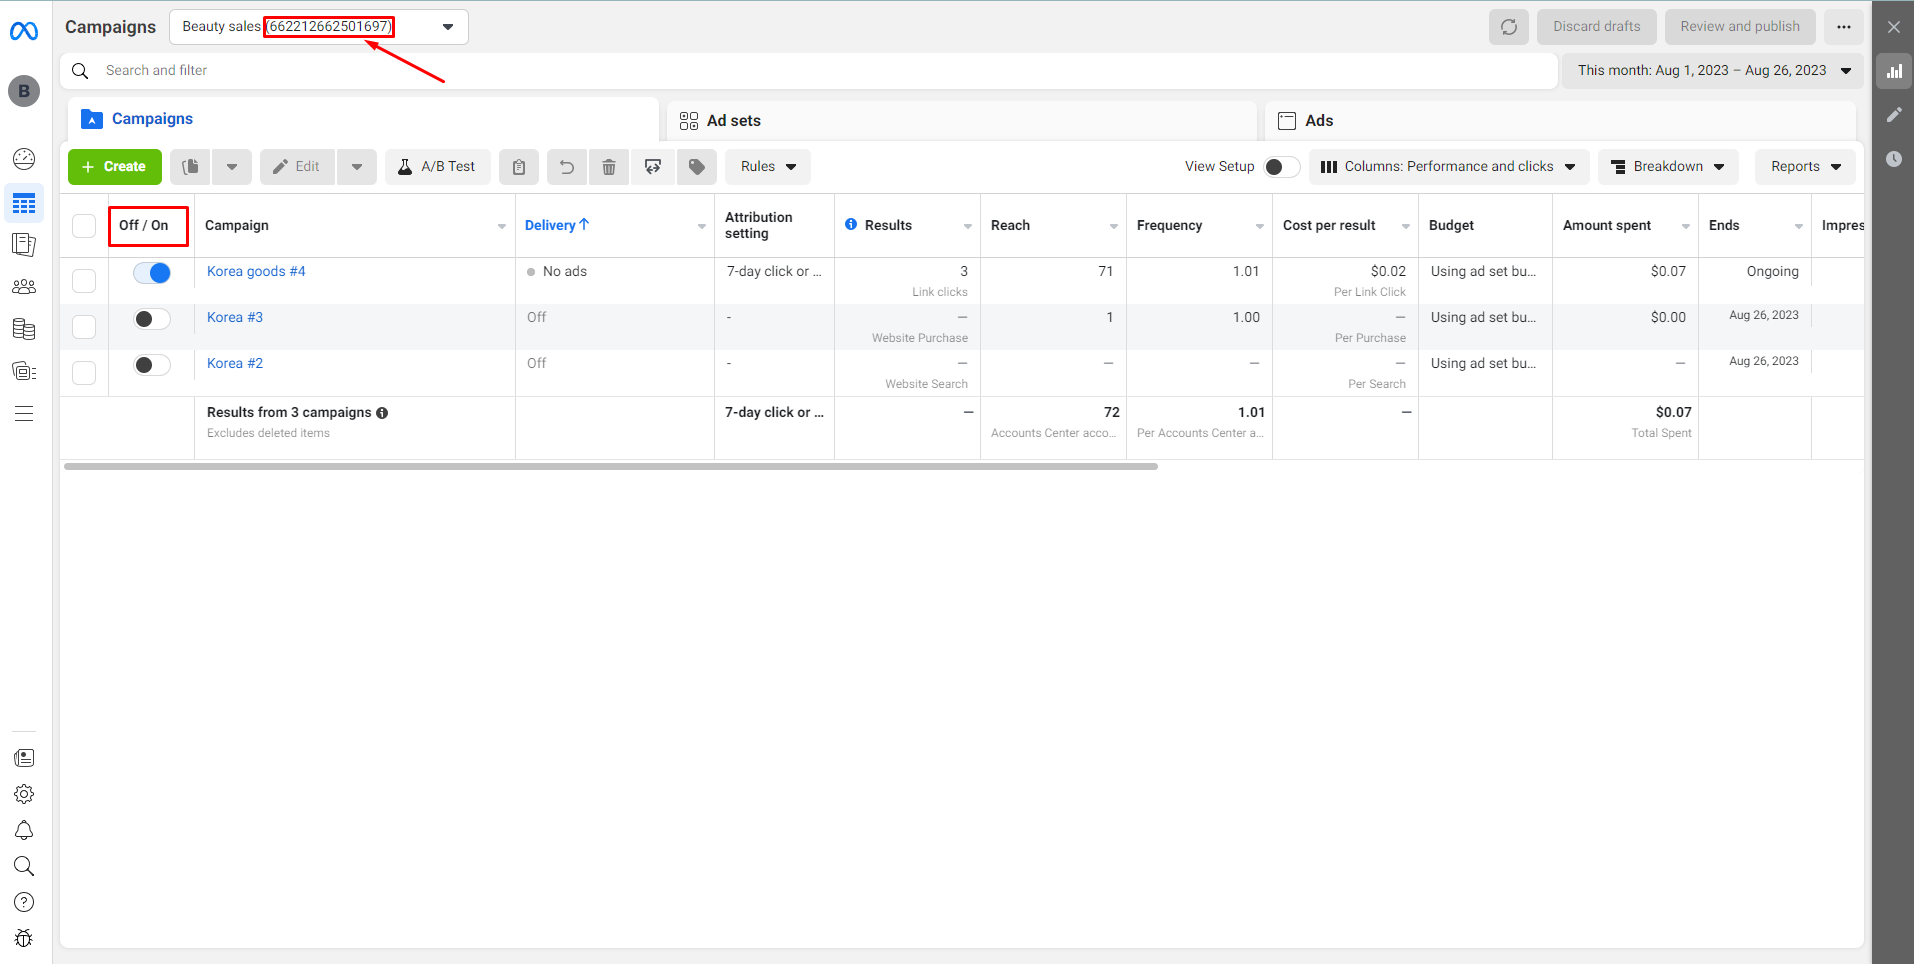
- Publish your campaign. Pay attention to the campaign status in your Facebook Ads Manager Personal Account:
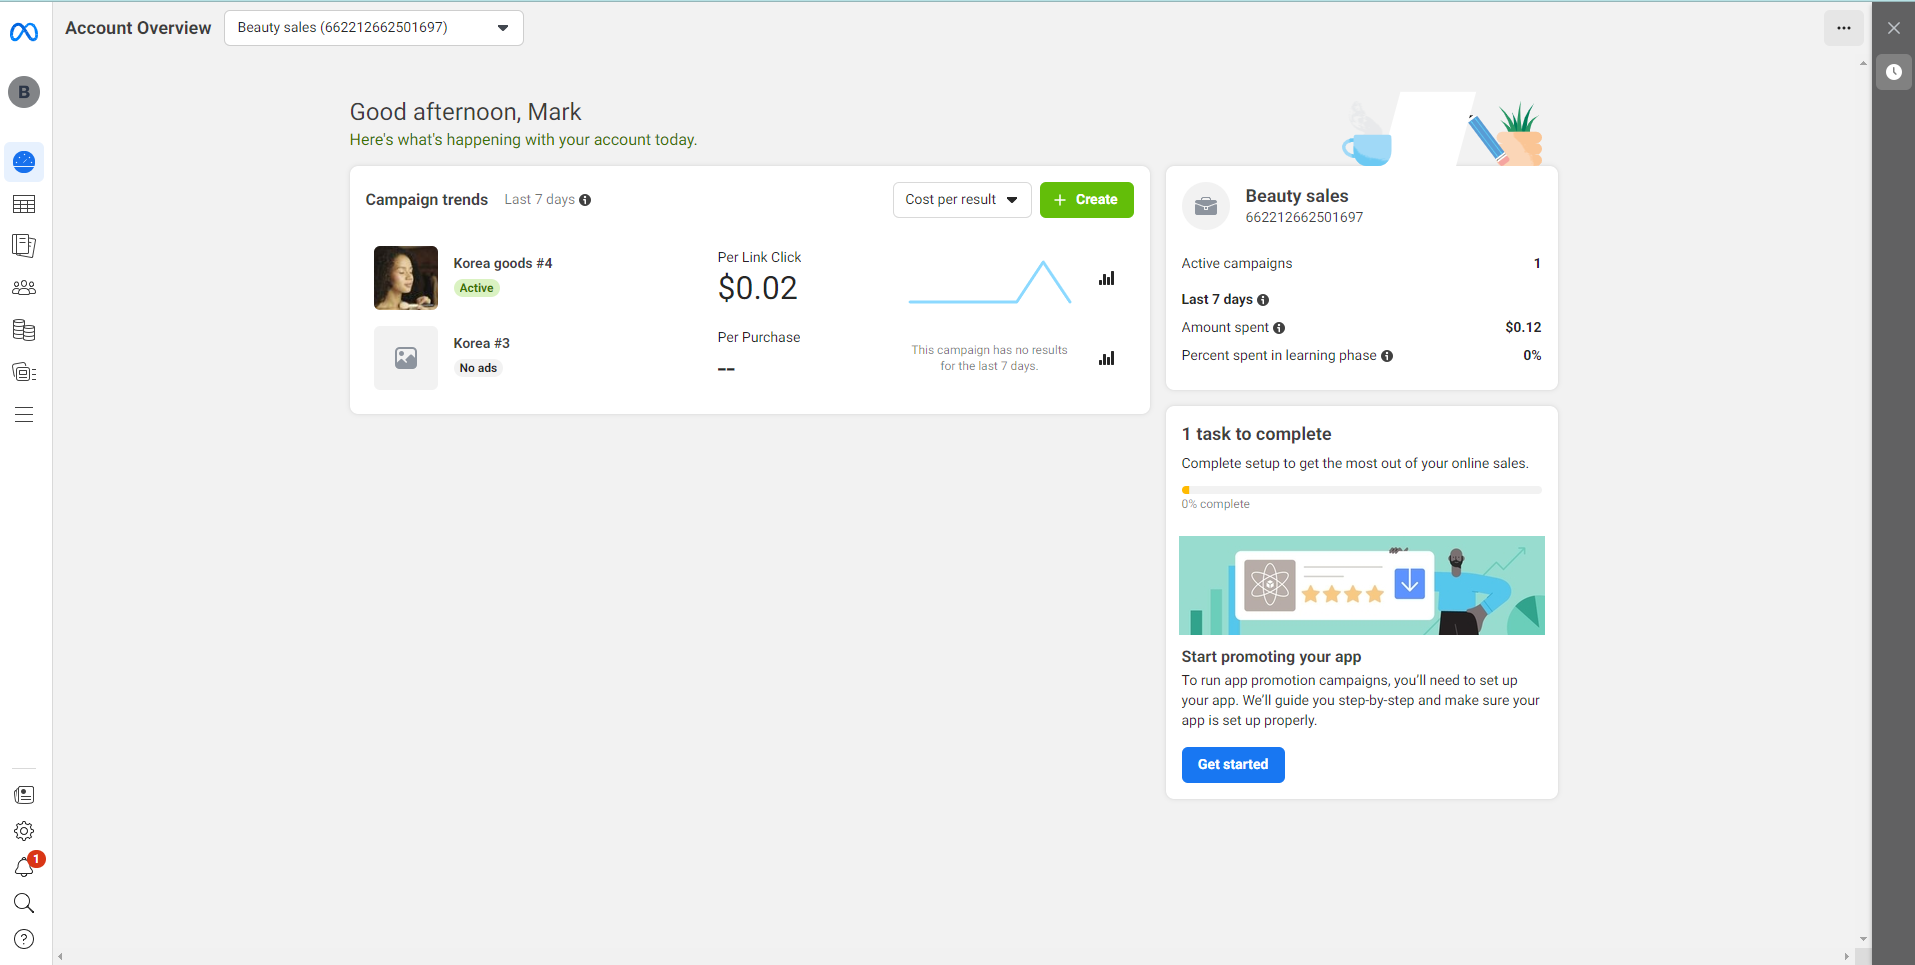
- After confirming the campaign, as targeted clicks begin to show, check the events in Account Overview section
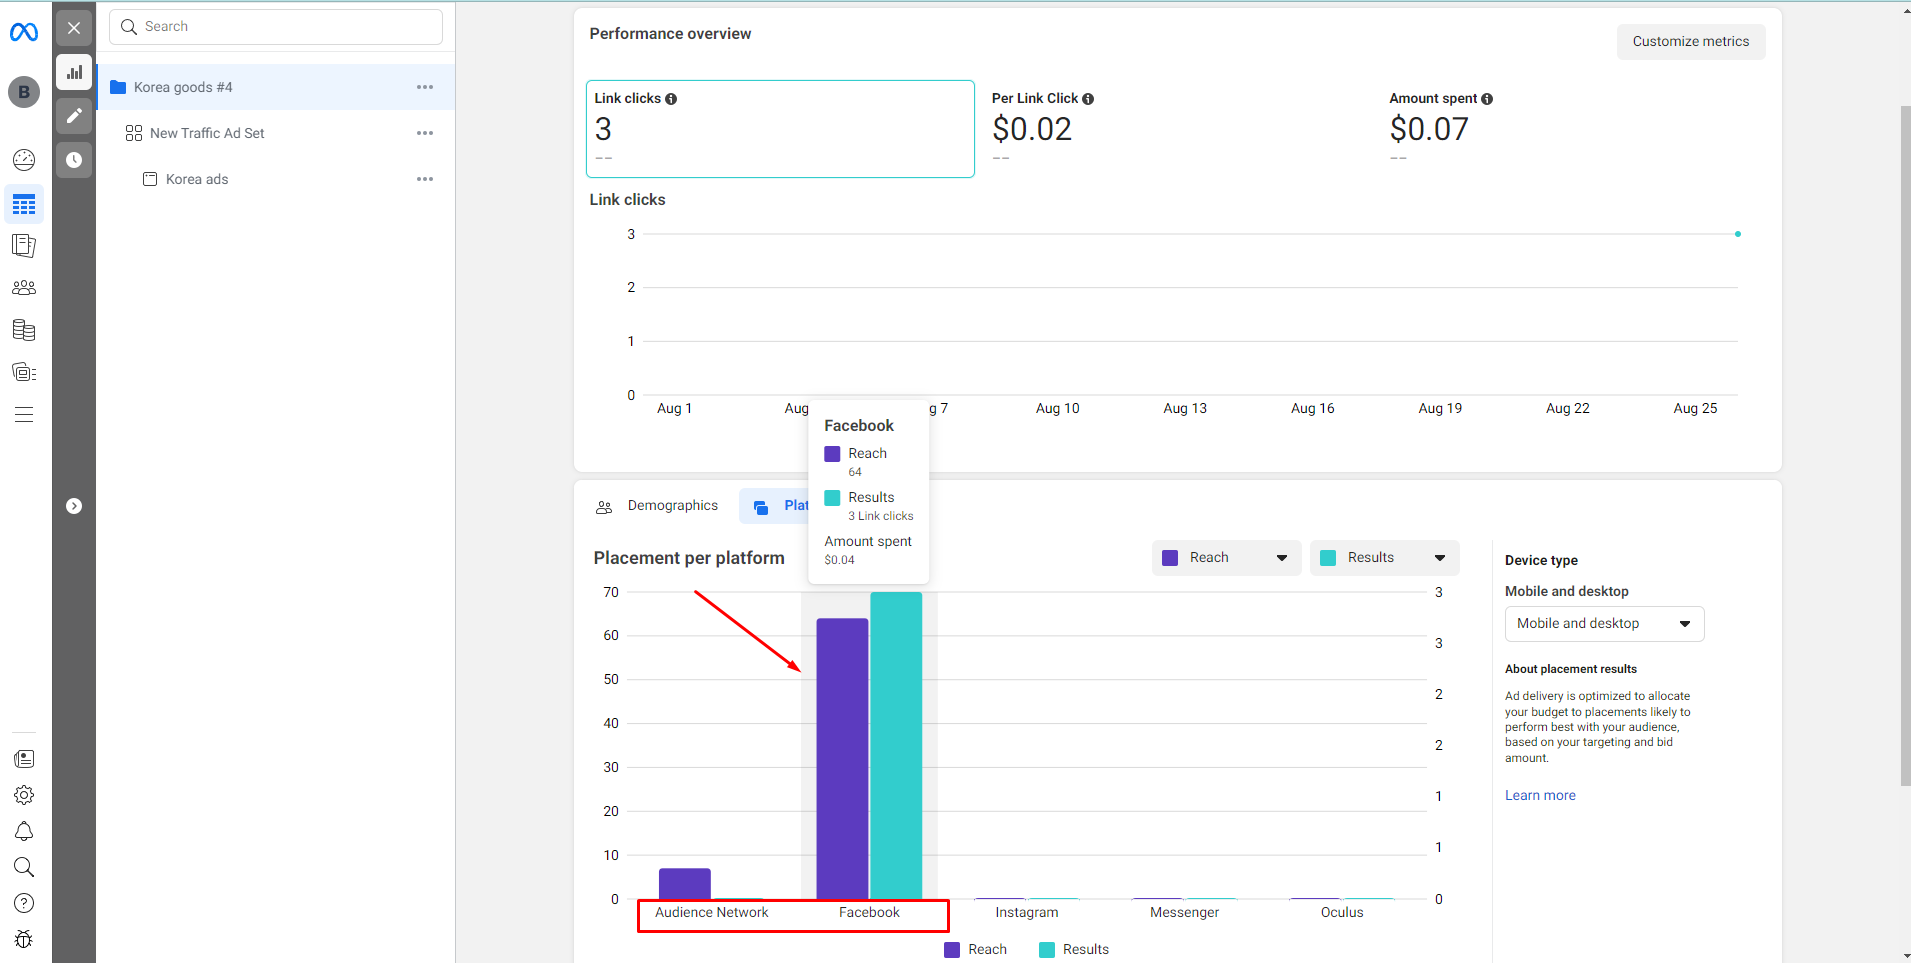
# Sending additional parameters to Facebook
By default, Keitaro sends the following parameters to Facebook:
               'action_source' => 'website', // This parameter is sent by default and cannot currently be changed.
               'event_name' =>               // Event type specified in the integration setup mapping window.
               'event_time' =>               // Event occurrence time.
               'user_data' => [
                   'fbc' => click identifier,
                   'fbp' => browser identifier,
                   'client_ip_address' => click IP address,
                   'client_user_agent' => click user agent,
                   'country' => country determined based on click IP address,
                   'st' => region determined based on click IP address,
                   'ct' => city determined based on click IP address
                ]
2
3
4
5
6
7
8
9
10
11
12
There is an option to send additional parameters in user_data:
- value - conversion revenue, transmitted with indication of currency,
- em - email,
- ph - phone,
- fn - first name,
- ls - last name.
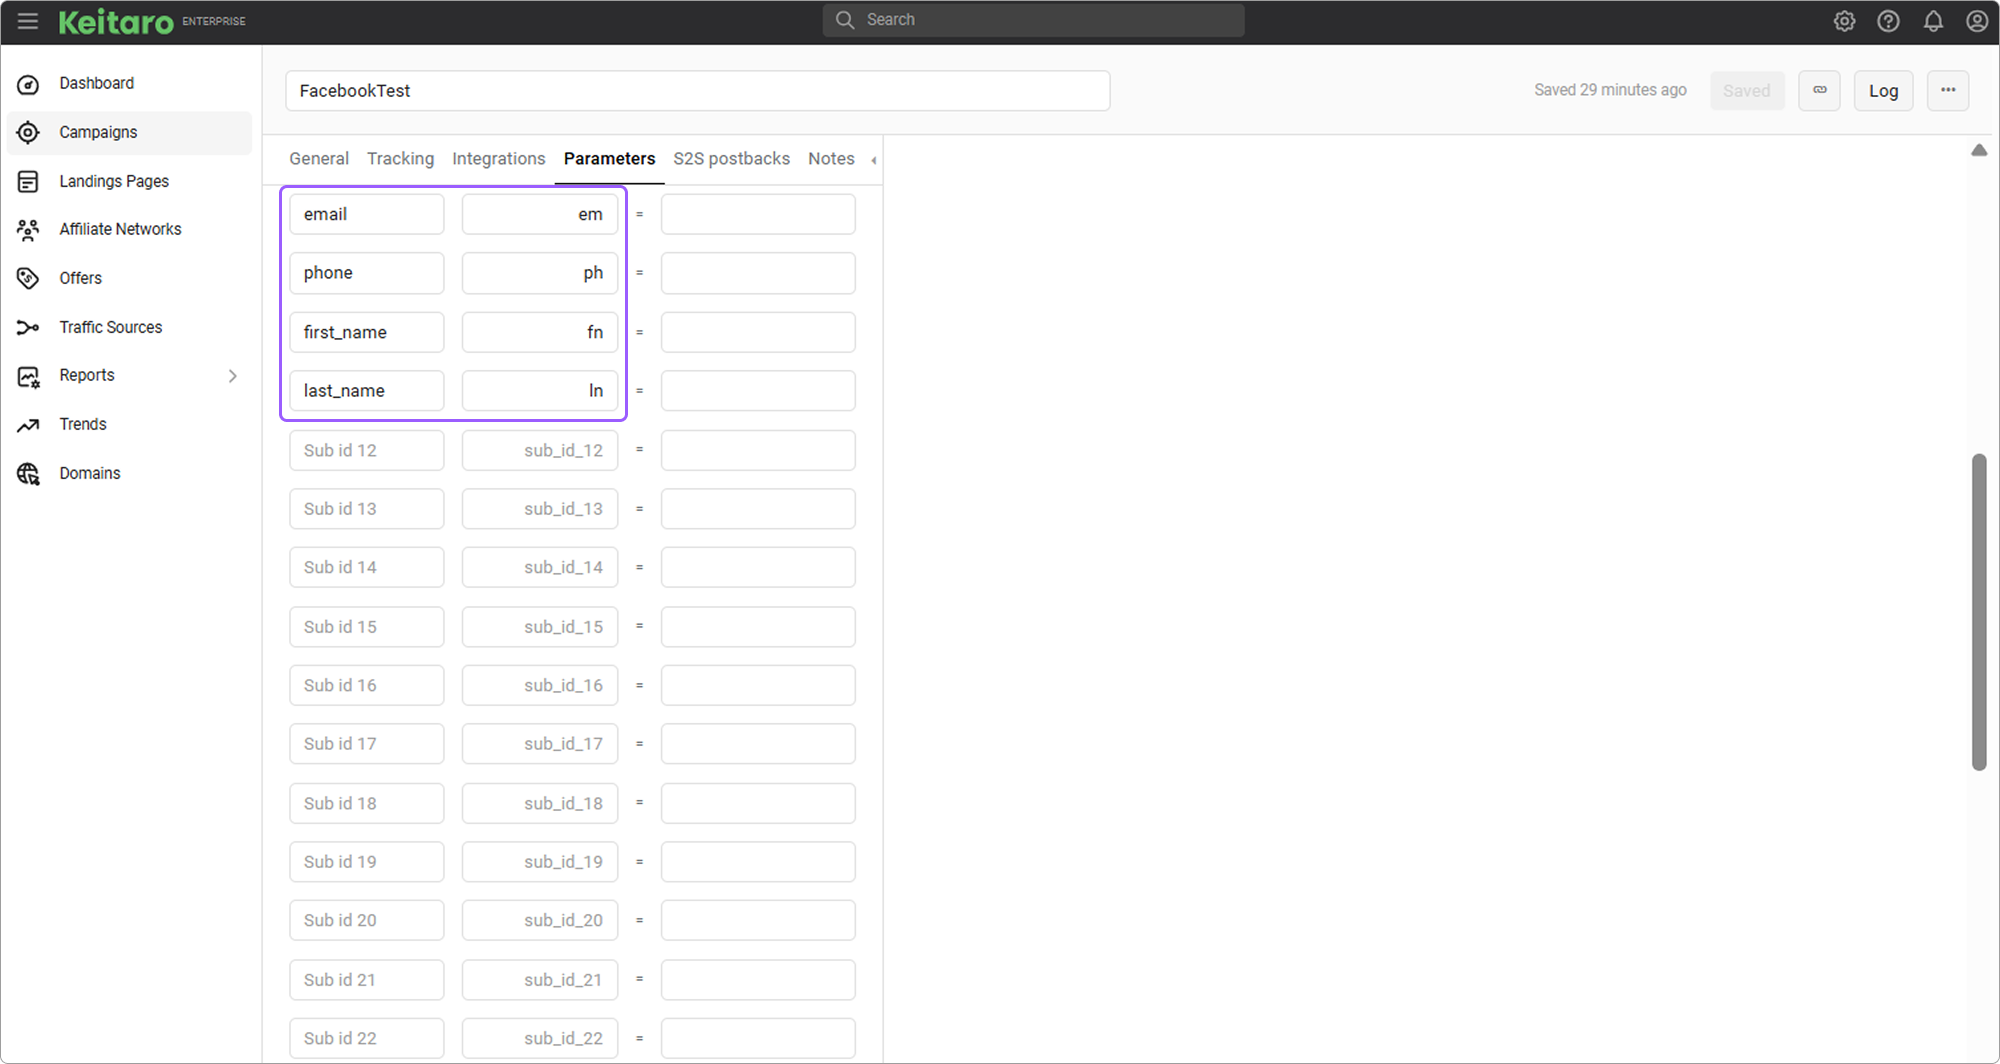
To send these parameters to Facebook in an incoming postback, you need to send the corresponding parameters to the tracker. Example:
http://your_tracker_domain.com/2a76c2a/postback?subid=3sh8so4er3&status=sale&payout=2.61&em=example@gmail.com&fn=John&ln=Snow&ph=+71234567890
# FAQ
Error "Not tied to the campaign."
The integration is not selected in the campaign's settings in Keitaro.
Error "Success" status, but costs are not updating.
Make sure there is adset.id parameter both in campaign's parameters in Keitaro and in Facebook link.
Integration shows an error.
Check the Facebook token, make sure it is not expired and valid for the account.
How does currency conversion work?
The tracker takes the currency from the Facebook account and converts it into the tracker's currency.
Costs update period.
The integration updates costs for the last 5 days.
The first update will be 30 days.